A plywood floor can be installed in any room, regardless of its purpose. Plywood flooring is often used as a leveler under the main floor covering. You can lay parquet or laminate on top. But the layers can also be used as the main coating. The installation of the frame and sheets will not take much time and effort, and the result will pleasantly surprise you.
Choosing plywood for laying on joists
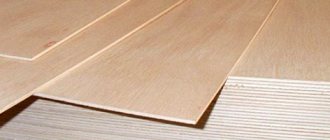
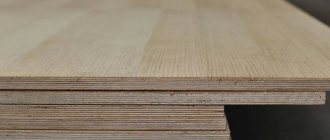
Plywood has a layered structure. The wooden layers are glued together during the pressing process. The strength of the source material depends on the thickness of the sheets. Manufacturing occurs from an odd number of layers. In order to know which plywood to use, you need to become familiar with the different types of material.
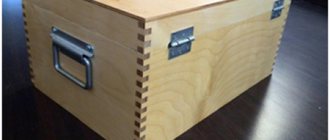
The performance properties of a plywood floor can be improved by installing heat-insulating material between the joists
The classification of plywood depends on the following conditions:
- Appearance and type of material;
- Processing of the front layer: sanded sheet or unpolished;
- Resistance to moisture, which is determined by the composition of the glue during manufacture;
- Environmentally friendly material.
Particular attention should be paid to the grading of plywood. The classification depends on the quality of the veneer and the presence of defects. This will help you make the right choice of sheets for your home.
Plywood grading:
- The first grade is high quality. There may be slight curvature of the veneer.
- The second grade may have small flaws, glue residues, inserts of different types of wood. Suitable for leveling floors.
- The third grade has knots and dried out places.
- The fourth rubbish is low quality. Has many defects and flaws.
The first and second grades are the most optimal option for flooring in an apartment. The first grade can be used for the front part. By painting it, you can get a flat and smooth floor.
To level the floor, you do not need to use sheets of plywood with an adhesive composition and the presence of formaldehyde resins.
The best types of wood for an apartment are birch or pine needles. This plywood is quite strong and holds heat well. The thickness of the layer should be 12-16 mm.
Related article: Floor leveling beacons: types and installation rules
It is worth noting the positive properties of plywood flooring. The advantages are the possibility of self-installation. It is also a quick and easy way to level the floor. Plywood serves as a strong and durable base for any other floor covering.
But laying plywood sheets also has disadvantages. These include difficulties in selecting layers. If selected incorrectly, the material will sag and creak. Another disadvantage is the possibility of the floor being too loud. But all these disadvantages are not observed if you choose and install plywood correctly.
Pros and cons of using plywood
Being a sheet material made from many layers of wood glued together, OSB is durable, practical and easy to use. For production, peeled veneer of birch, coniferous wood, and sometimes beech, oak or linden is taken. The advantages of the material include:
- ultimate load strength;
- relatively low weight of sheets with increased strength indicators;
- reduced thermal conductivity;
- reduced humidity level - plywood is suitable for cladding in rooms with changes in humidity and temperature;
- can be combined with any type of underfloor heating system;
- a wide range of product types;
- affordable price of the material;
- ease of transportation and self-installation.
The disadvantages include the presence of an adhesive composition, which is not environmentally friendly. But this minus is leveled out when purchasing plywood with an emission class of at least E1.
Determining the thickness of plywood for the floor by joists
When determining the required thickness of a plywood sheet, you need to take into account a number of nuances. First you need to pay attention to the distance between the lags, which is formed based on the characteristics of the floor. For example, the presence of insulation. Also, if desired, you can increase the strength and thickness of the flooring by laying plywood in two layers.
The thickness of plywood should be selected based on the purpose of the room.
Plywood thickness based on the presence of layers:
- One layer – 15-18 mm;
- Two layers - 8-10 mm.
If the flooring consists of one layer, then the thickness within these limits depends on the expected load on the floor covering. If this parameter is reduced, the structure will not become stronger. If the indicator is increased, then additional work will appear on cutting the layers. At the same time, the weight of the flooring will increase, and this is an additional load on the floors.
Method 1. Installation on old wood flooring
When laying plywood on a wooden floor, there are many options for fixing the sheets:
- on self-tapping screws;
- on glue;
- for liquid nails.
Adhesive compositions include water-based adhesive, two-component adhesive, assembly adhesive and bustylate. However, fastening with self-tapping screws is preferable.
Materials and tools
To successfully install plywood sheets, you will need the following tools and materials:
- plywood sheets;
- jigsaw;
- level;
- roulette;
- marker;
- self-tapping screws;
- screwdriver;
- substrate;
- construction vacuum cleaner or broom.
You may also need a sanding machine, a roller and primer, glue and sealant.
Preliminary preparation and priming of the floor
Installation of plywood on wooden floors is carried out only if the height difference when checking the level is no more than 1 cm. In this case, you will also need a substrate to compensate for unevenness and tape, which will need to be used to glue the joints of the strips of material.
Inspect the condition of the floors. Strengthen creaking and loose floorboards, replace rotten and damp floorboards. Do not try to restore boards that have traces of mold, damage, or have been attacked by rodents. They definitely need to be removed and the room ventilated.
We remove the baseboards and inspect the condition of the floor
Use a broom to sweep away dust and dirt from the floors. If desired, go over the wood surface primer twice to ensure better adhesion of the materials. And dry the base for at least 16 hours.
primer
Marking and cutting
Sawing plywood
Only saw plywood on a rigid base
Plywood sheets are sawn so that the number of joints is minimal, taking into account damping joints of 3-4 mm between sheets and 8-10 mm between plywood and the wall. This will help avoid swelling of the sheets, since during operation, under the influence of the microclimate and temperature fluctuations, the workpieces will increase in area by several millimeters.
Laying plywood sheets
Fixing the sheet
Leave a gap between the wall and the plywood
The cutting is done with a jigsaw, while the ends of the workpieces are carefully inspected for delaminations and sanded. On large areas, for ease of installation, plywood can be cut into squares of 50x50 or 60x60 cm. This technique will help to more accurately level the surface and eliminate possible installation defects.
The sawn sheets are numbered, and similar to their numbers, a schematic arrangement of the workpieces is drawn on a wooden base.
Leave the vent open
Requirements for the distance between joists for a plywood floor
For a plywood floor you will need wooden planks - logs. Dried wood is used as such bars. In this case, the dimensions of the planks should be 70 mm wide and 40-50 mm high. You also need to consider pads for joists. Their width is 100-150 mm, thickness - 25 mm.
The length of the lag must be at least 2 m. In this case, the plank must not have defects, flaws, or irregularities. Before installation, the timber must be kept for 10 days at room temperature. After this, you need to make sure that the wood does not crack due to drying.
The best types of wood for logs are coniferous or deciduous trees.
Choosing the distance between floor joists depends on the thickness of the plywood.
Related article: Modern methods of attaching curtains to a cornice
The installation of timber depends on the placement of plywood joints. They should lie on the logs. Therefore, when installing the base, you need to build on the size of the plywood sheets. The optimal interval between logs is 30-40 cm. Changes in this indicator depend on the thickness of the formation. The gap between the plank and the wall is 3-4 cm.
Plywood sheet sizes:
- Square layer – 152.5x152.5 cm;
- Rectangular – 122x244 cm.
It is optimal to install logs across the room, since the joints are located near the window. The plywood sheets should lie in the direction of movement. For apartment buildings, it would be correct to put soundproofing material under the joists.
Technical nuances
Sometimes laying the floor with plywood on joists is the best solution. If wood is expensive in the region, it is cheaper to lay plywood directly on the joists - without a rough wooden floor. The height of the log depends on how much the finished floor level needs/can be raised. If the floor does not need to be raised to a significant height, you can save money and use a board with a thickness of 28 mm or more as a joist. If the floor needs to be raised to a greater height (from 50-60 mm), we take a beam of a suitable cross-section.
The minimum board thickness for joists under a plywood floor is 28 mm
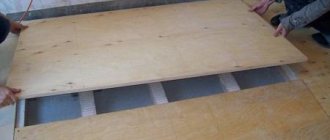
If 50-60 cm is not enough, a small “shortage” (5-8 cm) can be “added” using spacers - cuttings of timber of the required size. All the same, a perfectly level base is very rare, and spacers are used under the logs to bring them “to the horizon” (as in the photo above). If you need to raise the finished floor even higher, then take 150*50 mm timber (for example). If this height is not enough, a sheathing of edged boards is made on top (perpendicularly), achieving the desired height.
How to lay plywood on joists: with edged board sheathing
In any case, we use chamber-dried lumber, first or highest grade. They are usually coated with bacterial protection. It can also be impregnated with compounds that reduce flammability. Before laying, it is advisable to keep the wood indoors for a week. Then there will be a guarantee that the floor will not creak.
Chamber drying boards and timber are very expensive. To save money, you can buy regular lumber (but not raw) and keep it for about a year in a well-ventilated area (in an attic, in a shed) or in a stack outside, covered on top (but not hermetically sealed) from rain. But during the drying process, some of the material will crack, some will twist, etc. So the source material must be purchased with a reserve for rejection. The amount of the reserve depends on the initial state of the forest. The more raw lumber you use, the more waste there will be.
Lag pitch and plywood thickness
The lag laying step is calculated from the center of the beam or board. The beam width is at least 50 mm, the pitch is from 300 mm to 900 mm. The greater the distance between the supports, the thicker the flooring required. That is, the thickness of the plywood for the floor along the joists depends on the distance at which the joists are installed from each other. So when installing a plywood floor, there are options:
- Lay joists less often and use thicker plywood.
- Install the joists with a small gap, use a smaller thickness of the flooring.
Which is more profitable? You will have to count for each region. In some places the first option will be cheaper, in others the second. If you also need to raise the floor to a considerable height, you can get out of this situation by installing joists, nailing the sheathing across them across the battens, and then placing plywood sheets on them.
Table for choosing plywood thickness depending on the joist installation pitch
Laying plywood on a wooden floor under laminate, linoleum is included in the technological map. It is recommended to lay plywood under parquet and parquet boards. In this case, long-term operation of the finishing coating is guaranteed. So, covering the floor with plywood is a justified decision in many cases. It's just expensive. Currently there is cheaper sheet OSB. But plywood has a more stable quality, and with OSB - depending on your luck.
Plywood thickness for floor joists
The thickness of the plywood is selected depending on the selected floor design. The specific thickness depends on the distance between the lags:
- logs every 300 mm, plywood needed 9 mm;
- supports every 600 mm - sheet plywood is required no thinner than 12 mm;
- the logs are installed at 900 mm intervals - we put 18 mm plywood and no less.
Which plywood for the floor to choose?
Coniferous, birch or combined? Birch is better, but coniferous is optimal for the price. When laying on joists, two layers are usually laid. The total thickness should be no less than recommended. Two layers are done to get the most stable floor at minimal cost. Because the material for two layers of 12 mm will cost less than one layer of 21 mm. But when laying two layers of plywood, the installation time will increase and the consumption of fasteners will increase. This is also worth taking into account.
Thickness of plywood on old floor
When laying on any hard base (rough or old plank floor, concrete), one layer of plywood may be sufficient. Moreover, it is possible to level it in this way even on an uneven base. But in this case, two layers will be required and we take their total thickness from the table above. Due to its high degree of elasticity, such flooring can compensate for unevenness.
The thickness of plywood for floor boards is 10-12 mm
Provided there are no significant differences (only a few millimeters are acceptable), the thickness of plywood for laying on an old floor is 10-12 mm (in one layer). This will be more than enough even for coatings that require stability of the base.
How do you attach the joists to the base?
If the sheathing is attached to a concrete base, studs are used. In wood and concrete, a hole is pre-drilled with a drill whose diameter is 1.5-2 mm smaller than the fastener. The length of the fastener must be such that at least half the length of the stud/bolt enters the base.
How to attach joists under plywood to the base
If for leveling you use several shims made of materials of different thicknesses, then you need to drill the hole so that the pin/bolt catches them too. This is a guarantee that the gaskets will be secured and the floor will not sag or begin to creak.
Soundproofing and thermal insulation
In a multi-storey building, you should take care of soundproofing your floor - there will be fewer problems with your neighbors. To do this, it is better to use materials that do not conduct sounds well as leveling pads - rubber, fiberboard, pieces of linoleum. You can also install special vibration damping pads.
You can insulate a plywood floor with any of the materials
For thermal insulation, mineral wool is placed between the joists. In high-rise buildings (second floor and above) this is the best choice. The material dampens sounds and has good thermal insulation properties. Expanded clay should not be used as thermal insulation. Compared to modern materials, it is less effective (the characteristics are 4-7 times worse). You can use polystyrene foam or extruded polystyrene foam. But this choice may be justified if there is an unheated room below or the floor of the first floor in a private house. In this case, foam glass may have even better properties. 100% harmless, excellent thermal insulation characteristics, does not burn. But the price is high.
Please note that on the ground floor of a high-rise building or in a private house, waterproofing is spread over the joists. And it’s better if it’s a membrane rather than a film. The canvas is spread over the joists, the edges are placed on the walls, securing them there no lower than the level of the finished floor.
Laying plywood on the floor: rules
To prevent the plywood floor from sagging and playing underfoot, the first layer is laid so that the fibers of the outer veneer layer are perpendicular to the joists. In this case, the dimensions of the sheet and the pitch of the lag must be selected so that the joint of the sheets falls in the middle of the beam/board.
The junction of two sheets should be in the middle of the board or beam
If the lag pitch is large (50 cm or more), an additional beam is installed under the connection along the short side so that the joint does not hang in the air.
Rules for laying plywood on the floor
When laying out sheets, remember the following rules:
- A gap of 20-30 mm is left between the edge of the sheet and the wall. This way the plywood will not rest against the walls. When temperature and humidity change, it changes size. And this gap compensates for this expansion, otherwise warping will begin and the joints may rise.
- The sheets do not fit together tightly. Leave a gap of 3-5 mm. This is also to compensate for thermal and humidity expansion.
- The second layer is placed so that the seams do not coincide. This is necessary to ensure that cracks do not form in the floor. It also makes the floor more durable and stable.
With a large pitch, transverse bars are added on which the joints of the sheets will rest.
A few words about installing the fasteners. Lay out the plywood sheet and adjust it the way it should lie. Next, mark the position of the joist (middle) and jumpers on it - then it will be easier to install the fasteners.
Plywood fasteners
You can attach plywood to the joists with nails or self-tapping screws. Self-tapping screws are not hardened (they break less often). The length of the fastener is not less than three times the thickness of the sheet. That is, for fastening plywood with a thickness of 12 mm, a length of 35 mm or more is suitable. The fastener installation step when laying plywood is 15 cm.
When laying plywood, do not forget about the gaps
The second layer of plywood is often fixed with glue. They usually use construction PVA, but any type that can be used to glue wood is suitable. “For reliability” they also add screws. To get into the logs when attaching the sheets of the second layer, the position of the supports is marked not only on the plywood, but also on the walls. But, even if the fasteners only connect sheets, this will be enough.
The rules for laying the second layer are the same: compensation gaps are needed. And the seams should not coincide with the seams of the bottom layer. They must be offset by at least 30 cm.
Installation of floor joists in an apartment
The technology for installing the sheathing includes preparing the base of the floor. All unevenness, holes and cracks must be repaired. Then the waterproofing is installed. The lathing must be treated with antiseptics and fire-resistant impregnation.
The planks are not installed on a concrete screed. To do this, use a lining in the form of scraps of boards and bars. You can also take pieces of roofing felt and linoleum. For a level floor, you need to find the highest point on the floor and install the first joist. Along the entire perimeter of the room, you need to make markings at what level the logs should be attached.
Before you begin installing the joists on the floor, it is worth studying the theoretical part of the process
After installing the outer bars, you need to start installing the intermediate strips. The step between them should be measured at 40-60 cm. It is important to take into account the size of the plywood sheets. Their joints should be in the middle of the bar.
If you plan to further install a porcelain tile slab, then the step between the joists should be 30 cm.
When the frame is installed, you can begin to insulate the floor. The interval between the lags is filled with cotton wool or expanded clay. The thickness of the wool should be 5 cm. Next you need to lay a vapor barrier. The material is attached to the top of the insulation using a stapler.
Related article: Do you need a niche in the bathroom and how to make it from plasterboard?
Basic principles of installing logs in an apartment:
- The installation of the bars occurs perpendicular to the window or the direction of movement in the house;
- The interval between the slats is measured as 40-50 cm;
- The distance between the wall and the frame is 2-3 cm;
- Insulation must be placed between the joists;
- If plywood is installed under parquet, laminate or linoleum, then you need to use second grade level flooring.
The interval between the wall and the joist must be observed due to the possible expansion of the timber. This occurs due to increased humidity. This procedure will prevent the appearance of sagging and deformation of the laminate, which can be placed on top.
Stamps
FBA
This type of plywood is produced by gluing veneer with a special albumin-casein mixture. From an environmental point of view, FBA is an impeccable product, but it cannot be used everywhere. Maximum expansion of the use of such plywood is hampered by its insufficient resistance to moisture.
FSF
This brand means sizing with a phenol-formaldehyde-based resin composition. This treatment guarantees excellent performance properties. The material will be mechanically strong and practically does not wear out. Resistance to moisture is quite high. FSF is used in the construction industry, industry, and is often purchased for roofing work.
FC
This option involves joining the veneer using a urea compound. This technology is much better suited for various indoor spaces. Plywood with urea glue is very durable. The level of safety is sufficient for use in furniture, so it is also suitable for flooring.
FB
In this case, the veneer is saturated with bakelite-based varnish. This solution dramatically increases resistance to water ingress. The FB board can be safely used even in tropical and subtropical areas. The thickness of the workpiece is usually small, since insulation is not provided. FB is also suitable for floors in laboratories, kitchens, workshops and other places where exposure to aggressive substances is likely.
BS
In this case, treatment with a Bakelite-based composition is also used, but not with varnish, but with glue. This veneer is sometimes called aviation veneer, since it was previously used in the production of aircraft and river and sea vessels. This material is very durable and tolerates contact with moisture well. It does not grow harmful fungi.
BV
This brand of plywood is glued with a water-soluble bakelite solution. The slabs obtained in this way are not sufficiently resistant to water. But their strength is at a decent level. Bakelite plywood of any type must comply with GOST 11539-2014. There are no specific restrictions on size, so we need to cover this topic in more detail.
Laying a plywood floor on joists with your own hands
When laying plywood sheets over joists with your own hands, you need to start by preparing the layers themselves. If necessary, they are cut, all corners and protrusions are cut out. After this, you can lay the plywood on top of the frame.
To lay plywood on joists, be sure to purchase a screwdriver, screws and a level
Sequentially installing layers:
- First you need to calculate the plywood sheets. After this, you need to roughly determine the arrangement and make markings for the fasteners.
- On each layer you need to cut the edges at an angle and make holes for self-tapping screws.
- Next comes the countersinking. This is necessary so that the caps of the fasteners do not peek out.
- The next step is laying the plywood sheets. You can start from any corner of the room. The screws must be fastened vertically.
The plywood layer must be secured around the entire perimeter with screws. Additional fastenings depend on the sheet size. For little ones, you can make additional fixation only in the middle. For larger ones you need to use a cross fastening pattern.
The joints between the layers are sealed with sealant. Screw heads are also hidden using special mixtures.
The last step is cleaning the joints. Excess sealants can be easily removed with sandpaper. Next you can paint the floor or varnish it.
Plywood
Plywood as a building material is divided into:
- construction,
- industrial,
- packaging,
- furniture,
- structural.
For our purposes, it is logical to choose the first or last type. If we also take into account the aesthetic qualities of the material, then, perhaps, what is proposed from the structural type most fully meets all the requirements.
It is very important not to make a mistake when choosing plywood based on its moisture resistance characteristics.
A whole system has been developed here with its own standard notation:
- FBA is the most environmentally friendly plywood. If you do not place high demands on plywood for moisture resistance, then choose this one.
- FC – plywood with normal moisture resistance, without excessive exposure.
- FSF – increased exposure to moisture is already assumed here.
- FB is plywood impregnated with bakelite varnish, the most resistant, so much so that it can be used in aggressive environments.
- BS – plywood for structures in aircraft and shipbuilding. It has increased flexibility, very high strength, and complete waterproofness - qualities that, most likely, are useless in the construction of a floor.
- BV – plywood of the BS type, but with reduced resistance to moisture.
So, our plywood for the floor joists is FBA.
This is one of the reasons why a DIY plywood floor on joists will be indispensable. The possibility of using insulation between the joists is one of the features of this technology
Principal characteristics
When it comes to using plywood, the fundamental choice will be its quality, determined by the number of knots per square meter of the outer layer.
There are 5 quality levels here:
- E – so-called elite quality, when there are no knots at all. It is probably unnecessary to say that it is always necessary to strive to choose just such plywood;
- Well, then, a simple classification of quality - I, II, III and IV. In the latter case, the number of knots is not controlled.
- I – maximum length of knots and warping does not exceed 20 mm;
- II - cracks no more than 200 mm, wood inserts are permissible, and glue leakage is permissible only on an area of 2% of the total sheet area;
- III – no more than 10 pieces of knots with a diameter of no more than 6 mm. There is even a limit on the total number of deficiencies - no more than 9;
- IV – this is the worst quality with even fallen knots and edge defects of up to 5 mm.
How the joists will be attached to the floor under the plywood is largely a matter of experience, the main thing here is the reliability of the fastening.
Let us determine another important indicator of plywood - the quality of processing of the outer surface of the plywood sheet.
Based on this indicator, plywood is distinguished:
- NS – unpolished;
- Ш1 – polished on one side;
- Ш2 - polished on both sides.
Well, and, of course, the sizes. Although here we have to deal with long-established standards.
The industry produces sheets of the following four sizes in millimeters (width - length):
- 1525 to 1525;
- 1220 by 2440;
- 1500 to 3000;
- 1525 by 3050.
Solving the question of how to make plywood floors using joists is not at all difficult if you think through all the steps in advance, collect all the material and tools
Helpful advice! Before choosing the size of plywood sheets, carefully measure the entire working area and model the placement of all sheets. Create several possible placement options to reduce costs.
Tools
A reliable tool for any carpentry work is the key to the success of the entire project.
You will definitely need:
- A grinder or any other reliable and convenient cutting tool for large sheets of plywood. The ideal option, of course, would be to have a sawmill machine, but often you can only dream about it.
- A screwdriver is for attaching plywood to joists.
- Drill - it is indispensable for any operation of fastening wood, although we also use it for working on the floor, but the volume will depend on the chosen technology for fastening the joists.
- A tape measure and a pencil, the presence of which behind your ear will already be a given.
Two levels of joists can help reduce work directly on the floor - the second level is already attached to the first
Material calculation
To correctly determine the quantity of products, you must follow the step-by-step instructions:
- The floor surface is measured and all data is transferred to paper. You should get a detailed diagram of the foundation with a lag laying system. This allows you to immediately calculate the order of placement and adjustment of all parts, which is especially important in rooms with ledges and niches.
- The appropriate sheet size is determined and a layout plan is drawn up.
- According to the data obtained, the required number of slabs is calculated.
When installing a floor using joists, first of all, you need to draw up a diagram for installing joists, and then plan the laying of plywood according to it
. If the room has the correct shape, it will be easier to calculate the consumption: for this, the size of the object and the dimensions of the sheet are converted into area, the data in square meters is divided.
Preparing the floor surface
Check the air humidity level in the room in which you plan to level the floor with plywood on joists - it should not be higher than 60%. It is equally important to check the moisture level on the old screed. To do this, you should put plastic film on the floor for two to three days and press its corners. As a result, the inside of the film should not be wet, and the formation of condensation is unacceptable .
When there is no condensation, this will mean that the concrete surface is completely dry and suitable for further installation. Now clean the concrete surface from possible contamination.
Cooked logs should be well dried . They should also be cleaned of dust, and then treated with an antiseptic impregnation using a brush. It will help you in the future to avoid the occurrence of fungus and mold, due to which the wood collapses and rots.
The length of the logs should be up to 2 meters, their cross-sectional size is 50x100 cm. There are also square logs measuring 100x100 cm. You will also need a substrate, insulating material, moisture-resistant plywood with an approximate thickness of 18 mm and foamed polyethylene. Some craftsmen who want to save money use asbestos boards instead of plywood, but this should not be done.
Natural birch plywood costs a little more than other materials, but it is an environmentally friendly product that does not emit toxic substances of various origins into the air, unlike oriented strand boards and asbestos boards, which contain formaldehyde resins.
So, the base is completely ready for laying the floor joists, all that remains is to apply the finishing coat of primer to the dry concrete . This primer helps improve the strength of the surface and also remove dust. Wait until the primer has completely dried, since floor joists must be laid on a completely dry surface.