Purpose of stains
The simplest definition of what a stain is is a composition for impregnating wood, as a result of which the latter can change its shade.
On a note! Wood stain is the modern name. Initially, such solutions were known as “ beans ” (German: Beize - dye). Also at one time the name “Cologne land” was widely used - since the first beys received it from humus, which was mined near the city of Cologne. The humus was soaked in water, and the wood treated with the resulting composition acquired a brown tint.
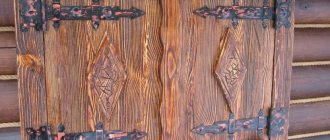
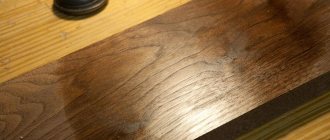
But to use stain correctly, you need to understand the mechanism of its action, because, for example, with ordinary paint, it is much easier to give a wooden surface the desired color. The point here is that painting is essentially the application of a colored film to the surface, behind which the structure of the wood is hidden. And tinting with stain is precisely the impregnation of at least the top layer of wood. At the same time, chemical reactions occur, as a result of which the tree changes its color, and what is most remarkable is that the structure of the wood not only remains visible, but also becomes more pronounced.
This feature of staining wood is widely used when it is necessary to “fake”, for example, a product made from alder - to “make” oak out of it. But in general terms, the main purpose of stain is simply changing the color tone of the wood. At the same time, the range of applications of modern stains is quite wide, since additional dye can be introduced into them.
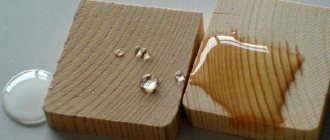
Also, certain types of stains can provide additional protection for wood from the adverse effects of external factors. At the same time, various types of finishing coatings can be additionally used to improve the characteristics.
Table covered with stain and oil Source rest-vm.ru
What is wood stain used for, the most common options:
- Toning of wooden surfaces.
- During restoration in order to restore the original color.
- To imitate valuable wood species.
- As an antiseptic.
- To add texture to a natural pattern.
- To protect against adverse factors. Some types have water-repellent properties.
That's basically all why wood stain is needed.
How to make stain yourself?
Some craftsmen prefer to make wood tinting solutions using their own recipes. Below we will present several options that are quite accessible for making at home.
In order to achieve a certain shade of wood, various plant and chemical compounds are used.
1. To give the wood one of the brown shades, thick infusions of tea or coffee can be used.
Strongly brewed tea contains tannins that can change the color of light wood.
- To make a stain from tea, a thick brew is made from it, which is filtered after cooling. The composition is then applied to the wood, and thanks to the tannins contained in the tea, the wood acquires one of the many brown shades. The color saturation will depend on the concentration of the tea leaves made.
- Coffee is used in much the same way as tea. Its ground grains are brewed, infused and filtered. The intensity of the color will depend on the strength of the prepared solution. In order to achieve a certain shade of wood, a small amount of soda is sometimes added to coffee. The proportions of the ingredients are 1:4, that is, 4 parts coffee to 1 part soda.
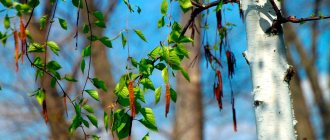
2. Walnut shells and partitions, crushed, boiled and strained, also provide a solution that will give the wood a brown tint. Sometimes soda is added to the composition. If it is necessary to achieve a red-brown tint, then potassium dichromate should be added to the decoction. 3. In order to achieve a reddish tint to the wood, an infusion of larch bark or onion peel is used.
Larch bark is an excellent natural ingredient for making wood stain, which gives wood a reddish tint.
4. Black stain can be obtained by using a decoction made from the bark of alder, willow, oak, and walnut shells to treat wood. All of the above ingredients are poured with water, brought to a boil, after which ½ teaspoon of soda is added to the broth, and it should boil for another 10 minutes.
To obtain the “ebony” effect, the wood is coated with a tincture made from acetic acid, to which metal elements, such as nails, are added. This solution should be infused in a dark place for seven days.
Buckthorn berries and bark are used to tint light wood.
5. To obtain a golden hue, use a decoction of buckthorn berries. 6. The gray color of wood can be obtained by applying acetic acid to it. 7. Wood fibers will turn cherry when a thick solution of magnesium permanganate is applied to them. To make it you will need 50 grams. powder, which are added to one liter of heated water. 8. Greenish tints of wood can be obtained by using a mixture of vinegar with 50 grams of copper sulfate, which should be boiled for 15 minutes before application. 9. Blue tones are achieved by mixing red elderberries with baking soda. 10. The tree acquires a bright orange color when tinted with a decoction made from poplar shoots - 150 grams of raw material per liter of water. The mixture must be boiled for an hour, then it is filtered and left in the light - after which it turns orange. 11. If you add alum to any of the above solutions, you can get a more intense color of the coating. 12. Heated cotton oil can give wood a dark shade and highlight its textured pattern. In addition, this composition will significantly strengthen the material. 13. As mentioned above, whitening compositions, which can also be made at home, have become very popular. A remarkable fact is that when applying bleaching compounds to different types of wood, you can get the most unexpected shades. For example, walnut has natural purple hues, so when a bleaching solution is applied, it may take on a pinkish or even bright scarlet color. The shade will depend on the amount of natural pigment in the wood. When apple wood is coated with bleach, it will acquire a delicate ivory shade.
Next, several whitening recipes will be given.
Oxalic acid is sold in the form of crystals.
- Oxalic acid. You only need 5 grams per 100 milliliters of water. This composition is used to bleach light wood. This solution is not suitable for dark wood, as it can leave unsightly stains. After application and obtaining the desired effect, the wood should be washed with a composition that includes 15 grams of lime and 3 grams of soda per 100 milliliters of water.
- Hydrogen peroxide is used to bleach all types of wood, except rosewood and oak. There is no need to rinse the wood after applying this substance.
Making homemade stain is not at all difficult, but in order to achieve the desired shade you will have to experiment, since it is unlikely that you will be able to “hit the mark” right away, that is, get the desired tone. Having prepared the solution and remembering its proportions, the stain is applied to a small area of wood and wait until it dries until the final effect appears. If the shade turns out to be too light, you need to apply a second layer of the solution.
When performing experiments, precautions should be taken, especially if the recipes use toxic substances or acids. It is recommended to work with them in a well-ventilated area or, if possible, outside. You should not neglect skin and eye protection - gloves and goggles.
For the final exterior coating of stained wood, it is best not to use polyurethane varnishes, as they may curdle. Therefore, in this case, nitro varnishes are more widely used.
Video: Demonstration of the recipe and process for preparing stain at home
Types of fighters
Depending on the type of base, all stains are divided into the following groups:
- aquatic;
- on alcohol;
- wax;
- based on artificial and natural oils.
In addition to the above, there are gel or acrylic based stains. Most brands are liquid concentrates, but formulations in the form of a powder or ready-to-use solution are also available. Now let's look in more detail at what wood stain is based on water and other bases.
Color palette of water stains Source anles.ru
Water
Most often used. Can be in the form of a concentrate, powder or ready-made composition. Powdered types of stains must be filtered after dilution. Otherwise, undissolved pigment particles will lead to uneven coloring. The main advantage of compositions of this type is the ability to choose the desired shade, darker or lighter, which is achieved by changing the concentration.
Advantages:
- Affordable price.
- Small expense.
- No pungent odor.
This type of stain is great for indoor use. They give the necessary shade; they are not intended for deep coloring. To obtain an even and rich tone, apply in several stages.
Alcohol
Can be liquid or in the form of a concentrate powder. Only alcohol is used to dilute them. Due to the pungent odor, work using them should only be carried out with good ventilation. Can be used for painting indoors and outdoors.
Preparing the surface for applying alcohol stain Source 5domov.ru
See also: Catalog of companies that specialize in paints and finishing materials
Advantages:
- Fast drying.
- Good penetrating ability.
- Huge selection of shades.
To work with this type of stain, experience and certain knowledge are required. Due to rapid drying, defects are very easy to occur. It is not possible to achieve uniform application of this type of composition with a brush and roller, so it is necessary to use a spray gun.
Wax
A relatively new species of beys, which appeared quite recently. They almost do not penetrate deep into the fibers and create a thin film-like layer on the surface to be painted. Suitable for creating a decorative coating when carrying out external work, as well as as a basis for varnish coating.
Wax stains Source imgur.com
Advantages:
- Provide camouflage of minor defects.
- Protect from rain and sun.
- Complete absence of chemical smell.
Due to their high cost, wax sealers are most often used for finishing work in order to improve the performance characteristics of the coating.
Oily
As is already clear from the name, oils are used as a base with the addition of a color that dissolves in drying oil. By changing the consistency of the working solution, you can obtain the desired shade.
Advantages:
- They penetrate well.
- Lay down evenly, without streaks or stains.
- Excellent protection against high humidity and insects.
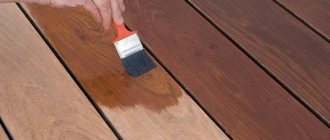
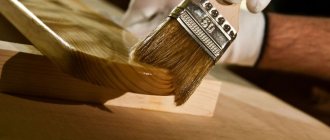
Applying oil stain Source ytimg.com
Paints of this type are most often used for painting parquet, furnishings and for outdoor work.
Coatings of this type do not fade and are not afraid of moisture. The main disadvantage of oil stains is the long drying period. After we figured out what stain is and what it is needed for, and looked at its main types, it remains to find out how it can be applied.
Work technology
If the composition has an intense odor, it should not be applied in the presence of children. The room must be ventilated. The wooden structure must be properly prepared. If the recommendations are followed, the desired effect is ensured, otherwise the composition will not protect the tree from negative factors, and may additionally worsen its appearance.
How best to apply stain to a surface: master class
Instructions:
- The mixture must be mixed by shaking the container. The recommended temperature of the substance is +36°C. This stain is applied much better with your own hands and penetrates deeper into the wood.
- If you plan to use a spray gun, the solution is poured into a special container. When using a brush or roller, the tool is slightly moistened with stain.
- The material is applied from bottom to top.
- If the product being processed is located horizontally, the surface is treated with the mixture alternately in different ways: along the fibers, across, then again along, etc.
- When smudges form, they must be removed immediately with a lint-free rag.
- There should be no breaks during processing. This may cause stains on the surface as the mixture dries quickly.
- Considering that stain is a deep penetration composition, the required shade can be achieved only after repeated application - 2-3 times. Moreover, re-processing is performed when the surface is completely dry.
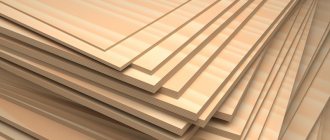
These rules apply to plywood, natural wood, and chipboards.
Basic rules for carrying out work
Recommendations:
- Despite the high adhesion of such materials, it is necessary to sand the wooden product before starting work. A special tool is used for this. It is necessary to achieve maximum smoothness. Eliminate chips and depressions.
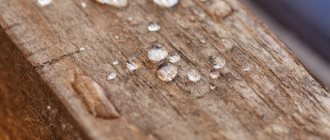
- When the top layer of wood is removed, the resin begins to appear. It needs to be removed. An excess of this substance will deteriorate the appearance of the product: stains will appear, especially if you plan to use a water-based stain.
- Even though the top layer of wood was removed during sanding, it is recommended to additionally degrease the surface. This will remove the smallest contaminants and increase the adhesion of materials.
Staining methods
Wood stain, no matter what it is used for, can be applied in several ways. In this case, it is necessary to take into account the characteristics of both the wood itself and the stain.
Trituration
The composition applied to the wood is distributed as evenly as possible over the surface using a soft cloth or foam rubber. This method of application favorably emphasizes the natural structure of the treated surface, making it brighter and more expressive. Rubbing is best suited for loose woods and compounds with long drying periods.
What is stain and why is it needed?
Stain is a tinting liquid that is used to give wood a shade that is not typical for it. Penetrating into the structure of the wood, the stain stains it without forming a film on the surface. In other words, the wood texture remains visible, only its color changes. Due to this, the pine floor can be given a visual resemblance to walnut or oak parquet. Naturally, this similarity will only be external! The remaining characteristics of the rock (resistance to decay, hardness, strength) will remain unchanged.
Video description
Applying stain in different ways
Spraying
Application is carried out using a spray gun. In this case, the color of the stain is selected a little lighter than necessary. The coating is sprayed in several stages until the desired color is obtained. Spraying allows you to achieve a more even texture when painting problem surfaces.
Pouring
Using a brush, a sufficiently large amount of the composition is applied to the surface to be painted. After this, it is left for 15-20 minutes to absorb. The longer the aging period, the darker the color. Unabsorbed stain residues are removed using a clean napkin.
Painting with a brush
This method is used when working with small or carved surfaces. When tinted with a brush, even one layer gives a deep and even color.
Preparing a wooden surface before applying stain
Any work, even the most basic one, requires certain efforts, dexterity, minimal skills, and accuracy. Using stain is not as simple as it seems at first. If in the process of work you do not take into account the subtleties and nuances, the order of actions, you may not achieve a positive result.
Initially, you need to decide on the shade and purchase the necessary tools for application. It is advisable to apply quick-drying compounds with a spray gun or other suitable sprayer. Sponges, swabs and brushes must be purchased to work with acrylic, water-based or oil-based stains. The size of the treated area is of no small importance. The wooden surface must first be cleaned, dried, and only then covered with the composition.
After complete drying, the product is carefully processed with sandpaper or a grinder. To avoid the appearance of defects, hand movements must be directed along the fibers. Scratches, chips, and depressions on the surface that were not noticed in time can be clearly visible after opening with stain. Using a grinding machine, the surface is made completely smooth.
Sanding wood
Using napkins or a vacuum cleaner, the wooden surface is freed from trimmed fibers and dust. Afterwards, the degreasing process is carried out using white spirit. When using a water-based stain, the surface is pre-wetted with clean water. Then it is sanded again.
If you have to work with coniferous species, then they have their own nuances. The presence of resinous places will make itself felt after treating the object with stain, and terrible stains will appear. It is advisable to avoid such misunderstandings by using the following methods before applying stain:
- Mix 750 ml of water and 250 ml of acetone. Wipe the surface with the solution.
- Stir 50 g of potassium carbonate and 60 g of soda ash in a liter of warm water. Walk the mixture over the surface of the wood.
To completely disappear the resinous areas, the procedure is carried out a couple of times. Afterwards, the surface is cleaned with soap and then just clean water, dried and covered with stain.
Basic rules for working with stains
In order for the finished coating to be high-quality and beautiful, when using paints you must adhere to certain rules. The first and most important of them is test painting. With its help you can get a more complete picture of the final color. In this case, it is advisable to do more than one sample. Different types of topcoat can produce different effects. For example, varnish makes the color deeper and more saturated.
Example of stain and varnish coating Source remontik.org
Tinting effects
Depending on the palette of shades used, the type of stain and the desire of the craftsman, you can give the wood a variety of effects. Due to the latter, design possibilities are greatly expanded.
Whitening process
White color is very popular in the interior. In addition, with the help of bleaching, you can restore the normal appearance of old wood, which has lost its attractiveness, but has acquired dark, bluish spots. You can also decorate some interior elements, for example, cover photo frames and paintings with bleaching stain.
Embossed white products that have been treated with special brushes look beautiful (this removes too soft fibers). After finishing the processing, they are covered with a white, light walnut stain. To protect the wood from the influence of atmospheric factors, you can apply white wax on top.
Aging of wood
An interesting option for finishing wood is to give it an aged effect. First, the product must be prepared: remove dirt, sand it, brush off dust. Then a water-based stain in white or another light color is applied to the wood. The freshly applied mixture is removed from some areas with strokes using a sponge. After drying, a finishing coat based on organic solvents is required, and to fix the shade, the pores are filled with shellac primer or wood varnish.
In addition to this method of making wood look old, there is another popular method. First you need to apply white stain, after drying, sand the product, then gently rub in dark wax. This will enhance the impression of great “age” of the coating and bring it closer to the “bleached oak” shade.
Imitation ebony
For this purpose, dark stains are used, which are marked accordingly. The wood is first sanded and polished to achieve maximum aesthetic effect. Then the stain is applied, performing one or two layers. In order for the surface to resemble a black mirror with knots appearing, you need to choose the hardest, most dense, finely porous rocks.
Giving other shades
Depending on the style, features of the interior or landscape, you can give wooden structures a variety of colors. It is only important that they all fit well with each other and do not conflict. The most commonly used non-wood shades are:
- blue - sometimes used as the main coating of finished products, pieces of furniture, gives them a very expressive look, goes well with white and yellow tones;
- gray – used in combination with bright accents, otherwise the product will turn out faceless; if there is an abundance of gray in the interior, there is a risk of depression;
- red – helps to highlight one or more elements from the total mass.
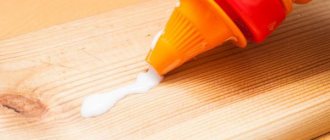
Some people try to save money and paint the wood themselves. Instead of stain, onion peels, alum, infusion of walnuts and other “folk remedies” are used. Unfortunately, the effect is rarely lasting, so it is better to purchase a high-quality composition that will last a long time and without complaints.
Features of choice
In conclusion, we will consider the features of choosing a wood stain for outdoor use - which one better protects against high humidity, which one is more suitable for covering surfaces exposed to the sun. We will also pay attention to compositions for interior decoration.
Wax or oil-based compounds are best suited for exterior work. The surfaces treated with them perfectly resist the effects of ultraviolet radiation and moisture. To ensure more effective protection, it is recommended to use them in combination with special products. For example, before tinting with stain, the wood is impregnated with an antiseptic. When using them, you must remember that they have the property of changing color.
Alcohol based stains
An important advantage of this type of stain is that they dry quickly, but working with them requires certain skills, since it is not easy to achieve uniform coloring of the surface. One of the unpleasant shortcomings is the characteristic oil stains, which stand out against the general background with shine or nuance of shade. The best effect can be achieved when applying the composition using a spray gun.
In addition to the drying speed, a positive aspect can be considered the creation of effective protection of wood from ultraviolet radiation and increased moisture resistance, therefore they are recommended for finishing surfaces used outdoors, especially since when working indoors it is necessary to ensure good ventilation due to the specific and rather toxic odor.
But, despite some difficulties in use, the wide range of colors of such stains ensures their popularity, especially since over time, almost the original brightness of the colors is preserved.
The basis of such stains are industrial alcohol and aniline dyes, and for the work you can purchase both ready-made compositions or concentrates, and dry powders, which should be diluted, strictly following the instructions.
How to make wood stain with your own hands? Video:
Video description
Selection of stains
The choice of stain for indoor work depends on the type of surface and purpose. For painting furniture, non-toxic compounds without a strong odor are chosen, and for flooring, they are highly resistant to abrasion.
Also, when choosing any fighters, you must consider the following:
- Color code . According to the international classification, each color is assigned a specific designation. But in practice, each manufacturer uses its own labeling. Therefore, for large volumes of work, it is necessary to purchase compounds of only one brand.
Example of a paint color palette Source wp.com
- Type of wood . Some types of wood have one unpleasant feature. After applying the stain, clearly visible stains appear on them. Most often, soft varieties behave this way, for example, spruce or pine. To paint them, it is recommended to use oil or wax stains, which apply as smoothly as possible, without leaving streaks or stains.
- Additional effects . The range of modern stains is quite wide. Among them you can find coatings that create the effect of antiquity, metallic, with mother-of-pearl or frost.
Color palette
Manufacturers offer stains of various colors to create original and stylish interior projects. For a classic style, a wenge stain would be an excellent option.
Mahogany looks no less luxurious, and it also advantageously emphasizes the structure of the tree. White is fashionable, popular, fresh and noble. The remaining colors are no less popular and loved by many.
As you can see, all types have different advantages and purposes; you can’t say for sure which stains are better, everyone is good in their own way. Choose the most suitable option for you to perform a certain type of work. Good luck!
Briefly about the main thing
Initially, the term “stained” was applied to oak wood that had lain in water for a long time, as a result of which it became darker. Due to similar results, this is now the name given to the treatment of any wood with special compounds called “stain” or “stain”.
Compared to paints and enamels, stains not only paint, but also highlight the natural texture of wooden surfaces, creating the same staining effect. Thanks to stain treatment, even ordinary wood can be “disguised” as oak or other valuable wood.
In fact, changing the shade is the main purpose of wood stains. But depending on the composition, they can also have wood-protective properties. Such coatings are more expensive, so they are used much less frequently.
Based on the type of base, all stains can be classified into water based - they are the most common and accessible, alcohol, wax - relatively new and oil based. Each of these types has its own advantages and disadvantages.
In most cases, to improve the characteristics of the coating, a layer of transparent varnish is applied after tinting.
Ratings 0
Which color should I choose?
Each stain color according to the international classification has its own code. And the name corresponding to the type of wood, the color of which is imitated by the stain. For example, “Mahogany”, “Oak” or “Plum” stain. But choosing impregnation only by name or picture on the label is unwise. You can get unpredictable results. There are reasons for this:
- The colors of stains of the same code, but from different manufacturers, can differ significantly in shades. For example, the water stain “Larch” has a pinkish-brown color, and the same “Larch” differs from “Novbytkhim” in a soft yellow tint. Many stores display sample dies painted with different stains. Samples will more accurately convey the actual color of the stain than the picture on the label.
- The appearance of painted wood is significantly influenced by its characteristics - natural color, density, structure. For example, stain on mahogany will look darker than on maple (provided the same tone of stain is used). This is due to the fact that mahogany wood itself is a darker shade.
The same experiment with maple and pine samples will show that pine wood stains more intensely and faster. Pine is softer and more porous, while maple is dense and hard. Therefore, it is easier for coloring pigments to penetrate into pine wood.
The degree of staining also depends on the texture of the wood. Oak with a pronounced texture quickly darkens from staining due to the fact that coloring pigments penetrate into the recesses of the veins. The main part of oak wood (outside the veins) stains less quickly and intensely.