What is patination?
Patina is traces of aging of a material on various household items. Artificial aging of furniture, which uses a patination composition, is called patination of furniture. This technique is very common in decoration. Essentially, this is an imitation of the natural color change of the furniture surface that occurs over time.
Now this is a fairly popular practice, because the appearance of products changes significantly, while the costs are minimal. Another advantage is that the procedure is easy to master and you can independently achieve the desired result.
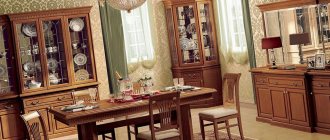
Today, not only cottages and dachas outside the city are decorated “antique”, but also in city apartments the method has gained its popularity. Solid wood furniture is needed to realize this design style.
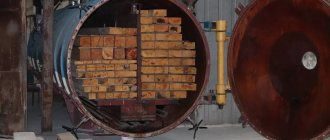
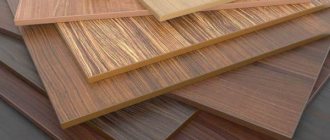
Veneered plywood
Patination of wood - methods and possible effects
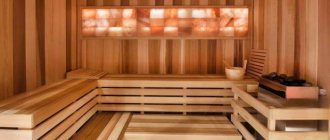
Patination is the artificial aging of the appearance of wood products, giving them a noble gilded or metallic appearance. Today it is used quite widely in the creation of luxury furniture, exclusive doors and windows, picture frames, etc. The furniture is similar to ancient examples of the Gothic style, the interior of the premises resembles a chic palace style. The patina looks especially impressive on relief wooden patterns and ornaments; some structural elements take on a real metallic appearance. If all technological operations are performed correctly and there is sufficient experience in performing such work, even real professionals can hardly distinguish between artificial patination and natural aging of wood.
The order of technological operations
You should not be afraid of a large list of operations; most of them have been familiar for a long time and do not require much time.
- Preparing the base. If you want to give wooden structures an even older look, you can use metal brushes to remove the soft layers of wood, which will enhance the impression of natural aging. There is a second way - simply sand the surface with large sandpapers or level the surface of the product with fine sandpapers. The choice of wood preparation method depends on the style in which you want to decorate your room and the purpose of the furniture.
- A primer must be applied to the prepared base; it is better to apply at least two layers. The primer will ensure more reliable adhesion of the patina, the coatings become more durable, and the risk of patina peeling as a result of changes in the relative humidity of the wood is eliminated. For the primer, you need to use a colorless polyurethane primer - its operational and physical characteristics are optimally combined with the patination technologies used. One more thing. It is advisable to wipe the first layer of primer a little with sandpaper - the smallest scratches will significantly increase the quality of the connection of the second layer of primer with the first.
- The primer also needs to be sanded a little in order to increase the adhesion of the patina to the primer. After this, you can begin applying the patina. The color of the patina should be selected taking into account the final style of the furniture, and it is better to try the achieved effect on several unnecessary sections of the board. The fact is that it is theoretically impossible to take into account all the nuances; even very experienced craftsmen always try to make a test before performing the main volume of work. Only practice can reveal all the characteristics of wood and the compositions used for patination.
- Patina treatment. After the coating has completely dried, you can begin processing the patina coating. There are two ways here - in some cases, remove a thin layer of coating using metal sandpapers, or cover the patina a second time with darker colors with a semi-dry brush. Both methods give good final quality; the choice depends on your skills and preferences. The second method, by the way, can give patinated surfaces additional relief.
- The final stage is a finishing coat with clear varnish. The coating is carried out using conventional technology; there is no need to invent anything new.
We have talked about the general patination technology, now we should talk about the features and the most used methods.
| Types of patina |
First way
It is considered the simplest, used by inexperienced craftsmen, and in terms of quality, strange as it may seem, it gives quite acceptable results. A thin layer of patina is applied to the prepared surface with a brush; after drying, the patina is sanded with a special metal sandpaper or a metal brush. In terms of color, the patina should be used a little darker than the product has.
| Patination of doors |
Second way
The so-called contrasting patination is used in combination with the first method. The purpose of such patination is to separately highlight existing three-dimensional patterns or ornaments on a wooden surface. Milled or hand-carved designs are covered with a patina in the color of gilding or silver; in some cases, an ordinary dark patina can be used. The compositions should be applied only to the drawings; work can be done with a brush or sponge; the patina should be thoroughly rubbed into the elements of the relief drawings. It is better to do final varnishing with matte varnishes; glossy varnishes can neutralize the resulting effect.
| Patinated frame |
Third way
The most complex, but also the most effective, is used for expensive models of luxury furniture. To improve the aging effect of the patina, craquelure is used - a special composition that causes natural cracks in the finishing coatings. Craquelure varnish is applied directly to the primer, and the patina is applied to it. As a result of complex chemical reactions, the patina layer receives cracks in various directions, and this visually ages the surface of the product even more.
Sometimes the crackle technique is used, followed by patination grout. This method requires applying two layers of craquelure varnish; the second layer of varnish must be applied to the first layer that has not completely dried. The depth and length of cracks in the patina depends on the thickness of the applied varnish. To make the cracks even larger in size, you can use a heat gun to speed up drying. After complete drying, you need to rub special grout of golden, bronze or silver colors into the cracks; the excess is immediately removed. To dry the parts, leave them for at least a day in a warm, well-ventilated area. The final stage is covering the surface with transparent varnish in several layers.
This patination is best used only in some parts of the product, usually in the corners. If you treat the entire surface, the results may disappoint you. There are several more very complex patination methods, but they are used only by highly qualified museum restorers; for ordinary furniture manufacturers, these technologies are unattainable for many reasons.
| Patina with craquelure varnishes |
← Use of second-grade lumber in construction Staircase made of veneered plywood onto a metal frame →
We recommend watching:
Plywood NEEDLES | 15mm | 1220 mm x 2440 mm | coniferous | grade 2/3 | NSH(PRICE ON REQUEST)
RUB 2,300
Plywood LAMINATED FOF | 21mm | 1220 mm x 2440 mm | birch
4,200 rub.
Veneered Plywood Ordinary Ash
RUB 1,285
Plywood FSF | 27mm | 1500 mm x 3000 mm | birch | construction | NS
RUB 4,900
Plywood FC | 21mm | 1520 mm x 1520 mm | birch | construction | NS
RUB 1,550
Plywood FSF | 12mm | 1220 mm x 2440 mm | birch | grade 3/4 | Ш2
RUB 1,750
Plywood NEEDLES | 18mm | 1220 mm x 2440 mm | coniferous | grade 2/3 | NSH(PRICE ON REQUEST)
RUB 2,600
Plywood FSF | 24mm | 1500 mm x 3000 mm | birch | construction | NS
4,300 rub.
Plywood LAMINATED FOF | 12mm | 1500 mm x 3000 mm | birch
RUB 3,600 RUB 4,000
LAMINATED PLYWOOD FOF (CHINA) | 21mm | 1220 mm x 2440 mm | birch
RUB 2,600
Plywood FSF | 12mm | 1220 mm x 2440 mm | birch | construction | NS
RUB 1,550
Plywood NEEDLES | 6.5mm | 1220 mm x 2440 mm | coniferous | grade 2/3 | NSH(PRICE ON REQUEST)
RUB 1,300
Plywood FSF | 18mm | 1525 mm x 3050 mm | birch | grade 3/4 | Ш1
2,000 rub.
OSB | 9mm | 1220 mm x 2440 mm
550 rub.
Plywood NEEDLES | 6.5mm | 1220 mm x 2440 mm | coniferous | grade SM | NSH(PRICE ON REQUEST)
1,000 rub.
Plywood FC | 18mm | 1520 mm x 1520 mm | birch | construction | NS
RUB 1,320
Plywood FSF | 40mm | 1525 mm x 3050 mm | birch | grade 3/4 | Ш1
5,000 rub.
Plywood LAMINATED FOF | 15mm | 1220 mm x 2440 mm | birch
RUB 3,100 RUB 3,200
Plywood FC | 3mm | 1520 mm x 1520 mm | birch | construction | NS
300 rub
Plywood NEEDLES | 21mm | 1220 mm x 2440 mm | coniferous | grade 2/3 | NSH(PRICE ON REQUEST)
RUB 3,100
Comments
No one has left a comment yet
What are the features?
"Patina" originally meant a thin oxide film that formed on the copper surface, which created an "aged" appearance. It is now quite simple to give a rare color to furnishings, having the necessary reagents at hand.
The easiest and safest way is to rub the wax mixture into the edges, corners and relief grooves on the wood. As a result of the work, we will obtain the effect of wood contamination associated with age-related changes in its structure.
How to make patina in an apartment? Sometimes ordinary paints matching the color are used, to which bronze or aluminum powder is added. They can be easily purchased at the store. This is how you make your own patina.
It should be understood that self-patination at home is ordinary painting, where conventional paints are replaced with specialized compounds. They do not affect the internal structure of the tree. This coating can be removed without consequences if you are not satisfied with the result.
In practice, artificial aging is most often carried out on furniture that has lost its attractive appearance, and its design does not meet the requirements of the time. Sufficiently strong, normally functioning wooden furniture can easily create a retro-style interior. In addition, applying a patina to wood will be a good protection against external influences.
On video: applying patina to exterior wood finishing.
Patination technology for wood
In general, the patination process consists of the following stages:
- Treating the surface (for example, after brushing) with varnish or paint (depending on whether we leave the texture visible or not) to form the base layer. If painting is used, then it is worth applying a layer of primer (varnish) on top of the paint layer to prevent damage to the base layer during further processing. The base layer must be well dried.
- Applying a patination solution or varnish (paint) of a darker tone than the base layer, with the obligatory filling of all recesses, pores and irregularities.
- Rubbing the patination solution into irregularities and depressions and simultaneously erasing the protruding parts of the product’s relief.
- Fixing the patination effect with a protective coating, such as varnish.
Types of patina
The following types of patina are distinguished:
- Shellac varnish. When working with varnish, a sponge or brush is used. Depending on the number of layers applied, the color varies from golden to transparent red.
- Acrylic patina for wood. It's acrylic paint. The least complicated in practice and ideally suited for apartment conditions. Acrylic patina is applied with a brush. The advantage is the large number of colors that can be used to tint the product. If necessary, repainting is done to achieve the desired shade.
- Bituminous patina. A bitumen-based varnish is applied to the furniture, the excess of which can be easily removed with white alcohol. The varnish is absorbed into the pores, creating an antique effect. This patina is dark in color. Shellac varnish will help preserve the result.
- Waxy patina. It finds its application, in addition to patination of wood, in order to emphasize the structure of the wood and tint it. It hardens for a long time, which ensures comfortable DIY work. Wax patina should be applied when the structure of the material needs to be revealed. Most often used for small parts made of oak and ash.
- Oil patina is similar to wax patina, but more versatile.
Details
Patination of wood and types of products
Plaque on wood most often does not mean anything good, because it appears when it is affected by rot or fungus. But on wood with high density and hardness, insensitive to water - for example, oak, a dark or white patina will become a real indication of antiquity. Furniture in an ordinary living room is often subjected to an artificial type of patination, because it is extremely difficult to obtain a natural type of patina. To improve the effect, mechanical and chemical methods should be combined. Several compounds are used for wood, and they are bought in construction markets.
- Thick patina - sold in the form of a paste, and is usually two-component. Typically, light brown, gold or reddish shades are obtained this way. For the gilding effect, the basis will be the natural color of the wood - for example, oak.
- Liquid - in fact, this is a special varnish composition that gives the wood a light yellow or even golden hue, which is inherent in ancient ash or oak.
- Faceted varnish composition - it is not exactly a patina, but rather an antique effect based on cracking. After drying, the varnish will begin to show the finest cracks, as happens on very old wood.
Types of coatings can be combined to obtain other, more interesting effects.
Patination methods
How to apply patina paint? The technology is almost the same for all methods, and only differs in the number of layers of paint or varnish composition.
- The first stage after cleansing and degreasing is brushing. Processing with a metal brush, or at worst with a chisel and nails, comes down to removing soft fibers on the wood surface, which, in fact, will happen over time.
- Next, pieces of furniture for the kitchen or living room should be treated with a white primer and sanded. White is most often used under light and gray tones. But if they want to make the basis of the effect contrasting, then use a transparent primer.
- Apply a coat of varnish and dry.
- Next, apply the patination composition and, after drying for a short time, remove the excess so that the composition remains in the deep pores.
- Cover everything again with a dark patina and again remove excess to the extent that you want to maintain the contrast between the fibers (dark and light). Next, coat the furniture twice with a simple transparent varnish.
Now let's talk about using the product for metals.
Patina on metal
Metal products in the interior of a living room or bedroom are not so common and are usually decorative and small in size - sconces, chandeliers, stands, candlesticks and the rest. Despite the fact that the new product has a bright shine and a beautiful color, there are quite a lot of people who want to give them a less modern look. And since it takes a long time to wait until this effect is achieved naturally, they resort to the use of chemicals.
Types of patina
The shades and varieties of film on different types of metals under different conditions differ and are very noticeable.
- The aging effect on the surface of silver looks more attractive. The metal is quite inert, and the film usually appears when reacting with sulfur, creating shades with tints from light yellow to turquoise and crimson. A black patina appears when exposed to chlorides and amino acids. The wild variety of this genus is not the most beautiful - the film is rough, and it also begins to protrude above the surface. But the blackening of silver surfaces helps give the product a rare elegance.
Gold is a noble metal that practically does not react. But if the alloy contains nickel or copper, light brown or even orange spots may appear after a while. Much more designers are attracted to the imitation of a patinated surface based on a gold color. This effect is purely decorative and is created with gold-colored paint, and at the same time a patina can be created on wood and metal - for example, on oak wood.- Usually in the living room you come across bronze and copper products, and sometimes with iron, if we are talking about a loft-style living room. On a copper surface, blue and green films are due to the deposition of copper acetate and chlorides, while black films are due to the formation of sulfite or oxide. Red patina is also formed by chlorine salts, but is usually formed artificially. A brown patina begins to appear when exposed to ammonium salts. For copper, almost all types of deposits are relatively safe, which will make forged copper products an excellent decor for the living room.
- But for bronze, blue and green coatings are dangerous. The decorative patina paint for the alloy is only a black film. They are achieved artificially through bluing - oil treatment and calcination in copper filings.
Metal coatings
Patina coating of metal parts is carried out mainly for parts exposed to heat (parts of fireplaces, barbecues, etc.). This treatment protects the surface and also maintains or improves its appearance.
Patina for metal can serve as an excellent decorative coating; the most popular colors are gold and white (silver).
You can apply patina to a metal surface in the same way as when working on wood, using a sponge or brush. We patina with a sponge if you want to only slightly emphasize a certain place. You need to touch the metal barely, with sweeping movements. Also be careful with the brush (about 3 cm wide). If there is any excess paint left on the material, immediately wipe it off with a dry cloth before it hardens.
Do-it-yourself patination of furniture
Of course, having the necessary tools and materials is a necessary condition, but in order to patina furniture professionally, the accuracy, diligence and diligence of the master are more important. Each action must be performed painstakingly, following the rules. Be prepared for the fact that it will take a significant amount of time to complete the work.
The point is that each action is performed in stages; there is nothing complicated in the patination technique itself. That is, before you start performing one operation, the previous one must be completed completely.
Before you start processing large furniture, it must be partially disassembled. All metal elements must be removed, leaving only the wooden fittings. The sequence of actions for successful patination of furniture with your own hands is as follows:
1. All sorts of imperfections are eliminated from wood by sanding it with sandpaper. Then the workpiece is scrupulously freed from dust residues.
2. The material is primed with a special primer intended for antique restoration and dried for 24 hours.
3. Apply a layer of patina paint and dry it for a day.
4. The next layer of the selected coloring composition is applied with small strokes in all directions. While the layer has not hardened, the excess is rubbed with a foam swab.
5. Before the second layer sets completely, it is rubbed with a dry cloth.
6. When the part is dry, defects are eliminated by local touch-up. After this, the wood is also rubbed with a dry cloth.
7. When the wood is completely dry, a final layer of varnish is applied to its surface.
Features of processing large parts
The patination technology is slightly modified when working with large parts, such as door leaves, furniture facades, and wall panels. The preparatory stage is completely repeated without changes, but priming is carried out with a special primer, which is based on polyurethane or acrylic compounds.
When the primer dries, one thin layer of paint is applied. The part, completely dry after painting, is sanded with a metallized sponge called Scotch Brite. Then the surface is wiped dry and coated with a colorless polyurethane, acrylic or nitro varnish. The shade of varnish is selected based on the natural color of the wood being treated.
For birch, walnut and linden furniture, light, yellowish varnishes are used. For oak and alder, darker varnishes are used.
Craquelure technique
Additional cracks, the so-called “craquelures,” provide the wood with a high decorative effect. To do this, use a special varnish, the main feature of which is cracking. In order for the created cracks to become noticeable, they are rubbed with a contrasting composition. Craquelure is often considered decoupage.
The surface is treated only with a primer; the use of a brush or sandpaper is prohibited. The first layer is applied with craquelure/decoupage varnish, which is selected according to the color of the wood. If required, a second layer is applied to make the nuance brighter.
A layer of decoupage varnish is applied to the still uncured varnish, which partially cracks during drying, forming cracks characteristic of the old coating. The finished surface is rubbed down. To consolidate the result obtained, the part is coated with a layer of varnish (most often shellac class).
How to apply patina to furniture facades (2 videos)
Patina with different effects (30 photos)
Applying patina to wood with your own hands
The patination process is simple and can be done at home. For work, it is better to choose high-density wood species that are resistant to changes in humidity, or use MDF or chipboard.
Preparatory stage
First you need to carry out brushing - exposing the hard wood fibers before patina, tinting, varnishing. The method reproduces the natural aging of wood, but at an accelerated pace. The surface is treated with a wire brush or coarse sandpaper, as a result of which hard fibers are removed. Then the base is wiped with a degreasing compound. The wood is not brushed under acrylic paints or for staining, but only cleaned of all kinds of contaminants. If there is already varnish or other coating on the surface, it must be removed using sandpaper.
Chipboard and MDF boards have a homogeneous structure, unlike wood, so their preparation has special features
To give it abrasion, the surface can be carefully treated with fine sandpaper, but the most effective is a more complex technology:
- applying a barrier primer to enhance the adhesion of the top layer of the slab to the patina;
- after drying, apply a polyurethane primer, which will become the basis for the patina;
- sanding the created coating with sandpaper to reproduce the wood structure;
- actual patination.
Applying patina using stain
Staining is ideal for furniture made in a classic style. The color of the products will become darker than it was originally. The operating procedure is as follows:
- Apply a water-based stain to the facades, covering the parts entirely. You can choose any color - walnut, mahogany, oak, beech or another.
- Use a soft sponge to wipe off part of the composition in such a way as to give an aging effect (mainly from the middle zones). The edges, threads, milling elements, and cracks should be left darker.
- Allow the composition to dry, then apply a second layer of stain of a similar shade, but not water-based, but alcohol-based.
- As the product dries, apply a layer of shellac. If you want to enhance the vintage look, you can additionally wipe off the antique wax.
Classic way
Classic patination is based on the use of acrylic, wax, bitumen, and oil. You need to choose a material of a suitable tone - wood, metal or regular. The technology resembles simple painting. First, a layer of patination material is applied to the base, then its excess is erased or shaded more thoroughly. The second layer in this case is performed using shellac.
Also, standard technology may involve the following actions:
- apply a dark patina;
- let the product dry a little, apply another layer of material of a lighter tone to highlight the dark pores;
- instead of a light tone, you can take gold or silver if we are talking about furniture in a classic style;
- As it dries, sand the base with fine sandpaper to create a scuffed effect;
- fix the result with shellac or acrylic varnish, choosing a matte composition.
Craquelure technique
This technique allows you to “draw” a network of cracks on the surface of the product, which provides an enhanced decorative effect. For craquelure, a special varnish is used with the same mark on the packaging, which can crack after drying. The procedure will be as follows:
the surface is treated with a primer, a brush and sandpaper are not used; apply craquelure varnish, selecting the desired color composition (if it is transparent, you can apply acrylic paint as the first layer, and then varnish); apply a very thin layer of matte water-based paint, acting carefully so as not to spoil the texture.
If necessary, cracks can be rubbed with bitumen mastic to darken them, but only after the coating has completely dried (after 1–2 days). When the film cracks, the product will take on an aged appearance. To consolidate the result, it is permissible to apply a layer of shellac.
Artificial abrasions
This method is well suited for wood and MDF, and goes well with the decoupage technique:
- dark-colored patination paint is used to paint the surface of the product;
- after the edges have dried, the carved elements are covered with a layer of paraffin;
- apply a second layer of patina to the item in a lighter shade or metallic tone;
- grind the surface with sandpaper;
- cover the product with stain or wax, or with a transparent matte varnish.