Drawing technology
The method is based on thermal transfer of toner and is quite often used for the manufacture of printed circuit boards at home. We will use this method to apply a pattern to plywood. So let's get started. First we need to prepare a drawing and paper.
Drawing
You can download from our website among the crafts you like, or read how to prepare a drawing yourself in the next article.
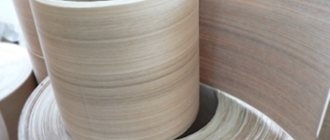
Paper
We will need glossy paper, the main quality of which will be a low toner retention rate. For example, it could be glossy magazine paper, but I personally use backing paper for labels. If you don’t have anything of the above recommended on hand, you can take plain paper, this technology will work just as well.
Printing a drawing
When printing, you must not forget that the image will be translated as a mirror image, so you need to prepare your layout in advance by “reflecting it horizontally.” You can do this programmatically or select the appropriate setting in the printer settings, provided that your printer supports this function.
Also, in the settings, it is worth turning on high-quality printing - this will give a larger amount of toner on the sheet and, as a result, faster transfer of the drawing to plywood.
A few rules
Before you start work, you need to familiarize yourself with some rules that will allow you to do the work quickly, easily and without damage.
- Make sure the board you will be working on is dry.
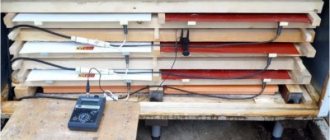
- Heat up the pyrograph. The tip of his pen must be dark red in order for the pyrograph to “write” well on wood. You can regulate the temperature of the pen using a special regulator located on the pyrograph.
- Have a support for the hand in which you hold the device. This is important so that the pen does not come off, ruining the drawing or damaging your hands or clothing.
- For beginners, it is better to choose simple photos or pictures that you want to transfer to the board.
- It's best to hold the pyrograph like a regular pen, this will allow you to apply as much pressure as you need.
- To get a fine line, run the burner quickly over the wood. To obtain a thick line, the pyrograph should be moved slowly.
- It is much more convenient to use light and soft wood; it is easy to burn on it. These species include linden, chestnut, and birch.
Related article: Seven secrets of the perfect backside
Transferring a drawing
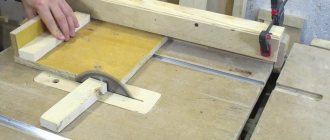
To transfer the design, place the printed layout with the toner down on the plywood, and slowly smooth the reverse side with an iron. It takes about one minute to transfer an A4 sheet drawing.
Iron
You can use a regular iron as a toner transfer stove. If you decide to take an iron that is also used in everyday life, then take care of its safety - use a pad made of paper and fabric to avoid the formation of carbon deposits on its surface.
As for me, I use an iron for upholstering aircraft models; it is quite convenient, since you can set the required temperature on it - 190 degrees. The surface of the iron has long been accustomed to various experiments, so I do not use a gasket.
As an alternative, you can use a hair dryer and a roller to transfer the design.
Removing paper
After smoothing the layout evenly with an iron, before removing the paper layer, you should wait some time, allowing the transferred toner to cool.
When the paper is removed, you should check the lines of the drawing to see how successfully they have been transferred and, if necessary, complete the missing elements with a pencil. At this point, the stage of transferring the drawing onto plywood is completed.
How to print a design on a wooden surface at home
Today there will be a lesson on the use of technology, which I am often asked about. Directly very, very often We will talk about thermal transfer of images directly to wood. This technology can greatly expand the creative possibilities of everyone whose creativity is associated with decorating wooden surfaces.
So, let's try to transfer the sublimation iron-on sticker to a wooden surface. Since there are questions not only regarding “bare” wood, but also those covered with primer/paint/varnish, I painted one of the wooden samples with white acrylic paint to see what would come of it.
We will need:
1. Two wooden blanks - one untreated, the second coated with acrylic.
2. Two sublimation thermal stickers.
3. Thermal tape. Can be replaced with regular masking tape.
4. Iron and ironing surface.
As usual, we place the stickers face down on our pieces of wood. To ensure that nothing moves out during heating, so that the picture does not “lead” and nothing gets blurred, we fix the thermal adhesive with tape. Once again, I draw your attention, use special thermal tape (it does not melt even in the crater of a volcano) or at least paper (painting tape). Ordinary stationery, of course, will not work
Now let's go ironing. We heat the iron, set the temperature to 170-200 degrees, on most irons this is almost the maximum, about three points.
We place the hot iron flat on the sticker, press it down a little (not with full force, but so that there is some pressure), if possible, we try to move it as little as possible and note the time of 80-90 seconds.
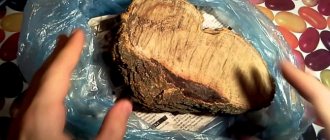
After the time has passed, remove the iron and cool the workpiece completely. When everything has become cold, carefully peel off the tape from the blanks and remove the paper. The first we will have is a blank made of untreated wood.
The picture turned out great, I didn’t even expect it. It turned out bright and clear.
Now it’s the turn of the acrylic-coated blank.
But here a surprise awaits us. The paper was tightly soldered to the workpiece, apparently to the acrylic itself, since there was nothing like that on the previous workpiece, no adhesive properties
Don’t panic. Feel free to generously wet the entire structure with the adhered thermal paper. You can directly pour water on it, or you can treat the workpiece a little more modestly with a wet sponge.
Soaked paper will come off very easily.
Remove all remaining paper and dry the workpiece. The picture has been translated.
Noticed another surprise? Completely different color rendering.
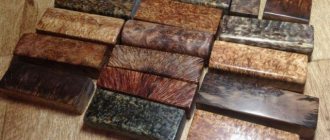
Comparing both blanks, we see that they have significant differences. On untreated wood the picture is bright and saturated, on wood coated with acrylic it is delicate, in pastel colors, one might say pale.
It is imperative to take this into account in your work when deciding whether to cover the wood with anything before translating the drawing.
In addition, I will say about the performance characteristics - the image transferred in this way to untreated wood is absolutely resistant to water procedures. I washed the pieces of wood, scrubbed them rather mercilessly with a dishwashing sponge, and used detergent. The drawing was not damaged. The paint penetrates the wood to a certain depth, so it can only be removed with sandpaper. As for the water resistance of the design on an acrylic-coated workpiece, it is somewhat more complicated. The paint itself does not wash off, that is, you can pour it with water without fear, but you still shouldn’t frantically rub the surface - the ink does not penetrate into the wood itself, remaining on the layer of acrylic paint. Therefore, if you erase the acrylic, the picture will also be erased.
These are the pies. Enjoy your creations
Drawing without carbon copy
In order to learn how to transfer a drawing to wood without a carbon copy, you can use several methods. Each one has a different set of tools and materials, but is simple in terms of implementation.
Image transfer methods:
- Graphite print. Take a simple pencil with a soft core and trace the contours of the drawing on paper. Turn the image onto the wooden base and quickly press without moving. In order for the graphite to be printed well, you can run it over the paper with a hard roller or a plastic strip.
- Thermal transfer. First you need to select an image taken with the right device. Using thermal action, a photocopy or printout made on a powder printer will be printed. Place the back side on the wooden base and heat the paper with an iron.
- Reprint using white spirit. The picture must be printed on a laser printer or copier. Attach the sheet with the pattern to the wood and wipe with white spirit. It is worth applying a little product to the cotton pad so that the paper does not become soggy.
There are other options, but the principle of implementation is much more complicated and requires more time and money.
Wood burning pattern
In order for the burning procedure to be carried out quickly and efficiently, it is necessary that the pattern on the surface of the wood be as accurate and high-quality as possible. Several methods are used to transfer an image to a surface. The most popular option remains transfer using a carbon copy.
How to transfer a design to wood for burning using carbon paper:
- You need to take a sheet of carbon paper. It is advisable to use paper that has been used more than once.
- Place the carbon paper with the ink side facing the wooden surface. Place a sheet with a pattern on top and secure the structure with tape or tape.
- Use a graphite pencil to trace the lines of the image. You need to work carefully, limiting the interaction of your hands with the paper as much as possible.
- After completing the tracing of the lines, remove the layers of paper. The drawing for burning is ready.
This method is very reliable, but requires special care in execution. During the translation process, carbon marks may remain, which are almost impossible to clean from the surface of the wood.
Preparation, components and tools.
A piece of board, plywood or any wooden surface. This is the basis. Sandpaper or, in my case, an abrasive sponge (100+ grit) for finishing the surface to which we will transfer. A brush, a wallpaper roller, if you have one, but you can do without it, a sharp knife, the picture itself or a photograph printed on a regular laser printer. If this is a portrait, or the correct perspective is important, we display it in a mirror in any graphic editor. You can use Picmonkey or regular Paint. Print, choose the best print quality. And the main ingredient of our Foto transfer potch idea can be chosen from any company, I chose this one due to its availability in the nearest store (245 rubles) and acrylic varnish (140 rubles) to your taste, glossy or matte. Transfer ⋅ is a certain composition that glues a thin layer of paper to the surface, forming a protection and making this layer transparent, which we will then protect with varnish.
Crop the image to the required size. Try to touch the drawing less with your hands so as not to leave greasy marks. I took the portrait of Mikhail Afanasyevich Bulgakov, mirrored it in the editor and printed it on a regular laser printer. I sanded the plywood thoroughly and cleaned it of dust.
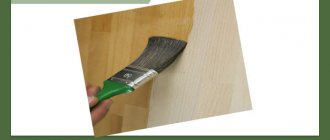
We apply the transfer, not too much and not too little, so that the layer is uniform.
Smooth and press, try to avoid bubbles. Carefully, trying not to move, glue the image down and try not to move. If you have a roller, roll it. I put a piece of plastic down and smoothed it out. We wait until it dries, they recommend 12-24 hours. If you can't wait, dry it with a hairdryer. Then the magic begins!
We pour water and let the paper get thoroughly wet, there is no need to be afraid, the main thing is not to rush and wait for the picture to appear.
Calmly and better with your hands, they just feel the surface and tell you how to act
We remove the top layer of paper until the image appears, it seems imprinted on the wood, but still caution will not hurt, try not to damage the image layer
Here is the finished version, all that remains is to dry it and varnish it. If after drying there is a layer of paper left and the picture is whitish, then the procedure can be repeated. It will not be in perfect condition, but after varnishing, clarity will appear and thereby protect the work from exposure to the external environment.
I have a glossy acrylic varnish, you can use another one, but first make sure it doesn’t conflict with the transfer on a separate surface.
This is how it turned out for me, if you choose a more structured foundation, it will appear in the photo accordingly. Good luck and make more crafts with your own hands, they will retain your energy and you will enjoy them!
comments powered by HyperComments
Selecting material for burning
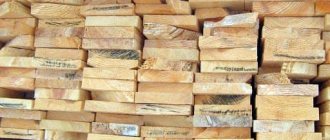
Plywood is great for burning. And among wooden boards, chestnut, linden, alder, poplar, and aspen are best suited. The tree must be dry, without knots, with a uniform structure and light.
On a light-colored workpiece, the design will look more expressive and will be easier to work with. Before you start burning, the surface of the workpiece must be cleaned with fine-grain sandpaper.
Decoupage technique - a simple option for transferring an image
Often, not only the production of interesting interior decorations with images on wood is required, but also a more practical use of technology. Knowing how to transfer a design to wood, you can restore old furniture and make a wooden element into a designer one.
To realize such ideas, the decoupage technique is used. The principle of this work is simple and does not require special skills, unusual materials or tools.
How to transfer a design to wood using PVA glue using the simplest algorithm:
- The prepared surface must be coated with PVA glue. The layer should not be too thick. Strokes should be made smooth and uniform.
- Place the design on the surface of the wood and carefully straighten the paper sheet. It is necessary to expel the air and position the edges of the cellulose base.
- Coat the image again with a thin layer of PVA on top. Wait until everything dries and duplicate the layer again.
Further processing is chosen in accordance with the preferences of the “creator”.