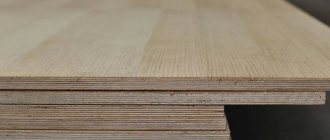
Facade shingles is not one of the most popular building materials. There is a misconception that the simplicity of this finishing wood is only suitable for furnishing eco-style premises, for roofing or walls of utility rooms. Adherents of architectural innovations in the use of shingles, shingles, and shingles refute this established opinion and expand the scope of application of these wood products.
What can you use to plaster?
You can prepare the finishing composition yourself. For plastering the surface, gypsum, cement and lime bases are used. Sand is used as filler.
Cement-sand composition:
- 3-4 parts sand;
- 1 part cement;
- water (the amount is regulated independently, i.e. the liquid is added gradually until the required consistency is obtained).
Lime-gypsum mortar:
- 1 part lime;
- 1 part sand;
- 2 parts sand;
- water.
Lime-gypsum plaster is used for finishing rooms where there is a low percentage of humidity.
Lime-cement mixture:
- 1 part cement;
- 1 part lime;
- 2-5 parts of sand (adjustable independently);
- water.
To prevent the finishing material from swelling on the working surface, it is first necessary to extinguish the lime. This plaster is not afraid of high humidity. In order not to wait for the end of the chemical reaction, it is recommended to immediately purchase slaked lime.
Cost in St. Petersburg
As you guessed, the façade panels described above are not the cheapest. As a rule, such materials are bought by those people who do not intend to save money, do not chase after the cheapest, but value high quality, beautiful appearance and uniqueness. For this reason, the cost of panels with imitation shingles and wood chips is quite high.
The cost of T-siding under shingles in St. Petersburg in 2021 from different suppliers ranged from 450 to 500 rubles per panel. Foundry and Nylight cost approximately 490 rubles per panel. If you have already decided for yourself what types of panels you want to buy, then remember that many colors need to be ordered in advance and you will have to wait a certain time (1-1.5 months).
Specifics of preparing wooden surfaces
Plaster shingles can be purchased at a hardware store or you can use existing slats at home. To perform finishing work, it is recommended to take planks that are as even and equal in size as possible. Plaster on shingles that have been severely deformed, for example due to moisture, will be thick. It will not be possible to make it thin, because... The curvature of the slats will not allow you to create a flat wall surface.
What material to use
Wall shingles can be made from any type of wood. Most often, the walls are covered with pine, spruce or aspen. The timber is placed in a special machine, which uses knives to split the wood into chips of the required thickness and width.
After purchasing, you should sort the planks. You can lay out the protile (first or bottom) layer from the curved shingles. The thickness of the material should be within 3-5 mm, and the width no more than 2-2.5 cm. Wider and even strips are applied on top.
Shingling can be made from thicker and wider slats, but it is not recommended to use them due to the fact that wood intensively absorbs moisture. During the finishing process, the lathing will absorb a lot of water, which will lead to prolonged drying of the surface. Another disadvantage of thick slats is that if excess moisture is absorbed, the slats will sag.
To create a wooden sheathing, you will additionally need the following tools and materials:
- hammer;
- nails (length up to 4 cm);
- level;
- knife.
In addition to making it yourself, you can buy a ready-made design. The advantage of such a grid is that it saves time.
Manufacturing algorithm
The planks are packed diagonally in 2 rows. The shingles should lie across the top layer. It is recommended to keep the distance between the slats the same. It should be equal to the width of 2-3 slats. In most cases, shingles for plaster are laid in 2 layers, but wooden lathing can be more (3-4 layers).
Installation technology
Finishing begins with priming the wooden surface. If the wall needs insulation or noise-reducing material, then the next layer is insulation. When there are no additional building elements, installation begins immediately after the primer has dried.
The first plank must be nailed at an angle of about 45° (relative to the floor). The nail is driven in completely, perpendicular to the wall. The last fastener, which is located at the bottom (end) of the strip, is driven in halfway. It should prevent the bar from falling, but there is no need to completely fix the bar. All intermediate nails begin to be driven in at an angle so that the tip points down and the head points up (in the direction of the slats).
This installation technology allows you to gradually “pull” the shingles, which will ensure a reliable fit of the sheathing. Fasteners driven in at an angle reduce the likelihood of the sheathing moving away from the main wall.
When the first layer is completed, begin stuffing the second. It is performed on the same principle as the forgiving one.
If a ready-made sheathing was purchased, then it is immediately applied to the wall and then secured with nails or self-tapping screws.
Replacing old shingles
After some time, the plates may lose their properties. Taking into account the fact that even new shingles partly evoke a feeling of antiquity, time-worn ones will become completely unattractive. In this case, you will need to replace the damaged parts. You can work with one or several roof elements at once.
Plate replacement process:
- Drive a wedge under the plate that is installed above the damaged one and lift it slightly.
- Chop the plate to be replaced with a chisel and remove it, cutting off the nail heads with a hacksaw.
- Drive in the new plate by lightly tapping it, nail it with nails scalded in drying oil.
- Apply roofing adhesive to the nails.
In some cases, it is not possible to install the new plate evenly. Then you need to cut it off from the thin end and repeat driving in again.
Plaster mixtures for wooden surfaces
You can buy a ready-made mixture for plastering wooden surfaces. If the finishing material is free-flowing, then it will need to be mixed with water (the proportions are indicated by the manufacturer) and you can start working. It is also possible to purchase plaster, which is used immediately after opening the container.
The following plasters are suitable for woodworking:
- Ferozite;
- Master of technogypsum;
- Rigips Isogyps;
- Baumit Manu;
- Kreisel Nanofix;
- Knauf Rotband.
Modern materials
Due to the fact that the construction market is replete with various materials, there are many options for improving plastering technology. A wooden wall can be plastered using an industrial mixture that is suitable for wood, or with a universal gypsum-based plaster. The adhesion of such products is quite high, and there is almost no shrinkage. But there is a significant disadvantage - the high price, so it’s easier to use rubbish. If you still decide to use special mixtures, you will also need a reinforced mesh, which is installed between the primer layer and the finishing plaster. For outdoor work, it is better to use more expensive analogues of building materials, since polymer additives improve their resistance to negative influences. Each plastered area requires less grouting and trimming due to the flexibility of the mixture, thereby improving the appearance of the home.
Plaster application process
Before plastering, you should clean the surface from dust and then wet the wall. Wood absorbs moisture well, so if you start finishing the walls right away, the moisture will quickly leave the solution. This will cause the plaster to adhere poorly and may fall off. After moistening, the wall surface is treated with a primer. This should be done well so that there are no unaffected areas left anywhere. The primer layer will reduce the percentage of moisture absorption, improve adhesion and protect the base from fungus and mold.
Panel sizes
See also
Tepofol insulation: how it differs from penofol, characteristics
The panels vary in size. This depends on the manufacturer as well as customer requirements.
The shape is slightly rectangular or square. That is, all sides are approximately equal. Because of this, the dimensions of the panels are determined by their area.
Most often, products with sizes of 0.4, 0.27 and 0.5 square meters are found on sale. These are rounded values.
It is better to coordinate this issue with the manufacturer or the seller. Calculate the total area of the facade for finishing, and also compare it with the dimensions of the siding.
Usually 200-300 tiles are enough to cover a medium-sized country house.
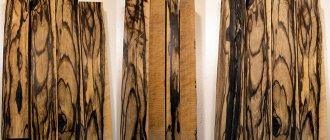
Color palette
Chips and shingles are offered in a wide range. Just like classic vinyl panels.
The client can choose the panel at his discretion. It is important to understand that this is an imitation of natural bark. Therefore, you should not wait for blue, purple or red panels. These are light and dark palettes. All of them are aimed at simulating trees existing in nature.
The color palette is limited only by technological capabilities, as well as manufacturer decisions. Some companies offer literally 5-7 shades. There are also those who have about 20 solutions in their assortment. They differ in color, shade and surface texture.
There are companies that are ready to paint their shingle siding, as well as wood chips, according to the client’s individual order. Yes, it will be a little more expensive.
How to apply the solution
To get a high-quality surface, it is important to work with good plaster and primer. The process involves applying three layers of solution.
- At the initial stage, you should slightly wet the felt.
- Next, mark using a marker. Determine the irregularities of the sheathing. Apply the first layer of mortar no more than 1.2 centimeters thick. Experts recommend keeping the thickness of the rough layer to no more than 9 millimeters.
- Spray is the first layer of clay mixture. It must dry and only after that a layer of soil is applied. If gypsum-based compositions are used in the work, then the layer should be within 7 mm. When using cement-sand mortars, the working layer is up to 5 mm.
- When applying the spray, it is important to fill all voids. At this stage it is not necessary to level the work surface. Approximately the same level of applied solution is sufficient.
- Next, it takes some time for the primer to dry a little: the second layer is applied.
- The third layer is applied using the same technology. Here it is important to pass the solution through a sieve with small cells and prevent the appearance of lumps. The finishing layer is applied to the ground. The work uses a rule and a grater. The working area must be rubbed with a plastic float. The movements are circular and measured.
At this point the work can be considered completed, and the plaster on the shingles needs to settle: time is needed to dry the finishing layer.
general information
At the beginning of the process , shingles are filled across the entire width of the wall; its very name suggests that it kind of covers the base, onto which the second layer of shingles is attached on top. Nail it at an angle of 45° relative to the floor. Curved, narrow dies are used for these purposes; their thickness should be at least 3 mm. A smaller thickness of the shingles will prevent the mortar from adhering to the shingles.
The second layer (exit shingles) is also installed at an angle of 45° relative to the floor, but in the other direction. In relation to each other, the shingles are located perpendicularly, at 90°.
The distance between the dies is 45 cm. The same distance is maintained in the second row. This creates a kind of mesh made of wooden shingles. The cells will be 45x45 in size, which gives rigidity to the entire structure and holds it together.
Step-by-step instructions for stuffing shingles
Plastering wooden walls (over insulated shingles) outside the house
Start filling the shingles from the bottom of the walls, then moving to the ceiling and filling it completely.
- At the beginning, two or three rows of forgiving shingles are made on the walls. The nails are only attached to it, but not completely driven in.
- The exit die is nailed at the ends with two nails. One of them is nailed as usual, and the second is driven in at an angle, with the tip of the nail directed towards the end of the shingles. Thus, it is tightened so that the connection is tighter.
- Next, nails are driven into the exit shingles every two shingles on the walls, and every other on the ceiling. The ends of the dies are not placed end to end, but with a gap of 2-3 mm. This prevents them from swelling during the plastering process.
- The nails attached when laying the shingles are removed and used. You need to score with 2 hits. First, slightly deepening the nail, and then, removing the fingers, hammer it completely in with a second strong blow. The ends must be secured so that later during plastering work they do not warp or tear the plaster.
Once you have finished with the shingles, proceed to the actual process of plastering the wall (read the detailed guide).
You can use Venetian plaster as a facing layer - read in detail.
Have you decided to make an extension or rebuild a low-quality wall? Find out how to lay bricks correctly on our website.
After finishing filling the shingles, the walls are plastered using a lime-cement mixture as usual, according to beacons and marks, with a layer of up to 20 mm.
Source