by Alexey | Crafts Tips Decor Interesting Workshop | Thursday, June 07, 2018
| Follow Make-Self.net on Facebook and be the first to read our articles. |
After decades of working with wood, my head is so full of information that there is no more room. For this article, we sifted through these thousands of tips and selected a few that were most useful. Fix these 17 tricks in your memory, they will come in handy for you too.
Checking the building level
When using a bubble level, all internal work turns into a real nightmare. If you want to live happily ever after, take 60 seconds to check the building level. Set it on your workbench and run a wedge under the bottom edge until the bubble is centered. Then flip the level over, placing the other end at exactly the same point on the wedge. If the bubble is not in the center, your level is a liar.
Photo of familyhandyman
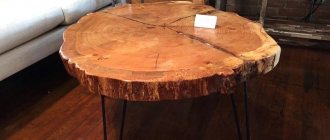
Types of turning tools
A wide range of tasks that arise when creating structures made of wood requires a large number of turning devices for various purposes. Modern manufacturers offer a wide variety of such products. Any turning tool is tasked with performing certain practical tasks. Each lathe cutter consists of two parts: the working part that performs processing or cutting and fastening elements. Approximately 20 centimeters from the entire length of the metal workpiece are allocated to the working part. This size provides freedom of maneuver for the tool, which guarantees the accuracy of the required operations. The length reserve allows you to process the cutting part many times. The length of the tail is determined by the length of the future handle. It must ensure safe operation.
Despite the wide variety of similar tools, all types of turning tools can be classified according to the following criteria:
- the nature of the tasks performed;
- the material from which it is made;
- tip shape and sharpening angles.
This classification of turning cutters allows you to accurately determine their scope of application. Depending on the nature of the tasks being solved, they can be cutting or processing. Steel grades with increased hardness are chosen as the material for their manufacture. This creates a good cutting leading edge.
Turning cutters are divided into the following types:
- cutting;
- chisels;
- scrapers.
Chisels are divided into two groups. The first is intended for rough processing or cutting. The second is used for final or finishing processing.
They mainly have four cutting edge shapes:
- straight or flat;
- radius;
- in the form of a bracket;
- corner
The width of the chisel is selected depending on the size of the workpiece. It varies from four to thirty millimeters. The main group of turning chisels has a blade that allows you to turn the necessary shapes on a flat surface. To give a certain corrugation, special chisels are made. These include:
- semicircular rayer (its name is determined by the shape of the blade. It is used to pre-process the prepared workpiece);
- Meisel has a double-edged cutting edge, the angle of convergence of the edges reaches 25 degrees. It is ideal for turning indentations of various sizes, making grooves, cutting out shapes and designs. With its help, surface finishing is carried out;
- chisel-hook (designed for making various recesses in the surface, Their size depends on the diameter of the hook);
- comb chisel - allows you to cut threads on the outer and inner sides of a wooden product (it is used to make wooden hardware for subsequent fastening of individual parts);
- chisel-scraper - used for finishing parts with a cylindrical surface.
- cranberries (these include corner chisels. They are used for cutting complex and three-dimensional designs, ornaments, bas-reliefs or various decorative ornaments on the surface of a product);
- rivets (used for fine finishing of a relief surface. It is especially useful for making complex images and sampling wood in hard-to-reach places).
Therefore, chisels can be flat or shaped. The main characteristics on the basis of which the cutters are classified are the shape of the future product and its artistic design. The work with chisels is done manually. The quality of the resulting product largely depends on the quality of the turning tool, the density of the wood and the qualifications of the craftsman.
Finishing is carried out using turning tools with a sharpening angle to the right or left. The experience of the work carried out has shown that the most acceptable angle is 70-75 degrees. For finishing cleaning, turning products are used, sharpened at an angle of 20-25 degrees.
To solve more complex (non-standard) problems, shaped cutters are used. These include turning products with a cutting part in the shape of a semicircle.
The variety of turning cutters offered for sale and the possibility of self-production allows you to choose a tool that will allow you to solve the most complex problems and create unique parts with the most intricate patterns from any type of wood.
Fixing screws on the cue ball
Use these quick and easy ways to secure a screw to your cue ball. Slide the screw through a piece of masking tape and stick it to the cue ball. Or use a small magnet on the cue ball.
Photos of make-yourself
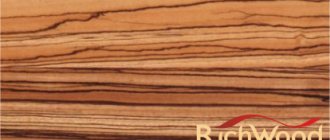
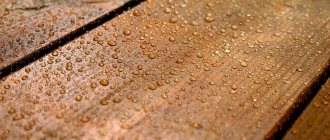
Cherry
When I first made a cherry spoon, I was surprised by the beautiful texture that emerged after coating the piece with oil. A truly magical manifestation of woodwork.
Dry cherries are darker in color closer to the core, but “fresh” cherries have a predominant reddish tint. Which changes color towards brown in a few days.
Cherries have a dense texture and are very difficult
. You need to be prepared for the resistance of the tree. Try not to rush the process of making the product. You can safely cut geometric patterns on cherries without fear that they will chip.
The wood fibers are even, sometimes slightly offset, which adds the opportunity to experiment. By the way, raw cherries cut much easier
and I would advise working with this one at first. Link to article:
How to get rid of dents on wood
Classic advice that everyone should know. All you need is a household iron and a damp cloth. Place a couple of drops of water on the dent and let them soak in for a minute. Then place a damp cloth over the dent and place the hot iron on it. The water will heat up and begin to evaporate, the wood fibers will swell and return to their original state.
Photos of popularwoodworking
Types of patterns
To understand the main distinctive features of a particular ornament made using the technique of geometric carving, it is necessary to familiarize yourself with several types of patterns, as well as with the diagrams and basics of their execution.
Skolishki
The main elements that need to be learned are chips, which are the cutting and cutting of wood parts.
Then you can start pruning, following the instructions.
- The cutting part of the blade should be applied to the left side of the triangle, and the beveled part should be in the area of its apex.
- We move the knife handle back without breaking the parallel between the right side of the triangle and the edge of the blade.
- Press down on the knife and return the handle to its original position. When performing these actions, a part of the desired shape and size should break off.
Diamond
Cutting a diamond on the surface of wood is quite easy, especially if you have already mastered the technique of working with pegs. The thing is that this figure consists of two triangles that have the same base, so it can be cut out using the principle described in the previous version.
In order to get an even pattern, you must first work out the top row of triangles, and then move on to the bottom, forming the figure we need.
Viteika
Also a very interesting element, which is based on the operating principle used when working with pegs. The only distinctive feature is that the triangles do not have a common base, but, on the contrary, are shifted in different directions from each other.
Pyramid
The pyramid is the first complex design you will learn when mastering the art of geometric wood carving.
The work takes place by drawing several triangles - while maintaining a certain order and distance between them. Three triangles are drawn at equal distances from each other, two of which are in the upper part and have a common edge. In the middle between the figures it will be necessary to mark the point of contact of the corners. The cutting part of the knife should occupy a central position, and movements should be made in the direction in which the natural layers of wood lie.
Star
The next figure to study is a little more complex, since it is based on a larger number of triangles than in all previously studied options. But despite this seemingly important nuance, the principle of working with this figure does not change, and the basis is still the creation of chips.
To create a star, you need to apply four or more triangles according to the principle used in working with a pyramid.
Squares
Creating squares is radically different from working with all previous patterns, since a completely different technique is used - straws.
To create a square, you must proceed as follows:
- after applying the marking, you need to step back a couple of millimeters from its edge and deepen the tip of the knife by 3 millimeters at an angle of about 45 degrees, then make a cut along the line;
- then, according to the principle of mirror reflection, it is necessary to perform all the same actions on the other side of the marking strip;
- after this, you need to position the knife vertically in relation to the workpiece and make two punctures (at the beginning and at the end of the line).
If all of the above steps are performed correctly, you will get a thin cut in the form of a straw, and by processing all the edges of the marking using this technique, you will be able to create an interesting pattern of the shape you need.
This technique is most often used to frame products of square and rectangular shapes, respectively.
Socket
Perhaps the following geometric pattern is the most difficult to execute, and at the same time it can rightly be called the most beautiful of all the patterns already familiar to you.
At the next stage, it is necessary to mark the middle of each segment located within the boundaries of the small circle and connect it with the points of contact of the segments with the boundaries of the large circle, located on both sides of the center we have outlined.
Having received the markings, we can begin carving, using the first technique we learned for working with triangles.
Using this pattern, you can decorate the lid of a box, the bottom of a decorative plate, the surface of a round table and other products of a suitable shape.
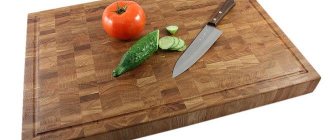
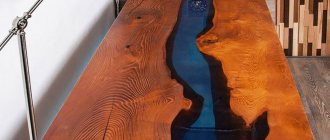
Creating texture on wood
Using the simplest tools and materials, you can give wood the most original texture of patterns and ornaments. Sometimes the most ordinary nails can turn a simple smooth board into a beautiful textured building and finishing material or piece of furniture. This list is by no means complete, but is just a starting point to start working with wood and transforming an ordinary board into an element of art. You need to pick up a hammer and a nail and use your imagination to start working with wood.
Read more here.
Photos of make-yourself
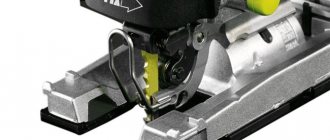
Saw and trim
carpentry workshop
The very first step that a carpenter will need to take to complete the work of making any wooden object. First of all, give the piece of wood the desired size and shape. This work is called trimming or sawing.
To do this, the bow saw blade must be installed so that it is in the same plane and the position of the saw must be taut.
At the same time, you need to check that the teeth of the blade, bent to the right, form one line, and those bent to the left, form another line. This is necessary so that the saw does not cut obliquely, and also so that when the saw moves sharply, the blade does not break.
In fact, a correctly installed saw blade plays a very important role. Sawing will be better if the teeth move along the same plane.
The saw beam should be tilted; when cutting longitudinally, the tilt can take a position almost perpendicular to the plane of the saw.
Also interesting:
Sanding wood by hand
How to dry wood in the microwave
Do-it-yourself glued solid wood. How to join boards
How to avoid splitting a wooden plank
When driving nails into a narrow plank, it often splits; to avoid this, you only need to blunt the sharp end of the nail with a hammer.
Photos of Mistry MakeTool
Edged board (2)
When building a house, situations quite often arise when wide edged boards are needed - for example, ridge and bottom elements of sheathing, material for lining the corners of a log house, and others. Such blanks can be obtained efficiently and quickly from unedged boards using a simple technique. A flat technological strip 2 is nailed to the unedged board 1, which slides along the guide bar 3 when passing the workpiece through a circular saw. The guide bar is secured to the machine table with clamps. To process the second edge of the board, the plank is torn off, the board is turned over with a smooth edge towards the guide bar and the operation is repeated.