Crafts for kindergarten
A master class on creating crafts from wood can be very simple if we are talking about working together with a child. Many parents are afraid to take this material for work, believing that it is too difficult and the child may not be able to cope.
However, working with wood is very useful; it develops both creative skills and fine motor skills. In addition, there are simple options, for example, applique from twigs.
To work you will need:
- Small wooden twig;
- Cardboard;
- Glue;
- Scissors;
- Dried leaves.
The thin branch will be the tree trunk. You can cut it with scissors at your discretion, changing the size and shape. The twig needs to be glued to a thick sheet of cardboard and wait until the glue dries.
After this, you can stick the leaves on the “branches” of the tree. This will be his lush crown. Leaves can be glued tightly either whole or crushed. A simple craft is ready.
First steps
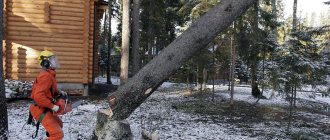
Rest a little and stretch your arms behind the miter saw. Yes, the next step is to cut the parts. I usually use a saw with medium teeth, they help to accurately cut all the necessary parts, and they also do not leave splinters. The edge is smooth and precise. If you've never used a saw yourself, take your time. I know you are worried, but such worry is extremely unproductive and can interfere with the whole business. Don't try to cut all the parts at once. As I told you at the very beginning, all walls and corners cannot be level, so some additional adjustments will definitely be needed. If your future drawing is symmetrical, I recommend starting work from the center to the edge. Be sure to check as you work.
How compassionate mothers harm their children without meaning to: quote from Agnia Barto
“Merzlyaki” are carriers of a gene that reduces resistance to cold
30-year-old daughter Alexandra Dedyushko has changed in appearance. Doesn't look like dad: photo
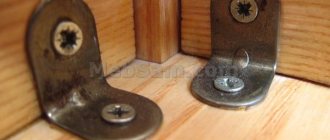
Wooden photo frame
There are several options for how to make a craft from wood to make a photo frame:
- Using small wooden slats to make the base and frame for the photo;
- Use twigs to frame photos;
- Instead of twigs or slats, take small cuts.
In any case, you will need a base where the materials for the sides will be attached. This can be either a thick sheet of cardboard that will not bend under wooden material, or a small sheet of chipboard.
- It is important to measure the required size on two sheets, one of which will serve as the back, and the second as the front.
- The back part remains unchanged, but the front part needs to be cut out for a photo window.
- Material is glued to the remaining part - saw cuts, branches or wooden slats.
Finally, you can insert glass into the resulting frame to prevent dust from getting on the photo.
Planning and measurements
Such a large and at the same time simple project will only be simple with some planning. This is pure geometry. You need to determine the height and width of the wall, be sure to note the location of sockets and other built-in elements. If you decide to remove the baseboards, be sure to measure from the top of the baseboard to the top edge of the ceiling, not from the floor, otherwise your pattern will shift and the job will be hopelessly ruined. I also recommend measuring the wall in different parts, because in our houses the walls are usually crooked and slanting, and the corners are never straight.
Once you have taken all the necessary measurements, you can begin to work. I chose a geometric pattern. If you do too, then regular tape will be enough for you to build forms. With its help you can easily and quickly create the simplest geometric pattern. But if your soul asks for sophistication, then a manual diagram is not suitable and it is best to turn to a special program, which, after entering all the initial data, will design the work and give the perfect drawing. Be sure to include all notes and details in the program. Take your time to print. It will take a few days for you to really like the final version. Trust my experience. Mostly all programs are free, but there are also paid ones. If this topic is too complicated for you, contact a designer or builder you know, they will help you figure it out. Well, just in case: you can fall out of budget and order development from a professional bureau. Think for yourself.
How to remove nails in a couple of minutes without pain: a housewife showed a life hack with oil
He will fix the dishes and furniture: 2 ways to make cottage cheese glue at home
Scientists have discovered how exercise helps strengthen bones
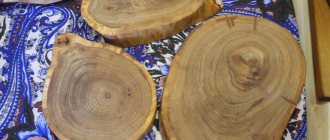
Figures from saw cuts
In the photo of wood crafts you can see that the figures made from saw cuts are different. It all depends on the degree of skill and the tools at hand.
It’s worth starting with the simplest figures; step-by-step instructions are provided for them.
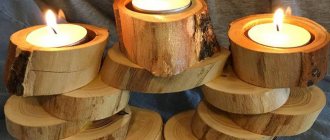
You can make a very beautiful owl from saw cuts. For this you will need:
- 4 cuts - one should be large, one medium and two small;
- Two drink bottle caps;
- Nails or screws that will attach parts of the owl. You can also take glue that can glue the wood together if the owl does not stand outside;
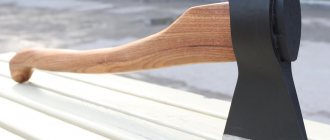
- A saw or ax, which will be needed to divide one of the cuts in half.
The largest cut will serve as the base and body of the craft. Two small cuts are the eyes. The covers will be the pupils. The middle cut needs to be divided in half and attached to the sides - these are the wings.
To make the owl look like a real one, you can also make her eyebrows that will hang over her eyes. To do this, you need to take an old bag and twist it a little, cutting off the edges. And then secure the resulting part above the eyes.
- Mosaic applique. It will turn out to be quite voluminous and large, because each cut takes up a lot of space, even the smallest one. There are a lot of ideas for wood crafts in this format. Some people make a sun out of saw cuts, others make a heart out of them. Mosaics can be made either on a vertical surface, for example, a wall, or serve as a separate composition. Then you will need to find some kind of solid base for the mosaic, lay out the craft, and then cut out the applique along the contour of the product.
- Hares made from saw cuts - the algorithm of work is similar to the owl craft. You will need 2 large cuts for the body, one smaller one for the head, two large oval cuts for the ears and three small oval cuts for the paws and tail. Between the two cuts of the body you need to place the head and tail and secure them. Then attach the ears on both sides of the head, and the paws at the bottom of the body.
The saw cuts can be used in any way you like; they make different animal figures very well. The main thing is that such a craft can be made with a child. When working together with an adult, you will get an excellent result.
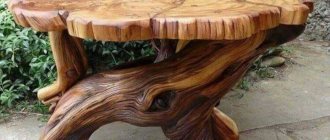
Cutting board
This type of craft can be done by an older child, a school student, or a novice craftsman.
- You can take either a solid piece of wood and cut a board of the required size from it, or glue several small plates together.
- To glue wood you will need a special glue - clamps.
- In order for the glue to set, you need to firmly press the boards together and fix them for a while.
- After the glue has dried, you need to go over the surface of the board with a plane. This will make it smooth.
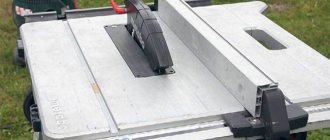
- If the board needs to be reshaped, do it with a jigsaw.
- Do not forget to drill a hole in the top part so that you can store the board hanging.
- If the board has been cut, you also need to start processing its edges and ends.
- Now you will need sandpaper, which can be used to sand all the edges.
- If the board is finished and given the desired shape, you can coat it with an antiseptic in the form of creosote so that it can be used for food purposes.
Decor
Decorating a homemade wooden door begins with sanding. Next, the treatment is carried out with an antiseptic that protects the wood from dampness and pests. After drying, the surface of the door is covered with two layers of primer or putty. The final layer is paint or varnish.
If you have a professional tool, as well as certain skills, the canvas is decorated with carvings, stencils are cut out, and even a mosaic is made.
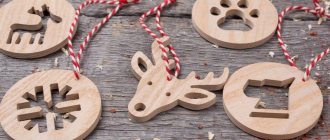
Multilayer crafts
The principle of operation of such crafts is reminiscent of crafts made from wood cuts. Only in this case you need to shape the material by cutting out all parts of the product along the contour.
Stencils for crafts can be found in any sources, if possible, you can draw it yourself.
For example, you can take a polar bear. It will consist of 3 layers.
- The first is the back of the body,
- The second is the front part of the body with paws,
- The top, third layer is the head.