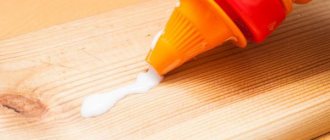
Nowadays, the cutting board has become not only a tool for cutting food, but also a full-fledged decorative item. You can make it at home, but you should pay attention to a number of important criteria: choice of material for manufacturing, gluing. But the main question is: what glue to choose so that it does not harm your health and is easy to use?
Wooden end cutting board.
Types of cutting boards
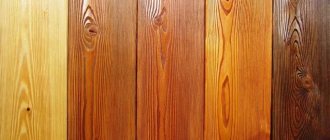
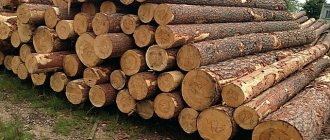
There are only two types of cutting boards: wooden and plastic. Any wood can be used in production, but preference is given to beech, oak, ash and maple. Plastic ones are famous for their easy and long service life.
An experienced chef will always choose only a product made of wood. It requires more care for its condition, but at the same time it retains the sharpness of the cutting object longer.
Wood is more durable than plastic and comes in a wide range of colors.
Material options for making boards
Like many other products that are usually made by hand, a board can be not only a tool for doing work in the kitchen, but also a wonderful decoration for the room. For this reason, there are several basic methods for making cutting boards by hand. Naturally, products may differ in the material used in the work.
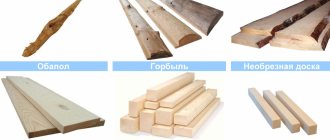
It could be wood, or it could be plywood. As for making products with your own hands from plywood, this is the most budget-friendly solution, and it’s also the easiest. Here it is worth paying attention to the fact that in this case the following rules work - the thicker the sheet of plywood you have, the better the result.
Small thickness material is not suitable for the work. As for wooden boards, this option will be the most practical. Also, such material will have a longer service life. If the question arises about how to make a cutting board so that it is inexpensive, then you can take not only plywood, but also birch or pine boards. Although the most durable and at the same time very hygienic will be beech, oak and acacia.
Care
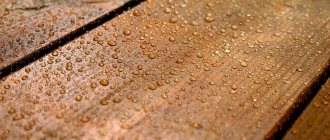
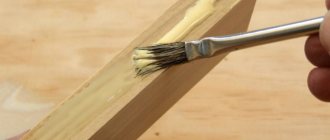
For comfortable use, immediately after production you need to coat the product with mineral oil and wax.
This will give the material even greater moisture resistance.
A wooden cutting board, unlike a plastic one, requires constant care and compliance with a number of requirements:
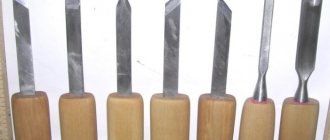
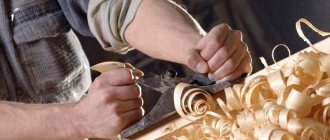
- It needs to be sanded again from time to time. This is best done with fine sandpaper. This will remove all the resulting irregularities;
- after each sanding you need to treat it again with linseed oil;
- there is no need to leave it dirty for a long time, and after washing you need to make sure that nothing prevents it from drying;
- You should not use one board for processing and cutting meat, fish and other products. It is better to store more than one product at home.
Processing the end of a wooden cutting board.
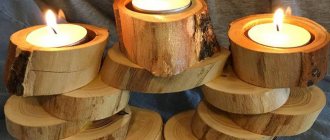
Volumetric fantasy
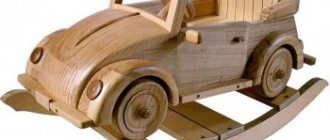
There is no volume on a plane, but a drawing can create volume. Using the peculiarities of perception and good equipment, you can make an outlandish kitchen board that every housewife will not dare to use for its intended purpose.
The first stage, and also the penultimate one, is sawing.
Another cutting.
The Digidog robot dog is being tested in conditions as close as possible to combat conditions
Scientists: by the end of the century the Arctic will become 20 degrees warmer
Misdemeanors that air zodiac sign women will never forgive their partner
And so you need to continue until you get a striped workpiece.
Assembling such a workpiece is not such a difficult task. Everything can be easily repeated on your own.
Gluing is a very simple process.
You will have to wait a bit until the workpiece dries and is ready to go through the grinder.
With her husband and daughter: what does the house where Gradova recently lived look like?
Nutritionist named foods that are dangerous for breakfast
March taroscope: what the cards told about the fate of each zodiac sign
Again sawing, but in a different direction. This is what will subsequently create the desired perception effect.
In principle, the process is very simple. We saw, glue, sand and saw again. A fast saw and a good sander are very important here. The sawing speed must be high, and the quality of grinding is essential.
How to make an end cutting board
In this case, the manufacturing process will be a little more complicated, because much more work will be required with wood. You should use cuttings from fairly hard wood species, for example, pine or oak. They should not be affected by diseases such as fungus, and they should not have knots or cracks.
The blanks will be processed on a jointer, and then strips 2.8 cm wide will be cut. The number of parts made of oak and pine should be the same. When the blanks are made, use a jointer and sandpaper to grind the parts down to a size of 2.5 cm, and lay the pieces one by one.
Next, we glue all the blanks together to create a solid product, and here it is important to note the fact that you cannot use an adhesive composition that contains formaldehyde. It is also not worth using epoxy compounds, and most often use PVA-based substances. The main advantage of such boards is that they are much stronger than ordinary ones, which are made of solid wood. In addition, end cutting boards are much less likely to dull knives during use.
Requirements for the material of manufacture
If the question arises about how to make a cutting board from a material such as plywood, then it is worth starting the work with the right material. In order to achieve success, it is worth using only first-class raw materials.
Such material will have a minimum number of knots and other defects. It is also important to note the fact that for such a purpose you cannot choose moisture-resistant plywood, because such raw materials are too saturated with adhesive compounds.
As for how to make a cutting board from natural wood, in this case you can use almost all types. It is worth noting up front that the most inexpensive options, such as spruce or pine, are not the most durable, although in fact you can increase their lifespan through proper handling.
There are several specific requirements that must be followed:
- Naturally, the material must be dry when used.
- Plywood or wood should not contain defects such as oil stains.
- The workpiece should not have loose or even rotten places, or even knots, but with good skill, knots can even be made part of the design.
Wood cutting board manufacturing technology
1. Process the wood scraps on a jointer. This processing is necessary so that the boards fit together clearly. Try to ensure that the height of all the boards is approximately the same; the width can be whatever you want.
2. Process the front sides of the boards on a planer. This will ensure uniform thickness and smooth surfaces. It is advisable not to make the boards too thin; the thickness should be at least 15, and preferably 18 mm.
3. Cut the boards lengthwise using a table saw. The minimum width of the boards should be approximately 12 mm. The stripes do not have to be the same width; vary it at your discretion.
4. Arrange the boards in the desired order. Try to achieve an interesting look by experimenting with combinations of colors and sizes. The number of planks depends on the size of the cutting board.
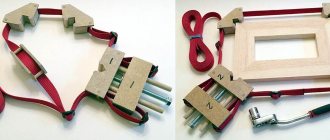
5. Glue the boards together. It is advisable not to glue everything together at once, but to divide them into several groups. The width of each group should be as wide as your planer can handle it. The glue must be non-toxic and moisture resistant. Apply a thin layer of glue to the side edges of each board, and then tighten all the parts with clamps.
6. As a result, you should have several groups of planks. Sand the surfaces of each group with an orbital sander, taking care to remove all the glue. Then planer each group, removing as thin a layer as possible from each side. Now you can attach the pieces of the cutting board to each other and give an intermediate assessment of your efforts.
7. Glue the board parts together using the same technique used to glue the boards. Remember that due to its large size, the cutting board cannot be processed on a planer; it will have to be sanded by hand. Therefore, try to glue the parts together as accurately as possible and wipe off any excess glue with a damp cloth. To tighten the parts together you will need quite large clamps.
8. Sand the board and cut it to the desired size. Grind with a hand sander and remove any glue deposits. When cutting a board, try to make it proportional, that is, choose the length of the board based on the width. It is also advisable to take into account the size of the sink, because if the board does not fit in the sink, washing it will be problematic.
9. Round the edges of the board using a router with the appropriate bit. A special table equipped with guides will greatly simplify the task.
10. Cut a groove around the perimeter of the board, which is needed so that the juice released by the food during cutting does not flow onto the table. You need to cut out the groove using a router with an appropriate rounded cutter. To make the groove even, use a plywood template. Secure the template with masking tape on three sides, and move the router along the fourth. Then remove the tape from one of the sides and secure the one along which you made the groove. Depending on the depth of the groove, you can get by with one or more passes.