Although the term “fighter” is known to many, we still did not put it in the title of our article. Because home craftsmen better know this product under the name “stain”. Today we intend to tell you about stain in more detail. So that, firstly, you can easily select the variety you need. And, secondly, you used it confidently, giving your wood products expressiveness and beauty.
Stain: what is it used for and what types does it come in?
The main feature of stains is that their liquid structure guarantees rapid absorption into the wood. And they are applied in order to paint the surface layer, preserving the surface relief of the product and its natural texture. As a result of the processing performed, even inexpressive wood species acquire a touch of nobility. Moreover, this is done without any significant costs. You can always experiment with stain shades to expand your finishing options.
Folk recipes for wood stain production
Making stain can be mastered at home. Compositions can be produced in several ways:
- from plant materials;
- from tea, coffee or vinegar;
- from chemical components.
You can also make a whitening composition. Let's look at the technologies for producing stains with our own hands in more detail below.
Vegetable stains
Below are recipes for plant-based beans:
- Larch bark decoction. Gives the tree a red tint. Birch wood will look especially beautiful.
- The onion peel also gives it a reddish hue. It is customary to treat light wood species with this decoction.
- You can get an impregnation from walnut shells that will give the wood a brown tint. To prepare the impregnation, you need to grind the shells into powder. The dried powder is boiled in water and filtered through a sieve. Next, soda is added to the solution. If you add potassium dichromate to the solution, the wood will get a reddish tint. To obtain a gray tint, acetic acid is applied to the already treated surface.
- Black coloring can be achieved by treating the tree with a decoction of oak and alder bark.
- Also, black color can be obtained by decoction of willow and alder bark.
- A uniform brown color is obtained thanks to a solution to which equal amounts of walnut shells, alder catkins, as well as oak and willow bark are added. The components are poured into water, which is brought to a boil. After this, half a teaspoon of soda is added and the solution is boiled for another 10 minutes.
- A decoction of nut shells and apple tree bark will give the product a brownish tint.
- The wood will acquire a golden hue after treatment with a decoction of buckthorn berries.
Compositions based on tea, coffee and vinegar
- To produce a stain that will give wood a brown color, you should mix ground coffee with soda.
- You can turn light wood brown by brewing tea. The depth of color depends on the strength of the brew.
- The “ebony” effect can be achieved by pouring acetic acid into a container with nails and letting the solution sit for a week in a dark place.
Chemical based formulations
- Oak wood will turn brown if you soak it in slaked lime. The walnut, in addition to its brown color, will acquire a slightly greenish tint.
- Cherry color can be imparted to wood by applying a manganese solution to it. To prepare it, you need to add 50 grams of potassium permanganate to a liter of warm water.
- A yellow color for light wood can be achieved by treating it with a decoction of barberry root. You need to add alum to the prepared broth, and then bring the liquid back to a boiling state.
- A greenish tone can be obtained by mixing 50 grams of copperhead with vinegar. Boil the solution for 15 minutes.
- If you mix wolfberries with vitriol, you get a brown tint. When these same berries are mixed with Glauber's salt, a scarlet color will appear. As a result of mixing wolfberry and soda, a blue tonality is obtained.
Whitening compounds
Bleaching impregnations are used as a preparatory measure before painting wood. Some types of wood get interesting shades as a result of bleaching. For example, the nut with its purple hue takes on a pale pink or scarlet color. Apple wood becomes ivory in color.
Recipes for whitening stains:
- Oxalic acid solution. For 100 grams of water, take 5 grams of acid. The solution is used to bleach light wood. On dark rocks, after treatment with this composition, stains of an unpleasant color will remain. After bleaching, the wood is washed in a solution where 3 grams of soda and 15 grams of lime are taken per 100 grams of water.
- Using a 25% hydrogen peroxide solution, you can bleach almost all types of wood, with the exception of oak and rosewood. In this case, washing is not necessary.
Water-based stain and its features
Water stain can be purchased in two versions:
- firstly, the liquid is completely ready to use;
- secondly, a powdered composition, which is diluted independently, bringing it to the desired concentration.
Water-based stain has good adhesion. Moreover, it is able to well emphasize the natural texture of wood and has a wide range of shades. These can be either light colors or rich dark reds.
Aquatic varieties of beys are practically irreplaceable during interior work. Because they are completely devoid of any toxic odors.
Example of water stain
But if you treat any of the resinous rocks with such a stain, spots may form on the surface of the product. This phenomenon occurs as a result of uneven absorption of the composition into resin-rich wood. To avoid this, as a rule, a degumming operation is first performed.
Color spectrum
In accordance with the international classification, each color is assigned its own code and name .
For example, “pine”, “walnut” or “fruit wood” stain.
To choose a wood stain in a suitable color scheme, you need to carry out a test painting of the wood and take into account:
- natural shade and type of wood subject to processing. Painting with stain can lead to the appearance of new shades;
- the color range stated in the catalogue. Colors under the same code from different manufacturers can produce shades of different depth and saturation on different types of wood. The same composition on pine will look lighter than on red wood. This can be explained by the fact that such wood has a more saturated natural shade;
- quality of stains. Compositions in the same color from different manufacturers can give different coloring effects. Therefore, you should not choose products of dubious quality;
- density of stains. The lower the density, the more the composition is absorbed into the wood. This results in a less saturated and deep shade.
The following colors of water-based wood stains are considered the most popular:
- “oak” – rich brown shade;
- “mahogany” – a noble burgundy shade;
- “pine” – the shade is close to the natural color of the wood;
- “natural” – natural light yellow shade;
- “light walnut” – practically does not change the natural color of the wood, and is used as a protective composition;
- “cherry” – light red and rich burgundy shade;
- “mahogany” – brown with light shades of red;
- “Wenge” – dark shades of brown;
- “larch” – from dark yellow to orange hue.
When to use alcohol stains
Alcohol stain is a finishing material based on aniline dyes diluted in alcohol. It can be purchased in both liquid and powder form.
Perhaps the main feature of such compositions is, firstly, the accelerated penetration of pigment into the wood structure. And, secondly, it dries quickly.
Example of alcohol stain
In principle, it is most convenient to apply alcohol stain using a spray gun. Because brushes, rollers or tampons turn out to be completely ineffective when working with such products. The reason for this is its rapid drying. If you decide to use the manual method, be prepared for the fact that there will be streaks, stains, and other defects on the processed products. Moreover, the tone will never be uniform.
What are the types
The products differ in their composition components, technical and operational characteristics. Depending on the chemical formula, they are used for interior and exterior work.
Water-based stain for porous surfaces Aquacolor, color – pine wood
Water
Stains of this type are made on the basis of water. Available in two forms: ready-to-use and dry. The color range is varied. After application to wood, it is possible to enhance the natural tone of the natural material, lighten or darken it. It takes 4-14 hours to dry. The process is quite long, but it is necessary for complete evaporation of moisture.
The aqueous composition penetrates deep into the wood structure, resulting in reliable protection against rotting. Other advantages of impregnation include:
- environmental friendliness (can be used even in children's rooms);
- no unpleasant odor;
- the ability to wash off before drying;
- easy change of tone in subsequent treatments;
- hiding wood fiber defects.
The tinting effect is so impressive that many people choose colorless varnish as a decorative coating.
After treatment with water impregnation, the wood fibers are raised. To eliminate unevenness, it is necessary to sand the surface with a fine abrasive or rag.
With all the advantages of water stain, there are also negative sides. This coating does not provide moisture-resistant protection. Therefore, it is not recommended for use on street objects.
Wax
Developed on a wax basis. The principle of operation is different from other types. The active substances of the composition do not penetrate deep into the structure, but remain on the surface, creating a water-repellent film. The tree acquires moisture-resistant properties. The effect is so great that a wax-based product is used to treat wood surfaces located in saunas, steam rooms, and baths. It can also be used to protect street structures.
Wax stain is applied as a base before varnishing or painting. This preparation eliminates the formation of stains or unevenness after coating the wood with paint and varnish.
Oily
To make oil stain, synthetic and natural oils and dyes soluble in drying oil (white spirit) are used. This composition has a number of advantages over other types:
- there is no unpleasant odor;
- thanks to tinting, you get a beautiful and durable color that does not fade for many years;
- no toxic substances are used in the manufacture of impregnation, which indicates the environmental friendliness of the coating;
- A moisture-protective layer is formed on the surface of the wood, preventing liquid from penetrating into the structure.
The properties of oil stain are used to treat furniture, floors, parquet and other wood surfaces indoors. The material is not suitable for outdoor use due to its low resistance to UV rays, unless special substances that protect against ultraviolet radiation are used in production.
After application, oil stain dries within 10-48 hours, depending on the temperature and humidity level in the room. You can begin further finishing only after the impregnation has completely dried.
Acrylate stain Tikkurila Pirtti Panel Stain
Acrylic
Impregnation is available in liquid form. The color palette is impressive: almost all tones are found, identical to different types of wood. Acrylic compositions are distinguished by the absence of toxic substances, quick drying, and reliable protection from moisture, ultraviolet radiation and rotting. After application, no smudges, stains, or stains form on the surface. The coating turns out perfectly smooth.
Acrylic stain does not have a strong odor. The product is considered safe for people, animals and the environment.
Alcohol
The composition is based on alcohol or an organic solvent. A sign of the presence of the second component is the prefix NITRO in the name. The product is available in ready-to-use form or in powder, which must be dissolved in alcohol/white spirit before applying to wood.
The peculiarity of the stain is quick drying. It only takes 5-30 minutes for volatile substances to evaporate. It must be applied quickly; it is recommended to use a spray gun or spray gun for the job. To dilute the thickened alcohol stain, you need to add a little solvent to it.
Purpose: outdoor work. It is not recommended to use the product indoors due to its high toxicity.
| For interior work | For outdoor use |
| Wax | Alcohol |
| Water | Wax* |
| Oily | Oil* |
| Acrylic |
*For outdoor use, stains are selected that contain special substances that increase resistance to UV rays.
Why is oil-based stain interesting?
Any oil stain is a product consisting of corresponding dyes dissolved in oil. Moreover, linseed oil is usually used for this.
The process of applying this stain is quite simple. It is always applied evenly. And this can be done either manually or with a spray gun.
As a rule, craftsmen highly value oil stains because they:
- firstly, they do not form a surface film;
- secondly, they effectively emphasize the wood texture;
- thirdly, they provide the air exchange necessary for the tree.
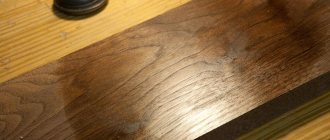
Example of oil stain
An important feature of any oil sealant is that it is resistant to UV radiation. That is, such a stain prevents the treated surfaces from fading under the sun. As a result, color saturation can be maintained for years.
Exterior stain
In addition to the above-mentioned calcpaste, the protective white wax stain Verfijn Steigerhout beits is well suited for whitening external surfaces.
Its use emphasizes the naturalness of the natural surface structure. In addition to the remarkable aesthetic effect, this stain for exterior use perfectly protects the wood surface from blueing and rotting for a fairly long period. Film-forming coatings are also used to bleach wood.
Another whitening product is Sigmalife VS-X alkyd-based exterior stain. This stain, in addition to its immediate whitening functions, serves as a primer and has remarkable protective properties; it will protect the wood surface from bad weather and ultraviolet radiation for a long time. For the best result, apply Sigmalife DS acrylic as the last (finishing) layer or AVIS timbercoat varnish, which is also made on an alkyd base and is of high quality. When using Sigmalife VS-X, the tree will be reliably protected from all environmental aggressions, even if the finishing layer is not applied immediately.
There are many methods and technologies for bleaching wood coatings, and to consider them all would probably require a whole book. This article highlights the basic principle of whitening and shows the means by which it is easier to achieve not just a better result, but one that you would prefer. In addition, each of the considered means has its own special characteristics that are not characteristic of others. Knowing these features will make it easier for you to make your choice for a specific use.
Acrylic and wax compositions
Due to the similarity of basic characteristics, such stains are very similar to their oil counterparts. But the distinctive feature of oil- and acrylic-based stains is their ability to provide effective moisture protection. That is, they perfectly protect wood from the negative effects of moisture.
However, we must emphasize their inherent drawback: the resulting finish is quite sensitive to mechanical stress. That is, it can easily be damaged by some careless blow.
Acrylic and wax stains are especially valued for the fact that they:
- firstly, they are easy to apply by hand;
- secondly, they ensure the maintenance of tone uniformity;
- thirdly, they do not create divorces;
- fourthly, they do not raise wood pile;
- fifthly, they well emphasize the naturalness of the wood texture.
About painting technology
In addition to the correct choice of paint color for wood, painting technology is of great importance. Only in this case the paint will not peel off several months after painting.
Choosing color and painting wood
When painting externally and internally, you will have to choose between glazing and covering compounds. The former protect the wood from moisture and insects, but the texture remains visible. As for covering compounds, they form an opaque layer on the surface.
The choice of paint color depends on many factors; when painting surfaces inside the house, the color scheme of wood paints is selected taking into account the overall design of the room. For example, when decorating the kitchen of a timber house in the Provence style, preference is given to light shades, but dark shades (mahogany, ebony, wenge, etc.) are not used at all.
In the photo - a kitchen in Provence style
When painting the exterior of a house, there are more options, such as:
light, calm colors (beige, white, etc.). Finnish houses are usually decorated in exactly this color scheme;
Note! When using light shades, you can combine it with dark inserts. This will make the house look more impressive
- it is allowed to use rich shades, for example, the color of teak wood will give a reddish tint after painting;
- You can use other shades, for example, green. You just need to take into account that the paint consumption should be higher so that the wood texture does not show through.
Greenish tint of the house
Also, when choosing the color of wooden houses, you should take into account the surrounding environment. If the colors of neighboring buildings are in calm, light colors, then it makes sense to choose the same shade. In this case, using bright colors will be unnecessary; the house will simply look ridiculous against the background of its neighbors.
As for painting wood with your own hands, when doing exterior work you should adhere to the following recommendations:
- do not quit work halfway, then the border between areas will be noticeable;
- paint under normal conditions - low humidity, direct sunlight does not fall on the paint;
- Before applying the next layer, wait for the previous one to dry.
It's better to paint the whole house at once
When working inside the house, the instructions require:
- provide good ventilation;
- thoroughly sand the surface before painting;
- in order to prevent the paint from being absorbed into the wood, it must first be primed;
- To obtain an even, rich color, 3 or more layers of paint may be needed. The drying time for each layer depends on the type of paint.
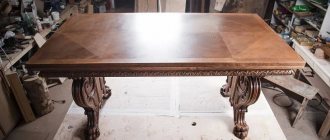
It is important to understand that the final result largely depends on the type of surface. For example, the color walnut applied to a board with an expressive texture in 1 layer will give an interesting effect - the texture of the wood will be visible, so it will give the impression that the board is really made of walnut
But if you apply paint to a sheet of chipboard, you will get a solid, even color.
Experiments with paint
Sometimes the desired effect cannot be achieved by simply painting or applying varnish to a wooden surface. In this case, you have to experiment and combine different compositions.
Note! It is advisable to carry out experiments on an unnecessary piece of wood. Otherwise, the price of such creativity will be too high
This technique is often used when it is necessary to age wood or achieve the effect of bleached wood.
To get the desired effect you need:
first brush the wooden surface with a wire brush to remove soft wood fibers;
Removing soft fibers
- clean the surface of small sawdust;
- then the fun begins - apply 1 thin layer of light paint, wait until it dries;
- protruding hard fibers will remain unpainted, imitating an old surface. A couple of layers of varnish can be applied on top to protect the surface from abrasion and fading.
A combination of shades for the same purpose is also possible. This does not mean mixing different colors, but sequential coloring in different shades. Any colors of wood paints can be combined in this way, the main thing is to ensure that one shows through from under the other, creating the illusion of wear and tear received over years of use.
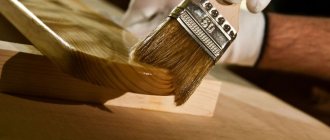
How stain is applied to wood: methods used during processing
In principle, there are only two such methods:
- Apply in excess and then remove excess with a swab
- Apply in excess, but do not remove excess
Let's consider these methods in more detail.
Applying stain in excess and then removing excess with a swab
This technique is usually used when working with aqueous compositions. Because with its help you can eliminate smudges, even out tonal transitions, and also obtain lighter tones.
If the stain is applied with a swab, then do it in a circular motion. If application is made using a roller or brush, then the movements should be longitudinal. After applying the stain, wipe off the excess. And they do this along the fibers.
When the first layer has dried, apply the second. This operation is repeated several times to achieve the desired color saturation.
Applying paint in excess without removing excess
This technique is usually used when treating wood with wax, oil and acrylic stains. And especially when it is necessary to obtain deeper shades.
However, partial removal of excess is still allowed. But only after the main part of the drug has been absorbed into the wood structure. This is done in order to:
- firstly, even out the tone;
- secondly, eliminate minor defects that sometimes arise during the application of the composition.
Stain: general application recommendations
Here are some of the most important recommendations that may be useful to you during your work:
- To enhance adhesion, the stain can be slightly heated. As a result, not only the speed but also the depth of penetration of the drug into the wood structure will improve.
- It is not recommended to pick up a large volume of finishing material with a brush, swab or roller. Because in the case of controlled sampling, the likelihood of blots and smudges is minimized.
- The ends of the boards need to be treated with stain more intensively. Because they absorb more composition than the main surface.
Selecting the desired shade
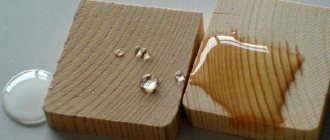
It is a well-known fact that wood stain, applied in several layers, determines the final color of the surface. In order to understand what it will be like, you need to make a color test.
For this purpose, the prepared scrap board is thoroughly polished. Then it is completely saturated with the first layer. After waiting for it to dry, apply a second layer, leaving a third of the board untreated. Cover the surface with the last layer, leaving two-thirds untouched this time.
Related article: Black parquet: dark floor in the interior, photo of light walls, laminate flooring in the kitchen and bedroom design, brown and white furniture
And finally, a completely dry board is covered with two layers of varnish, not forgetting to dry each of them. After completing this procedure from start to finish, you can choose the tone you would like to achieve.
When working with the material described here, it is necessary to remember that the stain used for woodwork has different effects on different types of wood.
Deciduous plants have excellent absorbency. Any type of impregnation can be used for them. For representatives of coniferous species, this figure is lower, which is explained by the presence of a significant amount of resins in their composition. This fact once again confirms the need to use color samples. If you ignore this stage, you can get an unpredictable and not always pleasant result.
How to properly prepare surfaces to which stain will be applied
Stain is used to highlight the beauty of wood and make it more expressive. However, in the process of staining, not only its advantages are emphasized, but also its disadvantages and defects. Therefore, the surface of the product should be properly prepared before processing. To make all flaws minimally noticeable, as a rule, the following operations are performed:
- First, the wooden surfaces are sanded using fine- and medium-grain paper. If there is any old coating, it is removed completely.
- Secondly, after cleaning the surface and leveling it by grinding, the product is degreased. Moreover, it is more convenient to do this with a sponge soaked in white spirit.
- Thirdly, if a product made of coniferous wood is subjected to processing, it is deresined. This can be done using a special composition.
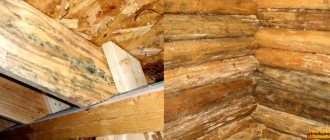
- Fourthly, if a water stain is used, the raised lint on the surface of the product is removed. We already wrote about this when we talked about water-based stains.
This is what lint on wood can look like
Elimination of defects
Removing stains caused by stain is a complex process.
- Streaks . If the fast-drying material was applied in a thick layer, this problem can be eliminated by removing it as much as possible. To do this, the drying layer is covered with fresh stain. The softened solution is removed with a rag. When the coating is completely dry, solvents are used. Another way to solve this problem is to use a plane or sandpaper.
- Spots . If the coloring is uneven, it will be difficult to cope with. The stained wood is passed through with a plane, and in plywood the top layer will have to be removed. But it is preferable to prevent the formation of spotting: conduct a preliminary surface test, use gel stain or suitable tools.
Taking into account the recommendations given in the article, it will not be difficult to treat surfaces with stain yourself.
How to solve the problem of spotting
In principle, the problem of spotting is quite common. As a rule, it is expressed in the fact that in some places the stain works more or, conversely, less effectively. This phenomenon is explained by the characteristics inherent in certain types of wood.
Spotting can be caused by one of the following two factors:
- firstly, the resin content of the wood;
- secondly, its uneven density.
This is what spotting looks like
The first reason can be eliminated if you first perform the de-tarring procedure.
To eliminate the second reason, you can use special air conditioners. Treating wood with their help allows you to close the pores and, as a result, ensure uniform absorption of the stain.
How to paint doors coated with varnish or paint
Over time, any doors wear out and become unsightly. The moment comes when they need to be restored. It would seem that this is not a difficult task, and anyone can do it
But not many people know that before finishing the doors, you should pay attention to the coating with which they were previously painted. If you are not going to completely remove it, then you should take care of the compatibility of coloring agents, those that were previously applied and new ones
In this article we will tell you how to paint doors coated with varnish or other paints. We will also figure out which paint is suitable for this or that material from which the door is made.
Deciding on the material from which the doors are made
If the door is quite old or, on the contrary, new and expensive, then in 95% of cases it is made of natural wood. To accurately determine this, just lift the door; if it is heavy, then it is wood. Modern versions of such doors are finished with veneer, while older examples were simply coated with paint or varnish.
If you lifted the door without much effort, it means that there are voids inside it filled with cardboard, so the weight of the door is not significant. But such a door does not have high sound insulation, and therefore its price is much less than that of natural wood. The top of such doors, just like wooden doors, is finished with veneer. Note that the texture of veneer resembles natural wood and is mainly varnished for stability.
Painting a veneer door
It would seem that the new door will not have to be painted, but this is not so. When selling a door, the buyer is often warned that after installing it, additional varnish treatment is required. The fact is that unscrupulous manufacturers, having made doors and instead of covering them with varnish in several layers, they do it only once. Therefore, additional processing is required. How to paint varnished doors, but it’s not at all difficult to do. A clean door must be coated with a layer of varnish, and after it has dried, the entire door leaf should be sanded. Then remove all chips from the surface using a brush or vacuum cleaner and apply a second coat of varnish. After it dries, the door can be used.
An important point in this work is that the door sanding process should be carried out before each painting. Then the surface will be even and smooth, and the doors will become attractive.
How to Paint a Previously Painted Door
Now we will look at a sample of an old door, opened with varnish or painted. In our version, this is a seasoned door with many chips, cracks and scratches. Such a door can be restored by removing it from its hinges or in a vertical position. Use a spatula to remove all paint peelings.
The entire surface of the door is sanded with sandpaper, and special attention is paid to cracks and pits. Using wood putty, all defects and unevenness of the door leaf are treated, but before that, they are impregnated with a special primer
After the putty has dried, the door is again sanded until smooth, all dust is removed, and areas that are not to be painted are sealed with tape. All this work is carried out before painting the doors coated with varnish or paint. After this, you should apply the first layer of paint and paint, and after it dries, the second. This can be done using a brush, roller or spray.
An important point here is the coating with which the doors were previously painted. If it was varnish, then the door should be varnished, and if it was paint, then paint
When choosing paint, pay attention to the compatibility of old and new material. If you decide to open painted doors with varnish, then in this case you should use a product to completely remove paint from the surface of the doors and only after that you can start painting with varnish
Don’t forget about the door frame and trims; they must be painted using the same technology as the door, only they cannot be removed, so all work will need to be carried out directly at the place of their installation. Now you know how to paint doors coated with varnish or paint.
Using different stain colors to create beautiful effects
The use of various combinations and color combinations, as well as application techniques, allows you to achieve interesting decorative effects. For example, the rubbing method is used to create a realistic imitation of noble breeds during the dyeing process. For this, stains with a hint of oak or pine are suitable. It is not recommended to select quick-drying compounds for these purposes.
If you want to create a memorable interior, they resort to tinting the wood with concentrated bright colors. To get a rich tone, you will need to mix several shades (two or more). As a result of mixing mahogany and blue stain, a purple stain is obtained. The same shade can be achieved by combining ebony and mahogany. A mixture of marigold and plum gives a mocha color. A similar effect is obtained by mixing rowan and walnut.
Colored stains look very unusual in the interior of a room. To get this effect, you need to cover the tree with the main background. After this, stains of other colors are applied with strokes. A colorless varnish composition is used as the finishing layer.
A huge range of stain colors allows you to create updated interiors
If you combine black, burgundy and blue stains in one interior, you get quite interesting combinations. Burgundy furniture looks very impressive in a room with blue wooden floors.
The list of options for decorating rooms using stain does not end there. A huge range of colors allows you to create countless combinations and secondary shades, which significantly expands the design possibilities of these impregnations.
Varieties
You can cover absolutely any wood surface with stains - pine, oak, maple, birch and so on. But you still need to know the types of this product, because each type of stain has certain properties.
Water
The presence of water in the composition of the stain is considered the main constituent ingredient. The group of water-based impregnations is considered the largest. Typically, these products are prepared in finished form or in powder form. The powder can be diluted in water independently according to the attached instructions.
Positive traits:
- Due to the fact that this product has a neutral base, it does not have increased toxicity and does not have any harmful effects on health;
- Availability of a wide range of shades with natural texture. Using these types of products, you can create shades from the lightest to deepest, which will help recreate a natural look and deepen the tone. This quality also gives the surface an expressive and noble appearance;
- It is easy and simple to apply, with minimal product consumption;
- Suitable for any type of wood - pine, birch, oak, maple, walnut, cherry;
- Not high cost.
Alcohol type stain
This product is available in the form of aniline dye, which is dissolved in denatured alcohol. This type of stain is sold both ready-made and dry in powder form, which must be dissolved.
This product has the advantage of drying quickly. However, this quality provides some qualities when manually applying the mixture to wood; after drying, greasy stains often form. Therefore, many builders recommend using a spray gun when using alcohol products.
Oily
In these products, all oil pigments are dissolved in solvents or White Spirit. This composition provides a number of advantages to this type of stain:
- When painting, it provides tinting of wooden surfaces in various colors;
- Oil mixtures are convenient to use at home;
- The composition adheres well to the surface and can be applied with any tools;
- The oil stain evenly enters the area of the wood structure, while forming a protective film on the surface.
Acrylic and wax
Wood stain, which is made from an acrylic or wax base, is new to the construction market. This product has proven itself positively among many consumers and professional builders. This is due to the fact that this mixture, after application, creates high protection for the base from negative influences and premature wear.
Features of the composition:
- After application, this type of impregnation forms an insulating film on the surface of the wood, through which moisture and other negative substances do not penetrate;
- Various color characteristics. Compared to other varieties, this composition has a variety of colors from natural to bright exotic tones;
- These types of stains are used by many modern furniture designers. These products are used to paint the external facades of cabinets, tables, and chairs made of different types of wood.
With whitening effect
It is not always necessary that the wood be dark in color; sometimes it is required that, on the contrary, it have a slightly whitish color. In these cases, impregnations based on hydrogen peroxide and acids are suitable. With their help you can get a light, bleached color of wooden beams. Typically, these solutions are used to prepare the surface for further painting.
Stain is simply a necessary thing to improve the quality of wood. This product protects the base from rapid wear and destruction. The main thing is to choose the right product and carefully read the instructions and characteristics of the composition. But which mixtures to choose all depend on what they will be used for - to improve color or for protection. It is better to first study the properties of each type of stain.
When using wood in your home interior, you think about how long it will last. The answer depends on whether you know how to choose stains and varnishes for interior woodwork. It is also worth considering further use: for furniture, choose non-toxic compositions, for flooring - abrasion-resistant ones.
Applying stain
When painting, you should adhere to the correct technology. Wood placed vertically is painted from bottom to top. This will prevent splashes from getting onto clean areas and will not leave stains in the future.
The horizontal arrangement of the boards requires painting at the first stage along the grain. Next, move the brush across them and, at the third stage, repeat the initial movement.
You can use a spray gun, a brush or a foam swab. The first option is suitable for large areas, as well as for alcohol- and nitro-based stains. The nozzle does not exceed 1.5 mm.
Brushes can be made with natural or synthetic bristles. Natural fiber is good for oil-based stains, while synthetic fiber is good for water-based ones.
Before use, the brush should be checked for strength. If, upon contact with it, no lint remains in your hand, then the product is of good quality and suitable for dyeing. The width of the brush should be 100 mm.
Water stains are applied, in addition to the two already described, with a swab or rag. The material should not crumble or leave marks on the wood, so you should choose cotton or foam rubber.
The wood absorbs the dye exactly as much as it is needed. You don’t have to worry about there being an excess, you just need to remove the excess liquid with a napkin. The stain may look completely different after drying and the color turns out to be an order of magnitude lighter. In order not to take risks and get the desired result, you need to take a piece of board and make a test.
To do this, sand it and cover it with the first layer - this will be the base. After complete drying, apply the second layer to part of the board. Apply the third layer to the remaining part.
When the paint has dried, coat the entire surface with varnish. Now you can decide on the color. The test is considered relevant for coniferous species, since they do not absorb stain well and a problem with the color may appear. The minimum number of layers is at least two. It’s a good idea to prepare several samples with different colors.
Water-based stain has the ability to straighten wood fibers. After complete drying, additionally sand the boards with fine-grain sandpaper, but without much pressure.
Drying time from 15 to 24 hours. Alcohol stain works differently. It will not lift the fibers, but it dries very quickly and forms streaks, so for uniform coverage it is better to use a spray gun.
If using a brush, first moisten the surface with warm water. This also applies to the end parts of the board. They should be wetted, as they absorb a lot of paint, which will make them look darker. Drying time from 5 to 25 minutes.
Work algorithm:
- the surface is sanded before painting; - clean off greasy stains, if spruce or pine - resin. You can use water (370 ml) in combination with acetone (125 ml). Method 2. Add 25 g of caustic soda to 500 ml of water. Method 3. In hot water (500 ml), approximately 60 degrees C, dissolve 25 g of sodium carbonate. Carefully treat the surface with one of the resulting mixtures and leave for 30 minutes. Wipe dry with cotton material. Now walk again with clean water, preferably heated; - slightly warm up the stain; — do not wet the swab too much and apply it to the wood; - if drips appear, carefully stretch them along the surface along the fibers; — the number of layers depends on the selected color on the test board; - as soon as the board is dry, wipe the board well with cloth. It will remove dried dye that did not get into the pores of the object; — the final stage is coating with varnish in several layers. After each layer sanding.
Wood can be painted in different colors. Today, “bleached oak” is considered a fashionable color. In order to obtain this effect, 2 types are used. The first layer is a white stain; it whitens the wood.
Moreover, the dye is water-based. The second type on a wax base is the next layer. Not the other way around. Since the wax stain is oak, it will not be possible to achieve the desired effect.
The stain color of the top layer can be any: brown, black, gray. Only the annual rings will be colored, the field will remain snow-white. The photo shows different types of stains. Their contrast is clearly visible here.
Peculiarities
Wood has always been the most popular material; even newfangled materials do not compete with it. Rooms with wooden furniture or decoration using this natural material will always have an advantageous appearance and create a special atmosphere. Wood products require constant care. Using stain you can protect its surface from the following factors:
- from high humidity;
- from external factors that adversely affect the surface;
- from exposure to direct sunlight;
- prevent dirt and scratches.
Wood stain penetrates into the material without leaving a layer like regular paints do. Applying stain allows you to quickly change the color of the product, give it a more interesting look, and emphasize the structure without overlapping it. Today, stains have already appeared, thanks to which it is possible to increase the use of wooden surfaces; moreover, they do not have disinfecting properties.
How long does wax wood stain take to dry?
How long does it take for different types of wood stains to dry:
| Type of stain | Complete drying time, h |
| Alcohol | 0,5 |
| Gel | 2 |
| Acrylic | 4-5 |
| Water | 10-12 |
| Oily | 12-14 |
| Wax | 10-15 |
Source:
https://krask a.guru/specmaterialy/zashhita-drevesiny/morilka-dlya-drevesiny.html#voskovaya-morilka
https://derevo-s.ru/material/zashita/morilka-dlya-dereva
https://kraskistroi.ru/raboty-po-pokraski/po-derevu/morilka.html#i-6
https://homemyhome.ru/morilka-dlya-dereva.html
https://fasadwiki.ru/materialy/derevo/morilka-dlya-naruzhnyh-rabot-po-derevu
https://promorilki.narod.ru/1230-voski_dlj_dereva_i_morilki_dlj_dereva.html
Wood stains: main types of compositions and subtleties of their use