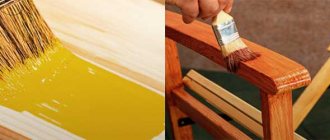
The secret to skillful woodworking lies in the use of quality tools. Therefore, every master approaches the filling of his hand suitcase with special responsibility and trepidation. Both experienced and novice woodworkers know that a plane is a valuable tool for hand-working wood. A properly selected tool will simplify the planing procedure and bring pleasure from working with it.
Tools used to plan wood
Sherhebel
This type of plane is used for primary rough processing of wood. The oval-shaped blade of the knife can, if necessary, extend 1-3. mm.
Planer with single blade
The tool is used for planing wood treated with Sherhebel and for initial planing of wood materials. The knife of the tool is straight, protruding approximately 1 mm beyond the body. A plane with a single knife does not have a device for breaking chips, as a result of which the chips come out intact. For this reason, unevenness and scuffing appear on the treated surface.
Planer with double blade
The tool is intended for finishing wood (planing the ends, eliminating various irregularities), which is due to the presence of a chipbreaker in it.
Jointer
The jointer is used for final finishing of surfaces. This tool smoothes out uneven surfaces and levels out large surfaces. The jointer is 3 times longer than a regular plane, as a result of which it is easy for them to plan long boards.
The jointer blade is 180 mm long and 65 mm wide. In front of it there is a device designed to remove the knife from the taphole using a mallet.
Half jointer
This tool is suitable for processing small surfaces. The length of its body is 530 mm, the knife is 180 mm, and the width is 50 mm.
Sander
It is a plane with a shortened body. It is designed for planing and cleaning surfaces with knots and burrs. Thanks to the narrow slot, it removes the top layer of the treated surface in the form of thin chips.
Types of wood planes and their names
Depending on the purpose and type of blades installed, planes intended for flat and figured planing are distinguished.
Types of tools for flat planing
This class of hand tools includes:
- Single plane. Used for rough processing of wood. Allows you to obtain clean and long chips without kinks. In this case, chips and burrs form on the treated surface;
- Double plane. Designed for rough processing of the workpiece surface. The cutting element is a straight cutter and a chipbreaker. After passing, a relatively smooth surface remains;
- Sherhebel. Designed for rough processing of wood and giving the workpiece the required shape. Outwardly it resembles a single plane. The main difference is the blade with rounded edges located at an angle of 45° relative to the sole. The shape of the cutter allows you to remove up to 3 mm of wood in one pass and work across the grain;
- Sander. Designed for surface finishing. The simultaneous use of a cutter and a chipbreaker allows you to achieve a flat and smooth machined surface. Additional cleanliness is achieved by installing the working elements at an angle of 50°;
- Jointer. Finishing tool. It is usually used at the final stage of carpentry work. The increased length of the sole and the use of two blades make it possible to achieve maximum smoothness of the treated surface;
- Zinubel. Finishing tool. A blade with grooves located at an angle of 80⁰ allows you to give the treated surface a rough structure. This improves its adhesion properties, allowing you to apply the varnish more effectively.
For figure planing
A distinctive feature of tools for figure planing is a blade with a specific geometric shape. They are designed for making grooves of various geometric shapes in workpieces. These include the following tools:
- Zenzubel. Thanks to the use of a blade with three cutting edges, it is used for planing perpendicular planes, folds and clearing quarters. Design features allow you to change the angle of inclination of the cutter;
- Kantenhobel. Compact tool for finishing chamfers and edges. A distinctive feature of this plane is its double trapezoidal blade. The working surface of the blade is located at an angle to the surface being processed, allowing processing with subsequent minimal adjustment;
- Tongue and pile pile. A specialized plane designed to create longitudinal grooves in a workpiece. A design feature of such a tool is the presence of two blocks connected to each other by screws. Loosening and tightening the screws allows you to adjust the position of the cutter on the workpiece. One of the blocks is a guide, and the other, equipped with a cutter, allows carpentry work;
- Federgubel. Designed for finishing figured processing of the surface of the workpiece. Just like the tongue and groove, it consists of two movably connected blocks. The main difference is the cutting element. It consists of two parallel blades, which during operation make it possible to obtain a longitudinal spike;
- Mold. A tool that allows you to obtain a multi-level stepped composition of the surface being processed. The sole of such a plane completely repeats the structure of the cutter, allowing you to obtain the most varied structure of the workpiece. It is used when processing cornices, baseboards, baguettes and door slopes;
- Falzgebel. A highly specialized plane for fine figure planing. It has a stepped sole and a special oblique cutter. The design features make it possible to effectively use it for stripping quarters, as well as for forming a strip along the edge of the workpiece without applying preliminary markings;
- Shtap. Designed for fast and efficient machining of convex and concave parts. In addition, the semicircular shape of the sole and blade allows you to give the ends of the workpiece a rounded shape of the required diameter;
Modern wood processing
Today there are two ways to carry out this operation. It can be done manually, or it can be done mechanically. If we talk about the mechanical style of processing, the most widespread operation is carried out on a jointing machine.
Since today technologies have been developed quite strongly, machines began to be equipped with program control, robotic systems, and automatic lines. All these improvements have led to the fact that the processing on machines has become of higher quality, and it has also been possible to significantly increase accuracy.
Planing technology. general description
Wood planing technology or the general technological process is that part of the process during which the shape, size or properties of the material being processed are changed. In addition, since wood is a rather demanding material for processing, the whole process is divided into several stages. The first stage is drying, since if the workpiece is not dried, it will definitely warp in the future. This is followed by the stage of cutting the material into pieces of the required size. The next stage is precisely the planing of wood or any mechanical processing of wood, the purpose of which is to give the desired shape and fit it to the required dimensions.
Don't miss: How a thicknessing machine is characterized: classification of thicknessers for home and production, nuances of choice
It is also worth noting that the sequence of technological operations may change. It depends on the type of raw materials, the finishing method, the organization of production, etc.
The essence of planing wood is that all roughness, warping and other defects are removed from the surface of the workpiece. It is worth noting here that most often these defects occur after the wood blank passes the sawing stage. Sawing is a process of cutting wood in which the direction of the straight line coincides with the direction of the working movement. That is, sawing and planing wood are two main processing methods, the technology of which is quite simple, but it is with its help that all wood raw materials acquire their shape.
Types of tools used for wood processing
Planing
Depending on the operations that are performed with the raw materials (various types of wood), the tool used can be qualified as used for:
- Sawing – cross and longitudinal saws, jigsaws and hacksaws.
- Splitting and chopping - axes and splitting axes.
- Planing - planes, cycles and various types of planes.
- Chiseling – chisels and chisels.
- Drilling – drills of various designs and augers.
Methods of performing the operation
Types of wood planing are divided into manual and mechanical, but they, in turn, can also be carried out in different ways. Before proceeding with the procedure itself, it is necessary to carefully inspect the workpiece and determine in which direction the fibers go. It is also important to understand the degree of roughness of the wood. There is an important rule. Planing of wood is always carried out layer by layer. In other words, you need to guide the tool towards the exit of the cut annual and oblique fibers. This is important because choosing the right direction will help make the whole process easier. In addition, there will be less roughness left. When working with tools such as a sherhebel or a plane, they must be held as follows: the horn is held with the left hand, and the right hand supports the tool stop. If a jointer or semi-jointer is used for work, then take the handle in your right hand and place your left palm on the block.
Naturally, this operation must be performed in accordance with strict safety rules. Sawing and planing of wood can only be done with tools that are sharp and properly sharpened, and that are properly fitted with wedges. The sole of the tool must be perfectly flat. In addition, you can only fasten a workpiece whose ends are parallel and perpendicular to the edges. The material that is clamped on the workbench should fit tightly to it so that there are no bends.
After planing wood with a hand tool has been completed, you cannot place it on the sole, lay it on its side, with the sole facing away from you.
Manual planing. Tools for work
The main tool for manual processing is a plane. With its help, all planes are processed. You can also use jointers or sherhebels. The body of almost all plows consists of such parts as a block, horns, a stop, a knife, and a wedge. The wedge is necessary in order to be able to secure the knife in the block. For manual planing of wood, a knife is used here, which is a steel plate. The thickness of the element is 3 mm and is made of carbon tool steel grades U8 or U9. The lower part must be hardened.
Don't miss: Flexible shaft for an engraver, drill or screwdriver: design and purpose
The block is presented in the form of a rectangular block of wood. The front part of this part of a sherhebel or plane is equipped with a horn mounted on top. Planers have a handle behind the knife. In addition, the last has a sole. It is this part that wears out most quickly in the area that is located in front of the span. For this reason, in some cases, a pentagonal insert made of the most durable wood is glued into a regular sole. When planing wood with a plane, it is necessary that the knife rests evenly on the back side of the notch. To do this, it must be made perfectly flat. There is also a stop behind the end of the knife, which is necessary to ensure that the handle does not rub your hand during operation.
Sherhebel is a tool that is used only for primary processing. In other words, rough processing of wood is carried out by planing. The knife of this tool is presented in the form of an oval cutter. With its help, the surface layer is removed, but after its work, quite deep hollows remain.
The next tool is a plane. Planing wood with this tool is also primary, and it consists of approximately the same elements as the sherhebel. The significant difference is that the knife here is made in the form of a rectangle, and its edges are slightly ground off so as not to tear up the wood during processing. It is used to level surfaces previously treated with Sherhebel.
Design features of planes
The classic example of the tool is made of a wooden body, with a securely fastened knife. In the lower part, that is, in the sole, there is a slot through which a sharp blade protrudes. For convenience, the front part of the structure has a horn. Due to the applied efforts, it ensures a tight fit of the sole to the surface being processed and gives the desired direction to the knife.
The structure of planes, like many other carpentry devices, has been improved. The wooden case in production is often replaced with a lighter plastic material, or a reliable metal one. And the process of manual planing, which requires great physical strength, is simplified with the advent of mechanized electric planers.
The principle of operation of a classic plane
The main structural elements that make up the tool are a knife and a base with a handle (horn). Therefore, the essence of working with this device consists of two concepts - the accuracy of adjusting the angle of inclination of the knife and the absolute adherence of the sole to the surface being processed.
The degree of contact of the working part with the surface of the product largely depends on the material from which the tool is made. The main condition that it must ensure is perfect smoothness and evenness of the plantar part. The wood from which the plane is made can become deformed and wear out over time. Especially when processing hard wood. The metal tool has a completely flat base, but is highly susceptible to corrosion. Therefore, when choosing a body material, it is worth considering the conditions in which the device will be used, as well as the variety of types of wood it processes.
Technical features of electric planers
Before moving on to the story of how to work with a plane correctly and competently, let’s look at the features of this tool using the example of BOSCH products. The manufacturer has supplemented the tool with special devices that protect both the user and the surface being processed. In the latter case we are talking about the supporting heel. It folds back during operation, but as soon as the tool is lifted, it closes the knives again, so you can safely place the plane on any surface without fear of the knives stopping. In terms of personal safety, the user is also protected from accidental activation of the power tool: the trigger switch starts the electric planer only after pressing a special button located on the handle.
Rules for working with a plane
You should use a hand plane taking into account the design characteristics of this tool. When planing, the force is transferred to the front of the tool body with the left hand, while the right hand holds the back. It is important to move the device along the fibers with long forward movements. The main nuance when finishing is not to reduce the force on the plane and not to remove it from the middle of the surface. During the roughing process, movements may be more frequent and finer. The main sign of high-quality work is a continuous ribbon of wood chips coming out from under the knife of the device.
Planing, at first glance, does not seem to be a difficult operation, but it requires some skills. Before finishing the product, it would be a good idea to practice on substandard scraps of material to get better at it. Otherwise, the appearance of the finished product may be spoiled by snags, breaks or deep cuts in the wood fibers.
When working with a plane, as with any hand tool, it is important to follow safety precautions: always check the serviceability and accuracy of the tool settings, store the device in a specially organized place, maintain a stable body position and a safe hand position. After use, it is recommended to clean the device with a brush and soft cloth.
Preparation for use
Preparation for work includes the stage of technical adjustment of the unit, as well as checking its performance. As for the technical setup, it is as follows. Knives that are installed on jointing machines must have a straight shape. Using a ruler and a feeler gauge, deviations from straightness are monitored. The gap allowed between the ruler and the blade is only 0.1 mm if the blade length is up to 400 mm. If the blade is up to 800 mm long, then the gap can be 0.2 mm. As with an electric planer, the knives must be balanced in weight. Installation of knives is carried out sequentially. The device has a chip breaker. Knife blades should protrude above this element by no more than 1-2 mm. To check the machine, it is necessary to have a test block, which is usually made of hard, dry, seasoned wood. It also has precision machined edges. The cross-section of the edges can be 20-30 x 50-70 mm and a length from 400 to 500 mm.
Don't miss: Wood chisel: purpose, types, selection: types, characteristics, choice
Setting up the plane
The rib, which is the working surface of the knife edge, has a slight radius of curvature. To reduce it, it is important to sharpen the knife blade in several stages using a sharpening wheel and a fine-grained grinding stone. A blade sharpening angle of 30° is considered optimal and universal for working with hard and soft wood.
Correct adjustment of the knife position will reduce the physical and time costs of processing the product. A slightly protruding tip will simply slide over the surface of the product. And if the blade is pushed far out of the block, it will grab fibers that are too thick and tear them. The cutting part should extend above the sole evenly and parallelly, protruding by 0.2-0.3 mm. These parameters can be observed using a ruler or by eye. Make adjustments with weak hammer blows, giving the blade the required position.