Acrylic paints for painting on wood are widely used in modern art. They are used for painting wooden products. Wood painting is an ancient folk craft. Until people learned to process metal, wood was the most accessible material for making household items: kitchen utensils, jewelry boxes, chests for storing things.
Paints for painting on wood.
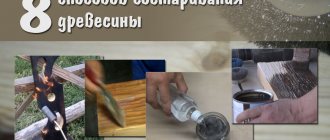
How to brush, stain, wax and patina wood (texturing)
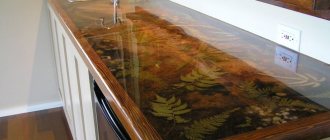
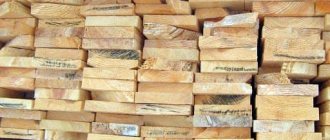
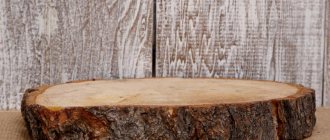
Natural wood attracts the eye with its beautiful texture.
The alternation of soft and hard growth rings creates an interesting pattern with bends, waves, fancy knots, cracks and wormholes. This truly creative texture was created by nature itself, and our task is only to emphasize it, reveal it, and make it tangible. all technical processes associated with this are called wood texturing.
Brushing, staining, patination and waxing techniques are used to texture wood.
Brushing , from English. Brush is a technique aimed at enhancing wood grain by combing out soft fibers. Wood has its own specific texture pattern due to the peculiarities of the growth of fibrous layers.
EVERYTHING YOU NEED FOR THIS ARTICLE IS HERE >>>
Soft fibers perfectly absorb water and coloring compounds and are easily amenable to mechanical action, in particular, combing, while hard fibers, on the contrary, protrude after combing with hard combs. Comb out soft fibers using special metal brushes.
The working part of such brushes consists of bundles of rigid corrugated wire, fixed in several rows on a wooden or plastic base with a handle (for manual combing) or clamped into a metal disk like attachments for power tools (drills, grinders, engravers) to mechanize the process.
You can buy such brushes at any construction or hardware store. After brushing, the wood pattern acquires a pronounced relief, but only to the touch. To visually emphasize the resulting texture, tinting with stains, waxes, paints and patinas is necessary.
Stain, stain or glaze is a special composition in the form of a liquid for impregnating and tinting wood.
Modern stains are mainly divided into aqueous and non-aqueous (based on organic solvents, alcohol or wax). The main difference is that water stain is easier to apply evenly to the surface and deal with smudges, but after drying it is still afraid of water.
Non-aqueous stain dries faster, but is also more difficult to apply evenly. Thanks to the presence of waxes and oils and other additives, it is able to withstand atmospheric conditions, but has a pronounced odor. For decorative interior work, water stain is the best choice.
Stains are applied to dust-free wood with a brush or cloth swab. At the same time, the composition does not form a surface film, but penetrates to a certain depth, being more intensively absorbed into the soft fibers, due to which the texture of the wood is emphasized even more.
For more intense coloring, you can successively apply several layers of stain with the obligatory drying of each layer.
Compositions for tinting wood (stains, stains, glazes) can be bought both in construction stores and in art stores.
I will give the highest quality examples of compositions (one might say my favorites)
Wood glaze HobbyLine, C.Kreul (Germany)
Water-acrylic translucent composition. Ideal for painting wooden objects: it gives a beautiful shade and reveals the structure of the wood.
Unlike construction stains, glazes have a rich color palette of various shades and small packaging, which is very convenient if you need to purchase several colors.
The colors can also be mixed with each other to obtain additional shades.
FolkArt stain © Stains, Plaid (USA)
Non-toxic water-based composition for application to wooden surfaces.
The stain is quite thick and concentrated in color, so before use it must be mixed well and better diluted with water. After application, you can wipe off excess with a soft damp cloth.
Water stains become lighter after drying and create a matte, cloudy surface; to restore depth and richness to the coating, it is necessary to apply a finishing varnish or wax.
Wax polishes perfectly protect wood and give its surface a silky and very pleasant shine. They beautifully highlight the wood grain, sand and polish well.
There are neutral (transparent) wax-polishes and colored ones, which serve not only for the final finishing of the product, but also for additional tinting (we talked about some of them in the article about covering the floor with oil and wax).
Waxes are applied to the surface with a stiff bristle brush and polished to a shine with a fleecy cloth or metal polishing wool. They are sold in tins at hardware stores and can also be found in craft stores.
Wax polish, Stamperia (Italy)
Paste wax polish for finishing coats. Available in three colors: neutral, antique (rusty brown) and dark (dark brown). Based on natural waxes with a pleasant fragrance.
Easy to apply to the surface, after a few hours you can polish it with a piece of thick felt. Can also be used for intercoat waxing when working with acrylic paints to create scuffs and chips.
Brushes for painting on wood
The best brushes for painting on wood are soft brushes of natural origin. Particularly prized are squirrel and kolinsky, and less commonly, sable. However, synthetic brushes are also perfect for acrylic paints.
Before the process, it is important to decide on the appropriate sizes for the brushes, which are indicated by numbers. For beginners, it is recommended to take one large, two medium and one thin small brush.
It is important to remember that all ancient trade paintings originated in the peasant class, in the hands of people to whom the plow and hammer were much more familiar than the brush. And if they could do it, so can you! In traditional paintings there is no need to draw faces, figures or maintain portrait likeness. The most important thing is to hone the technique of drawing different elements, learn to freely turn the brush in your hands and mix colors. You need to put in a little patience, drawing the same elements over and over again, and in the end you will learn to draw them perfectly! A fairly small number of simple basic elements and their combinations - that's all!
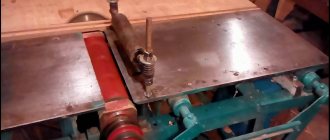
Brushing tool
The use of aged wooden parts in the decoration of furniture and premises is a well-known technique, but no less relevant today. One of the ways to create such a visual effect is brushing, performed with special brushes on machines or manually.
Professional woodworkers have been familiar with the term “brushing” for a long time.
The technique is used along with grinding and sharpening. In this way, small defects in the form of protruding fibers are removed from the surface, giving a roughness that is unpleasant to the eye, but at the same time a large ordered relief (fiber pattern) appears.
Do-it-yourself wood brushing: how to show the natural beauty of wood
Brushing wood is one of the wonderful technologies for decorative finishing of wood products. The method is based on the difference in hardness of the layers that make up the vast majority of solid wood. On a cross section of any wood product, a characteristic wood pattern is clearly visible, which is formed by fibers with different physical characteristics. Some of them are quite dense, others are less dense and quite easy to process.
When a layer of soft fibers is removed, areas consisting of hard fibers become embossed (convex), clearly appearing on the surface and giving the wood a particularly decorative appearance. Under natural conditions, this happens over time, when soft fibers are removed as the product is used. Brushing allows you to visually age the wood and give it texture in a carpentry workshop. The most obvious example of natural brushing is old boards washed up on the shore of the sea or ocean. In them, soft areas of wood are so thinned by sea waves and sand that denser areas can protrude by almost a centimeter!
Brushing: artificial aging of wood
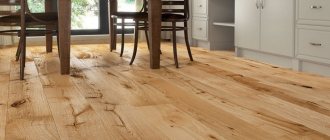
This wood structuring technology is suitable for use with soft and hard woods that have a clearly defined texture and distinct layers of different hardness: pine, oak, larch, ash, walnut, wenge. Wood species with a fine-grained and indistinct structure are not suitable for brushing, since they do not have the necessary layering. These types of materials include wood: beech, maple, alder, teak, birch, cherry.
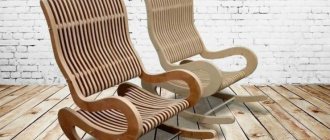
The use of brushing technology allows you to create original textures that look ideal in products for interiors of different styles. Structured wood is actively used in the manufacture of floors, furniture, and decorative elements. Natural wood fits perfectly into any design, adding original touches to it.
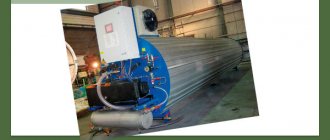
Equipment for structuring (brushing) wood
Brushing is the most accessible and easy-to-perform method, allowing you to quickly visually age natural material. This process can be carried out in a home workshop using a minimum of equipment.
This is one of the few technologies that allows you to achieve excellent results using exclusively manual labor. For this you will need:
- metal brushes of different hardness, which are used to roughly remove soft fibers from the surface of the workpiece
- sandpaper of various grits for rough sanding and final polishing
- stains and other means to give wood maximum decorativeness
- varnish for finishing the product at the end of the brushing process
Decorative painting on wood
Decorative painting on wood has its roots in ancient times. Even ancient people learned to make dishes from wood and thought about giving it a beautiful and original look. Nowadays, furniture, toys, and dishes are decorated with original designs. Not only adults, but also children do this. Therefore, many people want to know what paints to paint on wood, the features of these products and methods of applying them.
Painting as a decorative and applied art is passed down from generation to generation. Especially adults and children like to depict original patterns with folk motifs. Today it is very popular to paint various interior items: from paintings to panels. Drawings can be seen on toys, dishes, and musical instruments. It won't hurt you to have an idea of what paints to use on wood. The use of oil paint is obvious, but gouache, acrylic, watercolor, and aniline are also used. We will talk about each of them in more detail.
Revealing wood texture using dyes
Revealing wood texture using dyes
The patterned shimmer of maple and birch wood, as well as other types of trees, will appear deeper and shine with beautiful shades if you choose this particular finishing method. Here's what you need to know to be successful in identifying wood grain.
Those of you who have been successfully using ready-made stains for many years will most likely be surprised: “Why do you need to use dyes? Who needs them? Just don't rush to conclusions. Compared to pigment stains, which are most often found on sale, dyes produce purer colors that better highlight the natural shine of wood. The difference will be more noticeable if you use dyes to tint dense wood that does not tolerate regular stain, or patterned wood, such as wavy maple. Stain will usually make the wood grain look a bit cloudy, while stain will add impressive depth and richness. These differences are clearly visible in the figure below.
Curly Maple Toning
Stains and dyes have different effects on the appearance of wood, as they color it in different ways. Pigment stain only partially penetrates the wood; the coloring effect is created by tiny pigment particles settling in the smallest cracks and pores. If the wood has a smooth and hard surface (for example, maple), then the pigment particles simply have nowhere to stay.
Painting wooden surfaces
If the pattern on an old wooden product has faded or there is a need to slightly change the shade of an individual object, the wooden surfaces are painted.
First, the surface is prepared, after which the powder method of applying dye is most often used. This method of finishing paint is used to decorate furniture. Some people who do their own painting prefer to use clear varnish.
Wood dyes: choosing options
Dyes are sold in liquid or powder form, and any dye can be dissolved in one or more solvents: water, denatured alcohol, or oil (toluene or turpentine). When starting to work with dyes for the first time, buy a water-soluble concentrate or powder, which is easy to use, has good penetrating properties and good resistance to fading.
Regardless of the tinting method, end grains always pose a problem because they absorb more dye or pigment, becoming darker than the surfaces formed by the longitudinal grains. For a more even color, try one of the two methods below. Before tinting, sand the end grain with a finer abrasive than the rest of the area, or prime it with a 50:50 mixture of shellac and denatured alcohol and, once dry, lightly sand with 220-grit sandpaper.
Applying dyes to wood
In most cases, we prefer to work this way with water-soluble dyes. When the project or its parts are ready for finishing, we sand the wood as usual and wipe it with a wet cloth to raise the so-called lint. Let it dry for 24 hours and then lightly sand with 320 grit sandpaper. By removing the lint, we prevent it from lifting after applying the coloring solution. Then we dilute the dye as shown in the photo.
Boil water, let it cool for a minute and add dye powder to obtain a concentration of 30 g/l. Let the solution cool to room temperature
Mix the solution thoroughly and strain it through a paper filter or nylon stocking to get rid of undissolved powder particles
Using glass or plastic dishes, prepare such an amount of solution so that it is enough for the entire job and you do not have to re-achieve the desired color by mixing a second portion. We check the result on scraps of the same wood from which the project parts are made. Using a regular sponge, apply an aqueous solution of dye to the wood, spreading it in any direction, trying to quickly cover the entire surface evenly to avoid the appearance of spots and streaks when covering already dried areas.
Omissions and drips should also be avoided. We process all sides of the finished product at once. To make it more convenient to work with relatively small objects, if possible, we divide a large project into several component parts or tint all the parts before assembly. After applying the solution to the entire surface, you should immediately wipe off the excess with a soft cloth.
Preparing the tree
The process consists of several stages:
- The main thing is to choose the right workpiece. There should be no knots on it. After the product dries, they can easily fall off and ruin the appearance.
- If you cannot find a workpiece without knots, remove them. The holes must be carefully filled with putty. Use a product designed specifically for wood surfaces.
- Leave the workpiece for several days so that it dries thoroughly. Do not place it near heating devices. If the temperature is too high, it will lose its shape.
- Sand the surface with grit sandpaper (first medium, then fine).
- Apply primer to the workpiece. To do this, dilute PVA glue with water in equal proportions. Cover the surface using a wide brush. Avoid smudges and untreated areas.
- Dry the workpiece for several hours.
- Polish the surface with fine-grain sandpaper. If necessary, go through the primer again.
| The remaining dust after sanding can be removed with a palette knife. Add “sawdust” to PVA and use the resulting mixture to mask minor imperfections on the surface. After drying, polish the product. |
Working with alcohol dyes
If you decide to use alcohol-soluble dyes, keep the following in mind:
- Dissolve them only in denatured ethyl alcohol. Do not use isopropyl alcohol. Do not heat this flammable solution.
- Apply the alcohol-based coloring solution by spraying to avoid streaking due to rapid evaporation of the alcohol. Use a compressor-assisted sprayer rather than an electric sprayer. To tint small items, you can use a hand sprayer with a rubber bulb.
- To tint pine wood, which is most prone to stains, it is recommended to mix an alcohol-based coloring solution with shellac and apply the toner to the surface by spraying. Dissolved shellac is not absorbed into the wood, but forms a thin film on its surface.
Correcting the result of wood tinting
If the color looks darker than planned, it is better to lighten it immediately. In some cases, when the result is too far from your expectations, it is possible to return to the starting point. Rinse off most of the dye with water, then remove the rest with regular household chlorine bleach. If you want to darken the wood, apply the same or a stronger color solution again.
Removing excess composition ensures uniform coloring. If you applied the solution with a sponge, wring it out and run it over the surface again.
You can use a wet cloth to lighten the surface even if the dye has already dried, but you will achieve the desired result faster if the wood is still damp
Once you have mastered the techniques of working with dyes and learned how to choose the right color, start experimenting with the color palette. Once the surface is dry, add a different color dye to create a mixture of two colors. For example, add red dye to make the base tone warmer, or blue dye to create a cool tone. If the color looks the way you wanted, dry the surface thoroughly. Dry wood will fade, but a clear varnish will return it to the brightness of color and beauty of the design, as they were when the dye was applied.
Any coating can be applied over the dye, but be careful if you decide to use a water-based solution. When applying water-based varnish with a brush over water-soluble dye, the latter may re-dissolve and mix with the varnish, making it cloudy. Aerosol application will help avoid this problem.
Source: remstd.ru