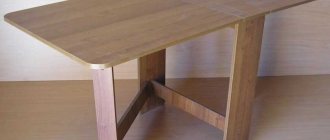
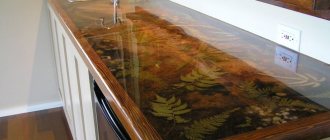
Despite the wide range of floor coverings offered in construction markets or repair hypermarkets, wooden floors remain classics of the genre and will never go out of fashion. Solid polished hardwood floors can last for decades without the need for replacement or repair. To install such a floor, you need to know detailed installation technology, have high-quality material and the necessary set of tools on hand. Below we describe in detail all the subtleties, nuances and algorithms for installing a wooden floor in an apartment with your own hands.
Rice. 1. Wooden covering in the interior
What to look for when choosing a wooden floor
Installing a wooden floor is a responsible task that requires a careful approach to the choice of material and type of construction. When purchasing elements for installing a natural wood floor, you need to pay attention to the following features:
- The main condition is the quality of the board. Wood, regardless of species, should not have cracks or a large number of knots.
Rice. 2. Wooden floor board
- The boards must be smooth and not have obvious radius bends.
- The best choice is wood with natural humidity of no more than 10% - 15%. If this indicator is higher, then, during operation, the material will shrink, which will cause the formation of gaps between the boards and local splitting.
- The surface of the material should not show obvious signs of long-term storage under unfavorable conditions. The boards should not show signs of rotting or fungus, dark spots or signs of prolonged exposure to precipitation - warping.
- The thicker the board, the more comfortable the surface will be to use for many years. Boards that are too thin will sag and creak over time. The minimum thickness of a finished wooden floor should be 20 - 25 mm. However, floorboards with a thickness of up to 40 mm are available on sale.
Rice. 3. Thick floorboard
- There should be no pockets of resin on the surface of the products, which will soften in the sun.
- The end of the board should be uniform, without signs of delamination or rotting of the core.
- Experts recommend that all boards in a single surface be made from the same year. In this case, the natural properties of wood will ensure that each element in the structure works together.
Rice. 4. Floor boards in the warehouse
When choosing a board, you should pay special attention to the type of wood. Despite the high cost, the best choice would be to buy larch or oak material. Such a surface, if properly processed and reliably protected, can last up to 50 years or more, without the need for repairs.
Materials for processing logs
Some environmental factors, such as dampness, should not affect the logs. Therefore, when installing floors in a wooden house, they should be protected from certain factors.
Bioprotective compounds
A preparation with a bioprotective composition protects wood from mold, rot, blue discoloration, beetles and fungi. One application of such products will provide protection for 27-32 years. You can buy them in the form of a concentrate. Sometimes a pigmenting substance is added to the composition, which makes it possible to control the quality of application.
Bioprotection treatment Source centermira.ru
Bioprotective compounds are praised for:
- environmental friendliness;
- slight odor;
- no allergens.
The preparations must be applied before the installation of the floor in a wooden house begins.
Leave-in antiseptic
An excellent option if the city has high humidity. It is also indicated for use in places with high levels of precipitation, temperature changes, in baths and saunas. Working with antiseptics is simple and not too time consuming. Approximate consumption per 1 meter is about 400 grams. Surface application can be achieved after 4 layers. After the work is completed, the color of the wood will become pistachio.
Traditional methods
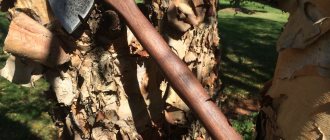
Folk remedies for treating lags:
- Transformer oil. Thanks to deep penetration into the wood structure and embalming, this product perfectly protects the material.
- Resin. Birch resin will help against beetles, fungi and rotting. Its only drawback is its vulnerability to fire.
- Motor oil. Pros: low price, good protection. Cons – the smell is too strong, sometimes it interferes for several months.
Treating logs with oil Source de.decorexpro.com
Types of bases for wooden floors
A wooden floor cannot be laid directly on the floor slab, as it requires a flat surface and a breathable structure. If the boards are laid in such a way that the space under them is not ventilated, bacteria begin to multiply in their structure, which causes fermentation and rotting of the wood. There are several types of bases for wooden floors:
- One of the most popular types of base is a rough coating in the form of a wet screed. It is installed by pouring cement-sand mortar along the beacons until the required thickness is achieved. When the correct consistency of the coating is achieved, the screed automatically spreads over the entire area, smoothing out all defects of the floor slab.
Rice. 5. Wet screed
The disadvantage of this process is the large amount of work involved, as well as the need for a long wait for the coating to dry and harden.
To install a wooden floor on top of a wet screed, you may additionally need a self-leveling mixture, or a plywood flooring, as well as a porous polymer gasket to increase sound insulation.
Rice. 6. Wet screed device
To prevent shrinkage cracks from appearing on the surface, the thickness of the wet screed must be at least 40 - 50 mm, and when laying reinforcement mesh with a rod thickness of 3 - 4 mm and a cell of 50 x 50 - 100 x 100 mm, increased strength of the base is achieved.
Rice. 7. Sound insulation of wet screed
- Lately, semi-dry screed has been gaining popularity. A special technology for laying a rigid cement-sand mixture is achieved using a special machine with a pump, which takes the raw material directly from a plastering station installed on the street. Thus, labor costs for transporting bags of dry mixture to the floor and mixing them manually are significantly reduced.
Rice. 8. Semi-dry screed
A semi-dry screed is completed several times faster than a wet one, and it takes no more than 1 to 2 days to harden. You can walk on the coating immediately after laying, leveling and compacting.
Rice. 9. Semi-dry screed device
- Another popular method of installing wooden floors, which has been used since Soviet times, is the installation of a finishing coating using a beam scheme, on wooden beams - logs. The logs are placed on the substrate after the surface leveling of the floor slab in such a way that the mark of the top of the beams forms a single horizontal plane.
The lag pitch, depending on the thickness of the finishing boards, is 300 – 700 mm. The insignificant volumetric weight of the structure does not cause increased loads on the supporting structure of the floor.
Rice. 10. Lag design. Option 1
When the thickness of the finished floor boards is less than 30 mm, in order to prevent their deflection, a spreading layer of plywood or OSB sheet is placed on top of the joists, on which, in turn, a polymer substrate and finishing boards are laid.
Rice. 11. Lag design. Option 2
If it is necessary to insulate the floor structure, for example, if it is installed on the first floor, an insulating layer of mineral wool, extruded polystyrene foam or expanded clay gravel can be laid between the joists.
To level the lags, you can use polyurethane foam, which will ensure that the element fits along the entire length, and will also reliably secure the material from tipping over during the installation of the structure.
Rice. 12. Lag design. Option 3
- Recently, European companies have developed a unique technology for installing wooden floors on top of plywood sheets, which, in turn, are laid on plastic clamps with threaded plates. Thus, the surface level can be adjusted by rotating the plate and moving it up or down.
Rice. 13. Adjustable tie
When installing a plank floor on adjustable supports or on joists, it should be taken into account that the elastic material will be located above the void, which can cause discomfort when walking due to increased noise. To avoid this, all cavities should be filled with porous materials that do not rot.
How to make a floor in a private house from boards
The floor is made of planks in one layer. It is the simplest flooring option. This design is suitable exclusively for summer buildings or housing in warm countries. If the building design stipulates that floor beams are mounted in the walls, then the distance from one beam to another is most often too large to immediately lay the boards.
To provide the necessary strength, you will need to lay joists. If you plan to install the floor on top of the support pillars, then the placement of the beams can immediately be made as required.
Now, logs are laid on top of the supporting beams, which are set strictly horizontally; for this, wooden spacers and wedges are used. After checking the location of all the joists with a level, they need to be attached to the beams using nails, and then the floorboard should be nailed to them.
Floor made of two layers of planks
Installing such a floor will require significantly greater costs and effort, but this is compensated by a reduction in heat loss. It is better to use coniferous wood for the construction of the subfloor. To save money, you can use a non-edged board or slab.
Most often, thermal insulation is installed in the space from the rough to the finished floor.
As thermal insulation, you can use expanded clay, a mixture of clay and sawdust, or straw. Naturally, you can also use modern materials - polystyrene foam or extruded polystyrene foam. For thermal insulation, a finished floor (tongue and groove board) is laid.
Concrete floor
The concrete floor is installed in several stages:
- First of all, marking is done. Here it is better to use a laser level. After installing it, he will mark the walls in the right places for the future floor. To mark the level in the center of the room, threads are pulled from the marks in the walls.
- Next we make gravel backfill. This is the insulation in your floor. The ground should be cleared of plants to prevent them from growing through the floor. After this, drive in the stakes so that their level does not reach the level of the future floor by 100 mm. The backfill starts from the wall opposite the door. After filling the entire area, the gravel is leveled and compacted, and the pegs are removed.
- At the next stage, sand is poured, compacted and leveled.
- Proper waterproofing plays a huge role; moisture insulation of a concrete floor is usually done with polyethylene film, the thickness of which is at least 250 microns.
- Next, we fill. First of all, you should set a level of beacons, which are used as wooden or metal slats, the distance between which is from 1 to 1.5 m. The upper edge of the slats should be in contact with the stretched threads. Then, the rope markings are removed.
- Now the space between the slats is filled with concrete, from the end of the room to the door. After this, the concrete is leveled using a rule.
After the concrete has “set,” the slats should be dismantled and the voids filled with mortar. To level the mortar in the cracks, use a “grater” under the plaster. After this, the floor is covered with plastic film for a month. It is better to periodically moisten the concrete. This will make it possible for the concrete to gain maximum strength.
Types and properties of wooden floors
There are several types of natural wood flooring, each of which has its own distinctive properties, as well as advantages and disadvantages:
- The most popular finishing floor covering made from natural materials is considered to be piece parquet. The surface of such a coating is made from factory-made wooden planks with dimensions of 50 - 80 mm x 400 - 600 mm, depending on the manufacturer.
These elements are called lamellas, and they are connected to each other mechanically, using the “tongue and groove” principle.
The thickness of such elements ranges from 10 to 20 mm. They are made from valuable and hard wood species - oak, ash, beech, larch, since such wood does not form cracks or deform over time. This flooring is considered one of the most durable.
The average market price for piece parquet varies from 1000 – 1200 rubles. per 1 m2, when using ash or oak up to 9,000 - 12,000 rubles. per 1 m2, when purchasing an exclusive teak product, without the cost of its installation.
- Block parquet is considered an expensive premium material, which greatly limits its use. In this regard, the market also offers a wide range of veneered parquet boards. The structure is a thin layer of natural wood, coated with a protective compound and laid on a base of plywood or pressed materials of natural origin (for example, pine).
As a rule, such products are produced in the form of piece elements with modular dimensions. They are often produced at the same enterprises that offer laminate for sale and have the same panel dimensions - from 90 - 350 mm in width, from 1200 - 1850 mm in width and from 5 to 15 mm in thickness, depending on the structure of the base.
The surface formed by parquet boards is no less durable than piece parquet. It is assembled into a “lock”, bypassing wet processes, and costs 2–4 times less than analogues made from massive lamellas.
The average cost of a parquet board ranges from 900 to 12,000 rubles. for 1 m2. Such a wide range of prices is explained by the presence of a huge number of manufacturers competing with each other, who introduce different technologies in the manufacture of their products, which is why the cost of manufacturing structures can vary greatly.
- Panel parquet is one of the varieties of natural flooring, which is made from plywood or softwood. Lamels made of more valuable materials are glued onto the base. The panels are laid on a previously prepared rough surface with a backing and can be easily trimmed for normal distribution over the area of the room.
An analogue of such a floor can also be boards made of tenchomassive - a special modern material in the form of pressed waste wood, covered with a thin layer of high-quality veneer.
The retail price of such material varies from 5,500 to 11,000 rubles. per 1 m2, depending on the type of wood, pattern and complexity of the layout of the lamellas on the board.
- The most expensive and prestigious flooring is made of solid planks. It can be arranged in an economical version, using pine material, which is popular in country house construction. At the same time, when implementing design solutions in apartments or cottages, solid materials made of oak, beech, teak and other elite woods are used, dried and prepared for long-term use.
Such floors are installed on highly porous screeds or on joists to ensure ventilation of the space underneath and prevent wood rotting.
The length of factory-made boards can be up to 6000 mm, and the width varies from 100 to 250 mm. When processing wood on a sawmill, the end surface is formed in the form of grooves and ridges for reliable interlocking.
The price for solid floorboards depends on the type of wood and is 2500 – 5000 rub/m2 (oak), 1000 – 2000 rub/m2 (larch), 3500 – 4000 rub/m2 (ash).
- Cork materials. Thanks to their excellent soundproofing and heat-saving properties, such floors are rapidly gaining popularity in the domestic market. A porous material made from cork oak bark is coated with a protective compound, which gives increased hardness and strength to the surface.
The material is laid on top of a backing made of plywood, rough boards or other material. Installing a plank floor on top of a screed, regardless of its type, is not recommended.
The price for 1 m2 of commercially available cork flooring ranges from 900 to 4,500 rubles, which depends on the thickness, quality of the coating, structure, type of wood, manufacturer and other factors.
In addition to natural flooring materials, which belong to high-price products, high-quality products are also used when finishing the room, the surface of which imitates different types of wood. Externally, such coatings are no different from solid floors, but they are based on PVC film coatings with different textures and shades. Such elements have low environmental properties, and when heated, they can release toxins that irritate the respiratory tract.
Pouring the floor in a private house instructions
To pour a concrete floor yourself, you do not need any special construction skills. The main thing here is to prepare the necessary consumables and calculate their quantities. If this is done, then filling the floor in a private house will be effective and simple.
Don’t forget, installing a durable and level concrete floor is the key to quality installation of any floor covering. To carry out quality work you must use:
- vibrating rammer;
- roofing felt;
- plastic film;
- expanded clay;
- foam boards;
- reinforced mesh;
- restrictive slats;
- building levels.
Work procedure or instructions for pouring a floor in a private house
1. First of all, you need to prepare the base surface for the future concrete floor. To do this, the top layer of soil must be removed to the required depth. Make an effort to ensure that the plane is as even as possible. Now, it must be compacted using broken bricks or crushed stone. A vibrating rammer will help you with this. If you do not have the opportunity to use such a tool, and you need to arrange the floor in a small area, then compaction can be done manually.
- 2. At the next stage of work, waterproofing and thermal insulation should be installed. It is most rational to use roofing felt for these purposes. If you want to save a little money on installing insulation, and you are sure that the groundwater level will never reach the floor in your house, then floor insulation can be done by laying several layers of a material such as ordinary plastic film. Here your personal preferences and financial capabilities play the main role.
- 3. When the waterproofing is completely installed, you should begin laying the heat-insulating material. For these purposes, you can use expanded clay or foam boards. Although this material is being used less and less, glass wool can also be used to create a heat-insulating layer. When insulating a concrete floor, take a responsible approach to the process of calculating the amount of consumables, otherwise, performing such repairs can cost you dearly.
4. Now, you can begin the process of filling the floor with mortar. Concrete is laid on top of the prepared surface from the end of the room opposite the door, while gradually moving towards the beginning of the room. The use of limit rails, which are set in accordance with the floor level, will help you in this process. It is very important here to strengthen the final layer with a metal frame. To carry out reinforcement, a regular chain-link mesh can be used. Using these actions, you can increase the impact resistance of the top layer.
5. Well, now we can proceed to the final stage. Here you will need to carefully make a screed using a leveling layer of cement, which has been diluted with water, until it turns into a liquid slurry. For these purposes, you can use a special leveling mixture, which is freely sold in specialized stores.
Tools for installing natural wood floors
To install a wooden floor with your own hands, you need to have a set of professional tools on hand that will help you achieve excellent results with minimal labor costs:
- Tool for marking, monitoring geometric position, taking measurements:
- Electronic laser or regular tape tape measure.
Rice. 39. Laser roulette
- Laser, water or bubble level.
Rice. 40. Laser level
- Angle and steel ruler for easy marking.
Rice. 41. Construction corner
- A simple construction pencil with a soft graphite lead.
Rice. 42. Construction pencil
- Lace to ensure straight installation of piece materials.
- Equipment for cutting piece wooden elements:
- Electric jigsaw with the ability to change the angle of the blade and bed.
Rice. 43. Jigsaw
- Cross-cutting machine to ensure cutting at 45 degrees.
Rice. 44. Cross-cutting machine
- Circular saw with width limiter for longitudinal cuts.
Rice. 45. Hand circular saw
- A file for finishing the edge of a surface after cutting and removing burrs.
- Tools for tightening boards after laying:
- An ax with a sharpened edge.
- Hammer with oil-free steel working block.
- A set of clamps for fixing several boards in a card.
Rice. 46. Set of furniture clamps
- Levers that create force - pry bars or car jacks.
- Equipment for fixing boards.
- A drill for drilling a guide hole to prevent splitting of wood when installing self-tapping screws.
Rice. 47. Hand drill
- A set of drills of different diameters and lengths, depending on the size of the fastener.
- A screwdriver or screwdriver with different bits and a function for limiting the tightening force.
Rice. 48. Bits for a screwdriver
- A wooden mallet when installing boards on dowels.
Rice. 49. Wooden mallet
- Tool for finishing the finished surface:
- A scraping machine with a vibrating or rotating mechanism.
Rice. 50. Looping machine
- A set of abrasives of different grain sizes.
- Polishing discs to bring the surface to perfection.
- Brushes for applying protective paint and varnish composition.
Rice. 51. Brushes for paint and varnish
Many tools used to install wooden floors are classified as professional equipment and have a high retail price. However, some retail outlets practice leasing such equipment with the condition of returning it upon completion of use.
Attaching boards to joists
For this purpose, both self-tapping screws and nails can be used. Each master prefers his own methods of attaching boards to joists:
- Some prefer fasteners to the bottom of the groove. They are driven in at an angle of 45° and their caps are recessed into the wood.
- Others prefer to fasten the board through a tenon. But even in this case, the caps are pushed in.
- The simplest option is when the screws are twisted or nails are driven directly into the front surface of the board.
The board is laid as follows:
- The first row should not fit tightly against the wall; it is necessary to retreat twelve, or preferably fifteen, millimeters from it. This gap is filled with insulation and closed after installing the baseboard. Its presence is necessary so that the tree has a reserve of space in case of its expansion under the influence of air temperature.
- To fasten the boards to the joists, either nails measuring from 80 to 120 mm or self-tapping screws having a length from 70 to 100 mm are used. In both the first and second cases, the caps are “recessed”. If the fastening was carried out through the front side, then in the future this place must be sealed with putty of the same color as the wood.
- In situations where wood that is not completely dried is used, a freshly laid floor will require approximately six or eight months to dry. This is exactly how long it will take for the tree to shrink and dry out. As a result, cracks will appear at the junction of the boards, and therefore the flooring will have to be re-laid. To facilitate this operation, at the initial stage only every fifth board is attached to the joists, and only when re-laying are they all attached.
- When installing boards made using the tongue-and-groove technology, to ensure a tight fit, a mallet is used, through which the tenons are driven into the grooves. There are times when the board is not completely flat, then wood glue is applied to the tenons and grooves, after which they are secured with special clamps.
- To ensure a tight fit of the last row, special wedges are used, which are driven between the surface of the wall and the edge of the board.
- The maximum gap at the junction of the boards should not be more than one millimeter.
Surface finishing
A wooden floor will not last long if it is not coated with protective compounds. Immediately after installing a horizontal surface, it is necessary to perform the following type of work:
- The floor surface is processed with a sanding machine until all irregularities and junctions of wood elements can no longer be felt to the touch.
Rice. 64. Processing the floor with a sanding machine
- The surface is dust-free and all large and small debris is removed from it.
- An antiseptic penetrating composition is applied to the floor, which simultaneously acts as a primer.
Rice. 65. Applying primer to the floor
- Depending on the ingredients and directions on the package, you will need to wait a certain amount of time to allow the primer to dry.
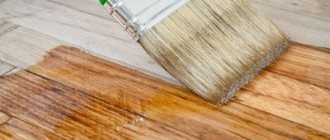
- At the final stage, a layer of paint and varnish is applied to the floor surface. The composition should be applied along the wood fibers in 2–3 layers until a reliable coating is achieved that will allow the floor to be used for many years.
Rice. 66. Painting a plank floor
When choosing paint or varnish, you should pay attention not to universal compositions, but to specialized substances intended only for wooden floors. When purchasing, you should pay attention to the brand of the product, as well as the number of positive reviews about the product from real users on online forums.
Pouring a concrete floor
The installation of a concrete floor in a private house begins with preparatory work. First, markings and gravel filling are made on the site of the future floor. The soil is first cleared of plants and the top layer, and then compacted. Next, a layer of gravel is poured, which also needs to be compacted well. In the construction of a concrete floor in a private house, gravel will act as thermal insulation. Sand is poured on top of the gravel. After compacting it, a thick polyethylene film is spread on the surface, acting as a waterproofing material.
How to make a concrete floor in a private house? After installing the waterproofing layer, you can begin pouring the screed. A cement screed in a country house is poured in the same way as a screed in an apartment: levels are set and the mortar is poured, which is leveled from wall to door according to the rule.
When pouring a concrete screed, several features should be taken into account. The solution for pouring must be fresh; for its preparation it is recommended to use cement of a grade not lower than M-300, screening out sand and water. To increase the strength of the concrete layer, you can add special compounds to the solution - plasticizers, which will give the future coating additional strength.
When pouring a screed with a height of 5 cm or more, you can use reinforcing elements or a reinforcing mesh, which is laid on the waterproofing layer before pouring. In the case of installing warm water floors in a private house, the use of reinforcing mesh and the addition of plasticizers to the cement mortar are mandatory procedures.
When the concrete hardens a little after pouring, you can remove the beacons. The voids left after their removal are filled with the same solution. After filling and leveling all the cracks, the floor is covered with polyethylene and left to dry. Drying a concrete floor is a long and responsible undertaking. The concrete must dry on its own within a month; if you have a heated floor system, heating should not be turned on until the screed is completely dry. By turning on the heating elements, you will help the concrete crack before the room is used. When drying, it is recommended to periodically moisten the concrete screed with water and cover it again with polyethylene: if this requirement is met, the coating will gain maximum strength and will not crack.
In order to correctly fill the cement, remove the beacons and dry the concrete, it is recommended to look at photos of the work of builders who specialize in arranging floors in private homes.
Features of waterproofing
Experts do not recommend using wooden floors in wet rooms, since the porous structure of natural fibers, when saturated with water, promotes the rapid proliferation of bacteria, which increases the risk of rapid rotting of the boards. However, if there is an urgent need, the installation of such floors is allowed subject to waterproofing:
- Coating screeds or joists with bitumen mastic before laying a wooden floor.
Rice. 67. Coating with bitumen mastic
- Installation of adhesive waterproofing under the finished surface.
Rice. 68. Installation of adhesive waterproofing
- Treatment of wood, joints between boards and places where the floor meets the walls using special sealing compounds based on acrylic, latex, rubber or silicone.
Rice. 69. Hydrophobization of boards
- The best option for modern technology for waterproofing wooden floors is to choose the right paint and varnish composition, the ingredients of which have water-repellent properties.
Rice. 70. Water-repellent coating on plank floors
To achieve the best effect, waterproofing a wooden floor in wet rooms should be done in 2 stages - before installing the final coating and when finishing it.
How to lay an array with your own hands
The solid board is laid on plywood sheets. The base can be either a concrete floor or a wooden floor on joists.
- It is necessary to measure 15 mm from the walls to create a ventilation gap and in case of seasonal deformations.
- The finished floor boards must be laid so that they are located across the subfloor boards. The first row is placed with a tenon to the wall and screwed with self-tapping screws. It is necessary to tighten the screws so that they are covered by the baseboard near the wall. On the second side, the screws are screwed into the groove at an angle of 45°.
- A wooden spacer is placed in the gap between the board and the wall. If the size of the room is greater than the length of the floorboards, then the boards are laid “staggered”. This will make the floor more durable.
- The second and subsequent rows of boards are laid with a tenon in the groove of the previous row, compacted with a mallet and fastened with self-tapping screws on the other side into the groove. If you want your wooden floor to last as long as possible, you need to lay the boards in such a way that the growth rings are located opposite each other.
The parquet board is laid "staggered". Solid parquet boards can also be used as a finished floor. In essence, this is the same tongue-and-groove solid board, only shorter. Its installation is slightly different:
- Can be fixed with self-tapping screws only from the tenon side.
- Installation is carried out only “staggered”.
- If the base is made of plywood, then it is better to glue the parquet board first and then additionally secure it with self-tapping screws.
- If you lay the board diagonally, the room will visually look larger.
Sound insulation features
The structure of natural wood, containing elastic fibers, perfectly distributes sound and vibration, which can cause discomfort for residents when using the premises. To avoid this, you should resort to sound insulation using the following materials:
- The easiest way to organize soundproofing of floors is by joists. Porous mineral wool slabs are laid between wooden blocks, expanded clay or expanded vermiculite is poured.
Rice. 71. Backfilling soundproofing material between joists
- It is also possible to use sprayed liquid polyurethane materials, which during hardening form a porous structure that prevents the spread of noise.
Rice. 72. Sprayed sound insulation
- To prevent the transfer of vibrations from the finished flooring to the joists, elastic polymer elastomer inserts are installed along their entire length, which dampen most vibrations.
Rice. 73. Elastomer inserts
- When installing floors on a screed, under wooden boards, parquet, plywood backing and other materials, sheets of cork, foamed polyethylene and other elastic materials are laid.
If proper sound insulation is ensured, shock impacts, vibration effects and structural noise will not be transmitted to adjacent rooms.
Floor repair sequence of actions
You can make a floor from scratch in a private house with your own hands. First you need to remove the old structure, which usually in an old private house is made in the form of a system of logs and wooden covering. If you plan to create a floor covering made of ceramic tiles, you need to make a screed. Tiles cannot be laid on a wooden base. For other types of flooring, for example, linoleum or laminate, you can restore the joist system and insulate the structure.
The process of repairing floors in a private house.
A new floor in a private house with a screed is created in the following sequence:
- The old structure is dismantled and the base surface is leveled.
- A cushion is constructed from gravel or brick chips and sand.
- A layer of film or roofing felt is laid to prevent moisture from penetrating from the soil.
- The level of the future screed is determined and marks are placed on the walls.
- Insulation is laid (expanded clay, polystyrene foam, mineral wool).
- Reinforcing mesh is laid.
- The base is divided into sections of 2 m using slats. The height of the slats must correspond to the height of the future screed (at least 7 cm).
- Cement mortar is mixed and poured into each section.
- The solution is leveled using the rule.
- The finished subfloor is covered with film and left to dry for 2 weeks. Concrete should be moistened periodically.
- After the concrete has dried, a leveling screed is made.
- The flooring is being laid.
Concrete base can be used for any type of flooring.
A multi-layer cushion of crushed stone and sand serves as a shock absorber in case of subsidence and heaving of the soil.
Scheme of pouring a heated floor with concrete.
In addition, it is a container for all communications that exist in a private home. Pipes and wires are insulated in special boxes and hidden under a layer of sand and crushed stone. The bulk pillow is created as follows:
- A layer of gravel (5 cm) is poured, then it is leveled, moistened and compacted.
- A layer of sand (10 cm) is poured, moistened and compacted.
- A layer of gravel (10 cm) is poured and compacted again.
Concrete flooring is more reliable and durable than wooden flooring on joists. It can serve for decades, maintaining its qualities. Concrete does not contain harmful components, retains its strength, remains dry, and does not deform due to temperature fluctuations.
Wooden structures are susceptible to external factors. Logs can be destroyed by pests. When temperature fluctuations occur, the boards become deformed, cracks appear in the floor covering, and the boards begin to creak. Mold can form on wood if there is high humidity. But creating a wooden structure is a more economical way to make a floor in a private home.
Tips for further use
In order for the finished floor covering made of natural wood to last for many years without repair, the owners of the premises should follow some rules:
- Treat the paint layer with care and prevent it from being damaged by mechanical influences.
- You should wear soft-soled shoes around the house.
- All contact surfaces of furniture must be glued with elastic, soft materials. The best solution would be to install self-adhesive felt pads or scraps of old carpet.
Rice. 74. Protective coating on furniture legs
- Wet cleaning of floors should be carried out only with special cleaning agents that cannot damage the paint layer.
- Upon completion of wet cleaning, excess water should be wiped off with dry rags.
- Once every 5–7 years, the floors should be re-scraped and coated with paints and varnishes.
Rice. 75. Wet cleaning of wooden floors
With proper care, natural wood floors can last for decades without the need for replacement.
Briefly about the main thing
Wooden flooring in an apartment is the best solution for ensuring maximum living comfort. Despite the high cost of such coatings, they are characterized by increased environmental friendliness, durability, maintainability and many other positive properties. There is a wide range of flooring made from natural materials on the market - piece parquet, solid floorboards, panel materials and other types of coatings. Before installing a wooden floor, you should stock up on a set of the necessary tools, and lay the covering in strict compliance with the step-by-step instructions, consisting of several stages.