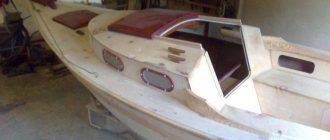
Due to the fairly high prices for boats, purchasing a finished product of a factory standard becomes difficult. In addition, a model manufactured in accordance with state standards does not always satisfy the needs of the consumer. For example, inflatable boats are quite mobile and easy to transport, but the percentage of rapid wear and tear due to physical damage to the hull is high. A long-awaited fishing trip or active recreation on the water can suddenly end due to the slightest puncture.
Experienced fishermen who want to save their accumulated money and get a watercraft that meets all the requirements decide to make their own boat from sheets of plywood. Making a plywood boat with your own hands is quite an exciting activity for fishermen who want to express their personality creatively. Shipbuilding begins with determining the size of the watercraft, sketches, which, as improvements progress, become masterfully executed drawings.
When starting to design a fishing boat, you need to become familiar with the terminology. So:
- Keel. A base for fastening all existing structural elements. The main element of the body.
- The stem. The bow of the boat.
- Sternpost. The side of the boat opposite the bow.
- Frames. Transverse parts that create the necessary rigidity and smooth contour of the body.
- Slan. Individual flooring located along the bottom of the boat.
- Boat sides. The sides are formed from boards that are installed above the stem and sternpost, combined with frames during the fastening process.
History of small wooden shipbuilding
The history of wooden boats goes back several thousand years.
The first wooden watercraft were canoes dug out of tree trunks. In Russia, they were found from 1878 to 1967 off the shores of Lake Ladoga, Desna and Southern Bug. Primitive boats were oak trunks hollowed out from the inside, and their age ranged from 2000 to 5000 years. Subsequently, man began to build a boat from wood, consisting of several parts: a base (keel and frames), crossbars (cans) and outer skin. Over time, the design was repeatedly improved and eventually became classic for all modern types of these small ships.
DIY boat made of plywood
A small watercraft that can carry 2-3 anglers on board and is not heavy in weight can easily be made from plywood, as one of the most affordable building materials. Moreover, the boat can move both with the help of oars and with the help of a boat motor or sail. This does not require special professional training, which is quite feasible even for beginners.
Plywood is a strong enough material to build a small boat, not to mention expensive yachts, where plywood is also widely used in their manufacture. In addition, it is easy to process using electrical or manual tools.
In addition, if you install a motor on such a boat, it can develop a respectable speed with good performance characteristics. In addition, a plywood boat is much more reliable than an inflatable boat.
Peculiarities
A simple example of a homemade vessel would be a punt. For greater convenience, it can even be folded. A collapsible boat is easier to move to a body of water. This mini-option is also advantageous because the manufacturing costs are quite low. Homemade plywood boats can also be motorized or ordinary rowing. In this case, the stern part will be different during manufacturing. You will need to install a transom under the motor (multi-layer plywood is suitable for it).
There are already popular models of boats, for example, the rowing sectional boat “Dori”, “Perch” and many others, drawings of which can be easily found on the Internet. And also in a specialized store you can purchase ready-made kits for assembling a boat from plywood, for example “Skif”.
The price of such a kit will be significantly lower than the cost of the finished vessel.
The keel is the main element of the hull, which is the basis for securing all parts. The bow of the boat is called the stem; on the opposite side of the structure there is a sternpost. Together they provide the required rigidity. The transverse parts that provide hull bending and rigidity are called frames.
The sides are formed by boards located above the stem and sternpost, which are connected to the frames when installing the structure. The prepared hull is covered with plywood on top, and a special flooring called a slant is made at the bottom of the boat.
Materials and tools
Firstly, you will have to select an appropriately sized room where the boat could freely fit. It is advisable that the room be heated, since all work can take place in winter. In the summer, it’s unlikely that anyone will start building a boat: in the summer you already need to sail on it. Moreover, the room must be ventilated, with the ability to maintain optimal temperature conditions. Since you will have to work with wood, the humidity must be optimal.
To draw a diagram, you need to have:
- drawing supplies;
- pencils;
- elastic bands;
- patterns;
- rulers and triangles;
- line;
- cardboard and drawing paper;
- paper glue;
- calculator.
At the construction stage you will need:
- jigsaw;
- hammer;
- axe;
- clamps (up to 10 pieces, no less);
- brushes, spatulas (metal and rubber);
- screwdriver;
- electric and manual plane;
- screwdrivers;
- chisels;
- stapler;
- circular and hand saw.
Materials for manufacturing can be:
- plywood (sheet 1.5x1.5 meters), thickness 4-5 mm;
- pine or oak boards;
- fiberglass for covering the boat hull;
- putty for filling cracks;
- waterproof glue;
- drying oil or water-repellent impregnation for wood;
- oil paint or waterproof enamel;
- nails, screws, self-tapping screws;
- metal strip, metal for various fasteners.
How are homemade plywood boats made?
It is quite possible to create a small, stable, capable of lifting 2-3 people on board and at the same time a light vessel, capable of sailing both with the help of oars, a motor or a sail, without special training, since boats of this class can be created even by beginners . And it is precisely for such homemade products, which use the simplest tools and have limited funds, that the most affordable material is plywood.
Durable and at the same time easy to process with both electric and hand tools, plywood is very widely used not only in the construction of small vessels, but also quite respectable sea yachts.
At the same time, for a small vessel, plywood is the best way to realize the possibility of installing a boat motor capable of developing quite decent speeds.
Tools and materials
Oddly enough, for self-building a boat, the most necessary condition is a properly selected room in which you can freely place the boat, while a prerequisite is the presence of ventilation and, when working in the cold season, heating that can maintain a comfortable temperature for work and prevent temperature changes air.
When making drawings you will need:
- drawing supplies:
- pencils;
- elastic bands;
- patterns;
- long metal rulers and large triangles;
- line;
- cardboard and drawing paper;
- paper glue;
- calculator;
During the construction process you will need:
- electric jigsaw;
- hammer;
- axe;
- clamps (and most likely a lot - at least 10 pieces);
- brushes, metal spatula, rubber spatulas;
- screwdriver;
- hand planes or electric planes;
- screwdrivers;
- chisels;
- stapler;
- hand saws and electric circular saw;
The following materials are recommended for manufacturing:
- plywood of standard sizes 1.5m * 1.5m;
- boards – pine, oak:
- fabric for covering the body;
- putty for sealing cracks and joints of sheets;
- special waterproof glue;
- natural drying oil or water-repellent impregnation for wood;
- oil paint (if the owner is an adherent of the traditional method of painting the hull) or special enamel for ship hulls;
- nails, screws, self-tapping screws;
- metal strip, metal for oarlocks and fastenings;
Read Flies for catching grayling and their choice by season
Parameters of the future boat
The optimal parameters for a boat made of plywood with a thickness of 4-5 mm are:
- the total length of the hull from bow to transom is 4.5 meters;
- width at the top at the widest point of the body – 1.05 meters;
- The depth of the boat is 0.4 meters.
What is the boat made of?
The main element of the boat frame is the keel - the base on which all other parts of the hull are attached.
The bow of the boat, formed by the stem, is attached on one side, and in the stern there is a sternpost. These are the elements responsible for the longitudinal rigidity of the structure. They can be either solid wood or composite - glued together in separate parts, and secured with nails or screws.
Hull bends and transverse shapes are formed thanks to frames - transverse elements of the hull, giving it additional rigidity. The boards on top of the stem and the sternpost, connected to the frames on both sides, form the sides.
The frame thus obtained is sheathed on top with plywood.
A flooring is made inside the boat - a slant, which acts as a lower deck so as not to stand on the bottom of the boat.
Plywood boats for motors
Boats for using a motor are not fundamentally different from those designed for oars or sails. The main difference here is that the stern is modified to mount the engine - they have a transom board or transom made of multi-layer plywood that can withstand the engine mount.
Some more modern boats may also have other elements of small vessels of this class - a cockpit, deck stringers, side stringers. To ensure buoyancy, such boats are provided with sealed niches filled with foam that can keep the boat on the surface in the event of capsizing.
Advantages of using plywood to make a boat
Plywood is a lightweight, affordable and versatile material that can be used for a variety of construction and renovation work. The advantages of using plywood sheets to make a boat include:
- Strength and lightness. The finished plywood structure is incredibly lighter than solid wood. At the same time, the strength of laminated veneer is practically not inferior to wood.
- Stability of the finished structure. Plywood sheets have clear geometric proportions, which not only makes marking and installation simple, but also guarantees excellent stability of the boat.
- Availability. Plywood is an affordable material, so a boat based on it will be inexpensive. In addition, you may additionally only need special glue, finishing materials and simple tools.
- Neat appearance. The plywood boat turns out to be very neat, and is in no way inferior to purchased structures.
- Ease of manufacture. Anyone with at least minimal carpentry skills can make a boat from plywood on their own. In this case, construction will take from one to several days, depending on the complexity of the structure and the intensity of the work.
In order for the plywood structure to be strong, stable and durable, special attention should be paid to preliminary calculations. If you have even the slightest doubt about your abilities, it is better to use a ready-made drawing.
Self-assembly of a boat from plywood
Many people wonder whether it is possible to make a high-quality swimming device on their own, save on it and enjoy the manufacturing process.
Boats made at home have a number of undeniable advantages over their own:
- Product weight. When using plywood, weight is significantly reduced compared to similar wooden or metal models.
- Using solid sheets will create ideal shapes, which will provide excellent stability and ensure ease of launching.
- Minimum final cost. You will only have to spend money on consumables, such as plywood, boards, glue, and varnish. It is worth noting that a lot can be found in the garage of a thrifty owner.
We recommend that you approach the choice of materials for assembling the structure responsibly; they must be of high quality, and the plywood must not have visible damage; your safety and health depend on this.
People with carpentry skills will spend one and a half weeks on this work, subject to working in their free time or two full days.
Building a boat
Of course, the first thing we do is consider material options and here we will immediately make our choice in favor of plywood. We will not list the advantages of plywood sheets, we will simply say that we will need FSF sheets of various thicknesses. This is a moisture-resistant material that we will treat with various means during the work process.
Model selection
Here we can’t help much, every lover of walking on the water has his own preferences, however, we will give simple parameters of the watercraft that we will have:
- The length of our structure will be 3500 mm, let’s convert it into meters for a better guide – 3.5 meters.
- 1350 mm – width, or 1.35 meters, which is quite suitable for a boat.
- Side height – 50 centimeters.
This is the option we will focus on for now.
Important! The considered option is just one of many types of floating craft and does not mean an exact design exactly according to its patterns. The choice of boat type is made according to a large number of parameters.
Parameters of the future boat
The optimal parameters for a boat made of plywood with a thickness of 4-5 mm are:
- the total length of the hull from bow to transom is 4.5 meters;
- width at the top at the widest point of the body – 1.05 meters;
- The depth of the boat is 0.4 meters.
What is the boat made of?
The main element of the boat frame is the keel - the base on which all other parts of the hull are attached.
READ How to prune juniper correctly?
The bow of the boat, formed by the stem, is attached on one side, and in the stern there is a sternpost. These are the elements responsible for the longitudinal rigidity of the structure. They can be either solid wood or composite - glued together in separate parts, and secured with nails or screws.
Hull bends and transverse shapes are formed thanks to frames - transverse elements of the hull, giving it additional rigidity. The boards on top of the stem and the sternpost, connected to the frames on both sides, form the sides.
The frame thus obtained is sheathed on top with plywood.
A flooring is made inside the boat - a slant, which acts as a lower deck so as not to stand on the bottom of the boat.
Material purchase
Regardless of the type of boat, its structure and the number of seats, we will need basic materials, in which plywood for the boat will come first.
So, in order:
- FSF plywood 4 mm thick. We choose sheet dimensions of 1240x2450 mm for the agreed dimensions of the structure, and we will need three such sheets.
- Epoxy resin minimum 5 kilograms.
- One kilogram of hardener of your choice.
- Two to three liters of microsphere is a filler for epoxy resin.
Important! To make the work easier, the instructions for using epoxy resin may suggest using syringes rather than scales to determine the required amount of material. This is more convenient, especially taking into account independent work.
What do we need
Set of tools
When starting work, we should make sure that we have all the necessary tools.
In principle, you will need a simple set:
The most convenient way to cut out workpieces is with a circular saw.
- wood saw (circular or reciprocating);
- jigsaw with a set of blades;
- sanding machine with attachments for processing plywood;
- drill and drill bits of different diameters;
- screwdriver;
- clamps for fixing parts to be glued;
Instead of clamps, in some cases paper clips are suitable
- hand tools - hammers, pliers, chisels, etc.
- measuring tool - tape measure and level.
It is better to carry out the work in a spare garage or workshop. In principle, the parts can be assembled on the floor, but it will be much more convenient to work if we construct special trestles from timber and thick boards, on which all the elements of our future boat will be placed.
Selection of materials
Projects for plywood boats, presented in abundance on the Internet, involve the use of a variety of materials. We will consider one of the simplest modifications, since it is better for beginners to practice the techniques on simple samples.
Blanks for work
To build the ship we will need:
| Design element | Features of the material |
| Sides and bottom | We use plywood sheets as the main material for making the bottom and sides. Plywood for a boat must meet a number of requirements:
|
| Inner frame | Supporting structures - frames, keel, struts, as well as seats and transoms are made from more durable materials:
|
| Connecting elements | Very often, only glue is used to connect parts into a single structure. At the same time, some methods involve stitching plywood sheets together using thin steel wire, nylon cord, thick fishing line, etc. As additional reinforcement of the seams, strips of fiberglass impregnated with epoxy resins are used. |
| Exterior decoration | No matter how high-quality the plywood is, it will swell with prolonged contact with water. That is why, both outside and inside, all wooden parts are treated with special compounds. These include:
|
Boat drawings and transferring them to material
Before we start purchasing materials, we will need drawings of plywood boats. It’s worth building a plan for a punt or tourist kayak yourself only if you have sufficient experience and you clearly understand what size boat you need and what design it must have. For a beginner, it’s better to use a ready-made project - fortunately, it won’t be difficult to find it on the Internet.
Drawings of a plywood boat with large diagrams of the main components
So, before making a boat out of plywood, we proceed as follows:
- Based on the drawings, we make templates of the desired shape and size from wrapping paper or old wallpaper.
- A plywood boat pattern is applied to a wooden panel and traced along the contour.
- In the same way, templates are used to mark the boards and beams from which the internal frame will be made.
Another scheme: a punt with plywood sides and a plank bottom
When transferring dimensions to workpieces, we are likely to encounter difficulties. This is due to the fact that the standard size of a plywood sheet (maximum 3000 mm in length) is often smaller than the planned dimensions of the boat. In this case, we need to master the technique of gluing plywood:
Read: Choosing a hook for catfish according to size and fishing method
We adjust the ends of the two parts to each other.
- Carefully cut off the edges to a length exceeding the thickness of the sheet by about 7 - 8 times.
- Lubricate the resulting bevels with carpentry or polymer glue and securely clamp them with clamps.
- After complete polymerization of the glue, we obtain a fairly long sheet with a strong miter joint.
Scheme for gluing plywood sheets
Blueprints
The first and most important stage of boat construction is the preparation of drawings according to which all elements of the boat will be manufactured. The drawings should include not only information about the shape and number of parts, but also the exact dimensions of each of them. After which the information from the drawing is transferred to the plywood. The ability to properly maintain the flotation device will depend on completing this process.
One of the simplest is the drawing of the boat “Sever 520”. It contains a minimum number of parts, which simplifies the process of transferring them from paper to plywood and assembling a solid structure.
One of the simplest options for a plywood boat
You can even make a motor boat using plywood. When designing it, you can also make a drawing yourself, or you can use a ready-made drawing.
Motor boat drawing
The drawing of a plywood boat should include not only a general view with designated parts and dimensions. It is important to make a separate drawing of the transoms, a section along the midship frame, as well as other details.
Detailed drawing of boat parts
Any of the finished projects can be modified to suit your taste and needs. However, if you plan to change sizes, then this should be done proportionally for all parts.
Oar boat drawings
It is not necessary to buy a ready-made one; if you have drawing skills, you can build your own. For greatest accuracy, it is recommended to use graph paper. When designing, perform the following actions:
- draw a center line;
- draw a top view and a vertical projection;
- frames are drawn at equal distances;
- check the dimensions and symmetry of parts;
- smooth curves are drawn along the marks from the side to the keel using a ruler.
Drawings of a boat with a motor
Note that homemade plywood boats for a motor have drawings similar to oar and sail boats. The appearance of the stern is different because the engine is installed on it. Modern models are made with niches filled with foam to prevent flooding when tipping over.
Boat drawings and transferring them to material
Before we start purchasing materials, we will need drawings of plywood boats. It’s worth building a plan for a punt or tourist kayak yourself only if you have sufficient experience and you clearly understand what size boat you need and what design it must have. For a beginner, it’s better to use a ready-made project - fortunately, it won’t be difficult to find it on the Internet.
Drawings of a plywood boat with large diagrams of the main components
So, before making a boat out of plywood, we proceed as follows:
- Based on the drawings, we make templates of the desired shape and size from wrapping paper or old wallpaper.
- A plywood boat pattern is applied to a wooden panel and traced along the contour.
- In the same way, templates are used to mark the boards and beams from which the internal frame will be made.
Another scheme: a punt with plywood sides and a plank bottom
When transferring dimensions to workpieces, we are likely to encounter difficulties. This is due to the fact that the standard size of a plywood sheet (maximum 3000 mm in length) is often smaller than the planned dimensions of the boat. In this case, we need to master the technique of gluing plywood:
We adjust the ends of the two parts to each other.
- Carefully cut off the edges to a length exceeding the thickness of the sheet by about 7 - 8 times.
- Lubricate the resulting bevels with carpentry or polymer glue and securely clamp them with clamps.
- After complete polymerization of the glue, we obtain a fairly long sheet with a strong miter joint.
Theoretical drawing of the motorboat "Kosatka"
The stem is cut in a smooth curve and is larger than that of conventional motorboats; due to this, the wetted length of the hull is reduced, especially in rough seas. When the stem enters a wave, the boat does not yaw to the side, since the point of application of the lateral hydrodynamic force does not shift as much to the bow as with a steeper stem.
Another important feature of the contours is the break of the side in the aft part, forming a section inclined at 45° to the waterline near the transom. The purpose of this section is to ensure the stability of a relatively narrow boat during sharp turns. When turning, the inclined part of the side enters the water and the hydrodynamic force acting on it prevents excessive roll and capsizing of the boat.
The blunt bow at the deck and the upward curved side line are a tribute to modern fashion.
The dimensions of the boat are taken to be minimal for a crew of four people and with the expectation that the hull will be sheathed with three sheets of plywood along the length
Read How to make fishing dough for crucian carp
A large deck width is required for stability reasons; a relatively narrow bottom is very important for reducing the wetted surface and reducing shock overloads when sailing in rough seas
When testing the first two Orcas built, it was revealed that the boat develops the highest speed when passengers and other payload are concentrated in the bow. Therefore, in the drawings provided, in contrast to the finished boat, all four seats are located with their backs facing each other. It is recommended to place the fuel tank below deck in the bow, and use the spacious aft cockpit to accommodate light camping equipment. In bad weather, the cockpit is covered with a folding awning on duralumin tubular arches.
The hull design is typical of plywood-skinned motorboats, but takes into account the increased power of the outboard motor and the fact that the boat will have to ride on the waves. We decided to limit ourselves to the minimum number of frames (six in total, including the transom), which would allow us to maintain the hull shape specified in the theoretical drawing during construction. Naturally, the cross-sectional dimensions of the frame parts had to be increased. By the way, due to the greater mass of wood, this will ensure greater durability of the structure than on light motorboats with frequently installed frames
This is all the more important because usually when making a set, the most accessible types of wood are used - pine, spruce, cedar, which have a lower density and “age” faster than oak or ash. To simplify construction, the toptimbers in the cockpit area are made wide, but without zygomatic and beam brackets
In the place where the main load is concentrated - under the passenger seats, on the shp. 3 reinforced plywood flooring was installed along the height of the seats. This is an essential design detail: after all, this is where the greatest dynamic forces act when hitting a wave. The frames are secured to the keel and bilge stringers using short angles with through bolts.
Cutting
There is nothing complicated in the cutting process; we make all the markings on the plywood sheet and start cutting the material. By the way, for cutting we will need a jigsaw.
If you try to make a cut with any other tool, this will most likely lead to:
- Uneven cut line;
- The material will be chipped.
An example of cutting And, despite the fact that plywood boats are, of course, processed and painted, let's still cut it as it should without defects and damage to the material.
We cut out the bottom and side elements. Here we need to understand one important point, we are doing the work independently, we will still need to either make the drawing ourselves, having sifted through a mountain of literature, or order it by turning to specialists.
From experience we can say that the second option is more preferable if we ourselves do not have such experience.
Important! In order for us to have temporary fastening of some elements during cutting and sawing, transfer of the pattern to the plywood surface, gluing of the fender and much more, we can use binders according to the size of the cut components.
How to build?
Let's take a closer look at the entire technology for making a plywood boat with your own hands.
Before you start work, you need to understand all the features of the future design: the shape and appearance of the vessel. When making a homemade product, you need to take into account that the basis of the vessel will be the keel, on which the remaining parts of the craft are attached. The bow part is formed from the stem; it is necessarily fixed on both sides. The stern section is secured by a sternpost. Both of these structures are responsible for the longitudinal rigidity of the vessel. They can be made from solid wood or from individual components that will be fixed with hardware.
The transverse members of the hull help add the necessary rigidity to the boat. On top of the stem and sternpost, planks are placed, connected by a transverse rib of the hull. In general, this entire structure forms the sides. It is also possible to install a cockpit, deck and side stringers.
To ensure good buoyancy, the niches are filled with foam, this helps prevent the boat from capsizing.
Before drawing up a drawing of a boat, you also need to decide on its dimensions. This largely depends on how many people the ship must accommodate in the future. To build a floating craft from plywood of the specified thickness (0.5 cm), the following parameters will be optimal: length - 4.5 m, width of the largest part of the vessel - 1.05 m, depth of the craft - approximately 0.4 m. To create a project, it is better use graph paper, this will allow you to make more accurate contours of the elements of the ship's hull.
READ How to make ax handles with your own hands?
Next we create a sketch:
- draw an axial line along the length to divide the drawing into two parts; maintaining symmetry in this case is very important;
- then we conditionally divide the diametrical plane into 4 sections, in which the transverse ribs of the hull (frames) will subsequently be located;
- we draw a vertical projection of the vessel, and also draw a top view of the vessel;
- draw out the frames;
- be sure to check the parameters of all elements according to a given scale;
- we draw up sketches of the frames on a scale of 1 to 1 on thick paper;
- Using a pattern and a long ruler, we draw an image of curved lines;
- we check the symmetry of the drawing; to do this, you can fold it in half and compare the identity of both halves on the pattern.
First, transfer the entire image onto thick paper. Then, using these templates, we draw the details on the plywood panels. You need to strictly adhere to the contours and selected sizes. It’s important to note here that there is no need to add allowances! After the transfer, we once again check the accuracy of all elements. Since plywood sheets can be smaller in size than the boat parts before cutting, several sheets are coupled together “on the miter side”. It is necessary to process the joints with a plane, then grind them. The joints are pressed with a load.
Using an electric jigsaw with fine teeth, we carefully cut the parts. The use of a special tool for this work ensures that there are no chips along the edges of the cut lines. After cutting, everything needed to be sanded. Then we make holes along which we will sew the hull of the ship.
They need to be drilled at an equal distance of 1 m so that the appearance of the product does not lose its aesthetics in the future.
- Let's make a transom. This is the part of the boat hull on which the outboard motor is mounted. To make this part, we glue together several sheets of plywood to make a board about 25 mm thick. If necessary, this part can be strengthened with a wooden block.
- We drill holes along the edge of the stern and along the transom.
- On one side of the keel we install a sternpost with a transom.
- We attach the stem to the other side.
- We connect the keel part with the stems using nails. Here it is important to check the complete absence of distortions. If necessary, we make adjustments using twine stretched between the transom and the stem.
- We carry out the fastening.
- After installing the stem, we place the frames at right angles. We check the fit with twine and do the final fastening of the parts.
- For the task of deflecting the vessel without distortion, we use round bars. They need to be secured to the outer parts of the keel from the inside. We also carry out fastening with beams.
- Next you need to sew the seams with nylon thread along the holes made. This material is highly durable and resistant to rotting. The thread is impregnated with epoxy resin to give it additional strength.
- We install the transom.
- We cut out the side elements from a pair of equal parts. Along the edges of the sides and the protrusion of the bottom part, we drill holes every 1.5 meters. We assemble and fasten the bottom of the vessel onto the boat frame turned upside down.
- Then we sheathe the frame of the vessel. We twist the elements. The sides on the bottom are attached so that their wound ends are on the outside. In the future, the transom will be placed between them. It must be taken into account that the fibers of the hull material should be placed not across, but along the vessel.
- The joints of all parts and seams must be glued with several layers of fiberglass and lubricated with epoxy. Each layer of fabric must be moved to the side.
- To increase the degree of rigidity, you can strengthen the bottom with strips. To do this, we make holes for screws on them every 25 cm, arrange them in places and fix them. Next, you need to make notes with a marker and remove them. We process the bastings using an adhesive base and screw them on. After the adhesive has dried, remove the screws and hammer the structure with nails.
- We fill the holes in the casing with epoxy resin.
- We install bench seats.
- We treat the outside of the boat with fiberglass glue. If this is not done, the subsequent coating (varnish or paint) will not last long. Plywood, like any wood material, tends to shrink and expand under the influence of external factors. This will be especially noticeable on the curves of the vessel - the paint will begin to crack. We distribute the fiberglass fabric over the surface of the skin, trying to avoid the appearance of folds and bubbles. It is better to glue the fabric by starting from the keel of the boat and moving towards each side.
This stage will be the final one in our work. The inside of the surface needs to be painted with heated drying oil. On the outside we apply paint to the fiberglass. It is better to use epoxy compounds, such as EP-140. We also decide on the color. If the vessel is multi-colored, we select the compositions of the required colors. You can put a drawing or inscription on the surface, write the number or name of the boat. To do this, it is permissible to use self-adhesive film; this will add neatness to the ornament.
To apply paint, you can use a sprayer or a roller or brush. The paint should be applied evenly: in a layer of equal thickness, with strokes directed in one direction. There should be no leaks or omissions.
If everything is done correctly, the coating will last for many years without cracks or chips on the surface.
How to make a boat?
Sew
In projects of cartop dinghy and skiff boats, patterns of their parts are often given. In this case, the boat is assembled by sewing (stitching) on keel blocks or trestles, see fig. The dry-sewn body is aligned along the contours using templates and temporary mounting spacers. The seams of the sheets, being the most durable, are placed closer to the nose, as it is the most loaded and susceptible to damage.
Assembling a plywood boat by stitching on keel blocks. K. p.136
We are building
The construction of a sharp-chine boat of greater than sewn capacity with single-curvature contours begins with the manufacture of the stem (see below) and the assembly of frame frames. The frames of sewn boats are often simply cut out of plywood (there are only 2-3 of them), but in this case it is uneconomical - too much of the rather expensive material will go to waste. The frames are assembled on the plaza, i.e. on a flat plane onto which the projections of the theoretical drawing on a scale of 1:1 are transferred. If the contours of the boat are simple and there is little space, only the hull projection can be transferred to the plaza. Methods for assembling frame frames, as strength, complexity and weight increase, are given in Fig. The grooves for the keel and stringers are selected in advance.
Assembly of frame frames. K. p.126
Next, the frame frames are placed on the frame (item a in the next figure), aligned vertically, along the contours, and the keel beam, stem (see below), fender beam and stringers are attached. After this, the body set is closed with a flat strip (pos. b). The purpose of the malkovka is, firstly, to create cuts in the keel beam, along which it will be planed to a given deadrise; secondly, check whether a section of double curvature has been tucked in somewhere, etc. trim the bottom edges of the floortimbers. Then the skin is applied, starting from the keel (below in the figure). After this, the body is removed from the frame, completed and equipped.
Assembly and assembly of a boat hull kit on a frame. K. pp. 129, 130, 144
Nose
Forteven is the most loaded and important part of the hull set. One of the immutable rules of navigation safety says: if danger cannot be avoided, it must be taken on board. Therefore, the manufacture of a boat stem should be taken with full responsibility.
Boat stem structures. K. p.146-148
The designs of boat stems are shown in Fig. Waterstop plugs made of solid, non-rotting wood prevent water from seeping into the housing. In terms of reliability, all these designs are approximately the same. A stem with a false bow is used in cartop boats with a narrow stem.
In rough seas and when hitting obstacles, the stem experiences large dynamic loads that tend to push the hull apart, so it is reinforced with a bridge insert. Amateur shipbuilders often neglect it or do not even know what it is; This is one of the significant reasons that homemade boats last much less than the terms stated in the projects.
The design of the transom of a boat with an outboard motor. K. p.151
Stern
Another rather important part of the set, especially for a boat designed for a motor, is the transom. Transom design for motors up to 10-12 hp. is given in Fig. on right. The total thickness of the transom, with reinforcement, is from 40 mm. Perhaps more: the mounting clamps on some outboard motors do not converge by less than 50-60 mm.
Unsinkability
A radical way to avoid the serious consequences of accidents on the water is an unsinkable boat. It is quite easy to make an undecked vessel with a displacement of up to 0.5 tons unsinkable: foam blocks are glued under the cans and along the sides from the inside; then, in the bow and stern, you can fence off the corresponding. forepeak and afterpeak and fill them with foam. Volume of unsinkable blocks in cubic meters. m is calculated by the formula V=1.2W(1+?), where W is the displacement in tons, 1 is the density of fresh water, ? – mass density of foam plastic. For example, if ?=0.08 tf/cubic. m, then for a boat with a displacement of 0.25 tons you will need 0.324 cubic meters. m or 324 cu.m. dm foam plastic. It seems like a lot, but in a dinghy boat 3 m long, such a quantity can be accommodated without any noticeable deterioration in habitability.
Basic methods of joining plywood and wood
There are two options for connecting parts: sewing and assembly.
Scythians are a do-it-yourself boat made of plywood, drawings of which are often given in detail. They are sewn on special trestles, placing the strongest seams near the nose, since it is more susceptible to stress than others.
Assembly of parts takes place on a flat surface. To implement this, frames are cut out, making grooves for the keel in advance. Frames with frames are installed vertically on the frame, the rims, keel, and stem are secured. Attaching the sheathing begins from the keel, carrying out further construction after removing the frame from the frame.
Sheathing a boat with plywood
According to the working drawing, blanks are cut out of plywood for sheathing the boat's hull.
Subsequently:
- the frame of the boat capsizes upside down;
- all surfaces of the keel and frames are treated with emery cloth and made absolutely smooth;
- the parts of the bottom of the boat are installed in their place and secured with a stapler, after which the fastening points are pierced with nails;
- The side skin elements are first tried on, and then fastened in the same way as when fastening the bottom;
- When gluing workpieces, you should pay attention to the direction of the fibers of the outer layer of plywood. They should be located along, not across, the boat.
Assembly of the structure
When you have the materials and drawings, you need to start working. The first step will be cutting out the parts from plywood. For this, it is best to use a jigsaw. It is important to cut exactly to size, otherwise the design will not fit together.
Then the frames are glued to the rear side; these parts will be very heavy. If the watercraft requires a motor, then the rear side is strengthened.
READ DIY epoxy resin table
The next step will be to attach the transom to the sides and bottom. The sheathing parts must be secured with glue.
After assembling the structure, you need to prepare aerosil and epoxy resin. These substances are mixed 1 to 1. The resulting substance is used to seal seams. Also for this purpose, inside the boat, the seams are sealed with strips of fiberglass.
Important: this type of work uses very toxic substances, so you need to work outside, or in a ventilated area, and using special protective equipment.
When the glue dries, you need to install the frames. Then you need to install seats, luggage compartments and other elements. After the vessel has dried, it is necessary to proceed to the final stage, which is sanding and sealing with fiberglass and epoxy mortar.
This is followed by the process of painting the structure, this will help further protect the vessel from the influence of water and give it a good appearance.
Painting consists of:
- Degreasing of all parts of the vessel;
- Treatment of wooden elements with impregnation;
- Surface putties. This will mask all defects;
- Primers. To do this, you can use boiled drying oil;
- Application of paints and varnishes. To do this, you can buy any paint, but special waterproof materials for plywood will help increase the service life of the boat;
Assembly - detailed instructions, step by step
Making a frame for the sides
The frame is assembled on a workbench and finished on the ground. Place the keel on the workbench, to one side of which the sternpost with a pre-attached transom is attached, and to the other side the stem.
The keel part with attached frames and stems is connected with nails.
You should carefully check for any distortions and, if there are any, make adjustments.
Adjustments can be made by stretching the string between the stem and the transom. After making sure that the axes coincide, you can finally fix it.
A thin cloth or paper impregnated with thick paint or resin is laid between all connections.
After the stems have been secured, you can begin installing the frames.
A cutout for the keel should be made on the frames at right angles. For a tight and reliable fastening of the frame, the cut under the keel should be made 0.5 millimeters narrower than the frame.
The fit should be checked with a stretched rope, which should coincide with the beams. By installing the frames at an angle of 90 degrees relative to the keel, you can finally secure it. After all the operations performed, you should set the deflection angle.
For this purpose, you can use a round or rectangular beam, which is temporarily fixed to the ends of the keel from the inside, and an 11-centimeter beam is inserted between the keel and the beam.
To eliminate lateral distortions, the stems and transom, as well as the beams, are fastened with some kind of beam.
Frame covering
For more economical consumption of material, we recommend drawing out all sheet parts in a reduced size on cardboard and cutting them out.
After this, he will draw in the same dimensions the formats of the plywood sheets prepared for cladding and try on templates on these sheets to minimize the amount of waste.
The contours of parts of natural size when marking on plywood can be obtained by connecting the points found when setting the given dimensions from the axes of the parts using a long ruler or pattern.
All parts are cut out with a jigsaw with fine teeth, taking into account a margin of 2 - 3 millimeters. For subsequent joining of sheets, you will need to add 70 millimeters.
Before gluing, you should align the axes of the parts to be glued using a thread driven between the boards on which the workpiece will be attached.
After the glue has hardened, identical parts of the board should be knocked together with small nails and adjusted together with a plane.
Along both edges of the cheekbones, at a distance of 12 millimeters, holes with a diameter of 2 millimeters are drilled in increments of 50 millimeters for the wire fasteners that will be used to connect later.
Fastening the casing should begin from the bow of the boat, fastening it with copper wire through holes made along the bottom and side. Twist the wire from the outside two or three turns with a slight slack.
Then we sheathe the transom and bottom of the boat
After the sides are assembled, templates A and B are installed and temporarily secured in the positions shown on the layout of the skin drawing.
Having assembled the bottom according to the same principle that was used when assembling the sides, you should install the boat transom and secure it with 3x18 screws at a distance of 50 millimeters using glue.
There is a possibility that the sides will protrude aft beyond the transom; in this case, the edges should be trimmed with a plane.
After all the above operations have been completed, you should finally tighten all the paper clips with pliers and crimp everything from the inside.
Fiberglass
All cracks and joints of the resulting boat should be glued with fiberglass cut into strips.
The first layer must be at least 25 millimeters wide, and the next two layers at least 80 millimeters, however, it is worth considering that the 2nd and 3rd layers should be offset in different directions from 10 to 15 millimeters.
After the fiberglass has completely hardened, cut off the protruding ends of the wire fasteners and glue them with fiberglass on the outside.
The bottom should be reinforced with strips to increase its rigidity and increase its service life. This is done this way:
The prepared strips are drilled for screws in increments of 20 - 25 centimeters. After this, the blanks are laid out in place and attached to screws, marked with a pencil and removed.
The marked areas are treated with glue and the workpieces are screwed back.
After the glue has dried, the screws can be unscrewed and the holes filled with specially prepared nails cut from wood.
After removing the auxiliary devices, all holes in the boat skin must be filled with sawdust or wood flour mixed with epoxy resin.
It is recommended to treat the outer part of the boat with an adhesive mixture and fiberglass; it is also possible to use cotton fabric for this purpose. If you use colored fabric, you can save on painting.
The inside of the body is treated with hot drying oil. To paint the bottom and cans of the boat, you can use regular oil-based paint.
Glue selection
The following adhesive materials are used in the construction of boats:
- Epoxy resins.
- Vinyl ester resins.
- Polyester resins.
Let's take a closer look at the above listed resins:
- Epoxy resin can safely be called a universal resin used in the production of swimming equipment , and has found indispensable application in composite structures and ship repairs. These resins provide the highest quality adhesive joint in terms of performance.
- Vinyl ester resin is essentially a hybrid compound. Increased strength is provided by epoxy molecules. Moderate shrinkage during hardening, and high strength prevents the formation of cracks during hardening. It is also worth noting the increased toxicity of this type of resin and the rather high cost compared to other types.
- Polyester resins can easily be called the cheapest type of resin, used in the construction of ships using plastic.
The main advantage, in comparison with other types of resins, is the relative cheapness of this product. The only disadvantages include the fact that it is used only for gluing fiberglass.These types of resins are used for the construction of boats and yachts and are used to impregnate products in the process of plastic reinforcement.
Regardless of the material, absorbency and adhesion are undoubtedly key to making a quality boat.
Processing methods
Processing plywood and protecting it from moisture can be done in several ways. Here are some of them (the most common in everyday life):
- puttying with PVA glue;
- coating with drying oil;
- treatment with nitro paints;
- gluing fiberglass.
Next, we’ll take a closer look at the best way to process plywood and how to do it correctly.
Protecting plywood from moisture and rot with PVA putty has many advantages. It reliably protects the material from many negative factors. Here are step-by-step instructions on how to complete the protection process:
- Before treating the material to increase moisture resistance, it is placed parallel to the floor and a layer of PVA glue is applied.
- Allow time for the initial layer to be well absorbed, after which it is covered with another layer of PVA.
- Continue the process until glue stains begin to appear on the underside of the sheet.
- The plate is turned over and the impregnation process is repeated.
After the work is completed, the slab is laid on a flat surface and allowed to dry under natural conditions. The disadvantages of this process include rather long processing times. Plywood will have to be protected from moisture for 3-4 days.
A similar impregnation can be done using epoxy resin. But this is quite an expensive pleasure and at the same time not harmless to human health. Sheets treated with epoxy resin are used for exterior use only.
Drying oil is the simplest way to impregnate a plywood board from water. Processing is carried out in the following way:
- The solution (oil for plywood) should first be heated to a temperature level of 600C, due to this its penetrating ability increases.
- Then we impregnate the horizontally located sheet with drying oil using a brush.
- After completing the impregnation process on one side, we proceed to the other.
- Be sure to thoroughly coat the ends of the plywood.
- When the first layer is applied, we begin to force-dry it using an iron or hair dryer.
- After drying is completed, we begin the repeated process of applying drying oil and forced drying.
The number of layers may vary. Stop treating with drying oil only when the solution stops being absorbed by the material (the water-repellent effect is fully achieved).
Why do you need to treat a ship?
Every happy owner of a wooden ship, who bought it or made it with his own hands, dreams that it will serve him as long as possible. This requires proper and high-quality processing of a wooden boat. Measures to preserve the vessel should be taken seriously, otherwise it will become unusable in two to three years without proper care.
The question often arises: how to tar a wooden boat? Before starting this work, the watercraft should be thoroughly cleaned and given sufficient time to dry. If this is neglected, the resin will not adhere well. Now you can start preparing the substance itself (two buckets are enough) so that it becomes liquid. To a very hard resin, it is necessary to add a little waste or fuel oil so that it acquires viscosity. Otherwise, the substance will break off upon impact.
While one resin is boiling, you can dissolve another resin in gasoline and lubricate the inside of the vessel with this solution, then wait for it to dry, then it will not stain clothes. Before impregnating a wooden boat, you need to double-check that the wood is dry. The solution should be applied in an even thin layer. Gasoline will penetrate deep into the tree and destroy all organisms and fungal growths that cause rotting. Such prevention allows us to answer the question: how to treat a wooden boat so that it does not rot. Then the vessel must be turned over and thoroughly watered with liquid resin on the bottom and its underwater part, spreading it with a wooden spatula. The bow and stern need to be treated especially carefully, covering all the cracks. Allow the resin to dry well (up to 24 hours).
There is one more feature that you need to know: how and how to treat a wooden boat so that it does not leak. The whole secret lies in what kind of resin is used. Coal tar will usually quickly begin to break down the wood with its chemical action. And you need to use tar, which will thoroughly protect the wood from corrosion.
Dimensions and drawings
Let's take a closer look at the technical capabilities of the future boat.
Relatively flat and narrowed bottom with a slight rise in the bow and stern. The height of the bow of the side is 540 millimeters, which in turn is greater than that of many motor boats of this class.
To ensure that the high nose does not interfere with visibility, a cut is made along the length of the nose by 100 millimeters. The bow is designed in such a way as to facilitate the embarkation or disembarkation of passengers, as well as loading.
Special cargo compartments are provided under the bow and stern. The design allows for the use of oars and low-power motors of up to 8 horsepower.
Installing more powerful models is not recommended, as this will significantly worsen driving characteristics without a noticeable gain in speed.
This model can be safely called multifunctional, as it is perfect for hunting, fishing and just household needs.
It is possible to install a canopy, in case of bad weather conditions, on a special aluminum structure for which there are nests on the side of the boat.
Maximum length in meters 2.3. Width in meters 1.34
Side height:
- The nose is 54 centimeters.
- The back is 40 centimeters.
- Stern height 45 centimeters.
- The body weight is twenty kilograms.
- Load capacity 180 kilograms.
Possibility of installing an outboard motor from two to eight horsepower.
It is possible to use one pair of oars.
Figure No. 1:
- A) View of the bottom.
- B) Top view.
- B) Transom (blanks)
Figure No. 2. External cladding (sheet preparation):
- A) Board.
- B) Cheekbone.
- B) Bottom.
Finishing of the boat
After all the manipulations carried out, the final stage of finishing work on the body remains.
Sequence of finishing processing of the finished structure:
- Sanding all uneven fragments of epoxy resin with sandpaper;
- Moisture-resistant putty is used to smooth out all defects obtained during the construction process;
- The finished structure is coated with varnish or moisture-resistant paint in several layers;
- Purchasing oars or making them yourself.
To prevent the boat from rotting over time, it is impossible to do without carrying out preventive treatments throughout the entire hull. With constant care and careful use, a homemade plywood boat will last a long time.
conclusions
Building a boat is a fascinating creative process for people who still like to live, who are not afraid to experiment and have a design streak. (see also How to properly make furniture from plywood with your own hands) But, on the other hand, you should not reinvent the wheel, be sure to familiarize yourself with all the photo materials, study the terminology and various design solutions.
Prepare yourself for possible reworking of unsuccessful decisions. Know how to “talk to yourself” and communicate with experienced masters. Only in this case is the success of the entire enterprise called “building a plywood boat with your own hands” possible.
If you are a romantic and choose the usual wind as a source of energy for movement, which means you set a sail, think about a good “shoe” for the mainmast, the reliability of this part of the structure should be at least ideal
In the video presented in this article you will find additional information on this topic.
Original hand-made plywood boats
Sources:
- https://LodMotors.ru/vse-lodki/fanernaya-lodka-bez-smoly.html
- https://FishingDay.org/samodelnye-lodki-iz-fanery/
- https://stroy-podskazka.ru/fanera/sdelat-lodku/
- https://lodka2.ru/sovety-moreplavatelyu/kak-sdelat-lodku-iz-fanery-svoimi-rukami.html
- https://RibalkaNa.ru/sorevnovaniya/samodelnye-lodki-iz-fanery/
- https://fanera-info.ru/podyelki/161-lodki-iz-fanery
- https://bolshoyulov.ru/samodelnye-lodki-iz-fanery-ot-chertezhej-do-spuska-na-vodu/
- https://rubankom.com/materialy/proizvodnye/fanera/1865-lodka-iz-fanery
- https://VolgaMaster34.ru/lodki/shpangouty-iz-fanery.html
- https://boatcity.ru/boat/kak-svoimi-rukami-sdelat-lodku-iz-fanery.html
- https://viascio.ru/raznoe/izgotovlenie-lodki-iz-fanery-svoimi-rukami
