In furniture stores, the price of designer models, those on which the “handmade” sign hangs, significantly exceeds the reasonable and possible mark. Wooden beds look very stylish and modern. The high cost of manufacturing materials makes it less popular. You can save a lot of money if you make your own bed from wood without involving specialists. Self-production will allow you to create a unique model that matches the design of the room in which it will be located.
How to choose wood
Before you start making a bed, you need to choose the wood from which the furniture will be made. All breeds are conventionally divided into two groups:
- Soft;
- Solid.
Soft breeds include:
- Cedar;
- Pine;
- Tuyu;
- Spruce;
- Alder;
- Aspen;
- Lipa.
Hard rocks include:
- Birch;
- Ash;
- Oak;
- Beech;
- Nut;
- Maple.
Each group has its own number of advantages and disadvantages. Wood of only one specific type has some characteristics. A brief description of popular materials for a do-it-yourself wooden bed is given below in the corresponding table.
| № | Name | Breed | Characteristics of the material, advantages and disadvantages |
| 1 | Alder | Soft | It is a popular material due to its low price category. When drilled, alder cracks, so when making furniture from it, it is not recommended to use nails as fasteners. Main advantages: low price, resistance to high humidity (does not absorb water). |
| 2 | Pine | Soft | Low price category. Disadvantages: wood is easily cracked and cannot withstand heavy loads. Advantages: antiseptic properties, air disinfection, not susceptible to wood pests. |
| 3 | Linden | Soft | It is susceptible to the negative influence of external factors; it is adversely affected by sunlight, high humidity and dry air. Linden is used to make interior parts of furniture because it is resistant to mechanical damage. |
| 4 | Oak | Solid | Oak furniture is durable and wear-resistant. Easily withstands heavy loads and is resistant to adverse external factors. Furniture made from this type of wood is elite. The main disadvantage: the high price category, which makes rare oak accessible only to a few. |
| 5 | Ash | Solid | Ash is susceptible to mechanical damage, does not bend under weight, and does not tend to deform over time. It is expensive, but the durability of the material justifies the high price. Requires protection and regular treatment from wood bugs. |
| 6 | Birch | Solid | During fastening of elements, the material does not crack. It has high strength, but an average price category, which makes birch popular. The main disadvantage is the need for special treatment against fungus, which easily infects the array. |
| 7 | Beech | Solid | Beech is a dense material. When properly treated, beech furniture lasts a long time. Changes in temperature and humidity have a negative effect on wood. The material is capable of deforming under the weight of human weight. Belongs to the middle price category. |
Wood hardness
Wood species
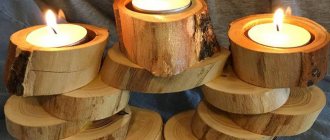
Photo recommendations on how to make a bed
Sources
- https://postroysamdom.ru/krovat-svoimi-rukami/
- https://DrevoGid.com/izdeliya/mebel/krovat/krvt-iz-dereva.html
- https://srbu.ru/mebel-dlya-doma/265-kak-sdelat-krovat-svoimi-rukami.html
- https://novinkimebeli.ru/kak-sdelat-krovat/
- https://mblx.ru/kojka/drugie/1043-krovat-svoimi-rukami-iz-dereva.html
- https://HomeMyHome.ru/krovat-svoimi-rukami-iz-dereva.html
- https://mebel-expert.info/krovat-svoimi-rukami-iz-dereva-chertezhi-i-sborka/
- https://krovati-i-divany.ru/sdelat/14-dvuspalnaya-krovat-svoimi-rukami.html
- https://AmiPlus.ru/zona-otdyha/kak-sobrat-osnovanie-dlya-matrasa.html
- https://HouseChief.ru/derevyannaya-krovat-svoimi-rukami.html
- https://weller.ru/svoimi-rukami/detskaya-krovat-svoimi-rukami-chertezhi-i-foto/
- https://berkem.ru/krovati/detskaya-krovat-svoimi-rukami-iz-dereva/
- https://severdv.ru/mebel/krovati/kak-sdelat-detskuyu-krovatku-samomu-v-domashnih-usloviyah/
- https://stroy-podskazka.ru/krovati/iz-dereva-svoimi-rukami/
Calculation of the quantity of materials
Below is a calculation of the necessary materials for do-it-yourself wooden beds. You can make this bed from solid pine because it is cheap. You can choose more expensive materials. The calculation of the required amount of wood is given in the table below.
| Material | Quantity, pcs | Size, mm | Purpose |
| Board | 3 | 50*100*2400 | Support beams |
| Board | 3 | 50*24*2400 | Decorative finishing |
| Board | 19 | 25*75*2400 | Making a bottom from slats |
| Board | 4 | 200*25*2400 | Frame making |
| timber | 1 | 2400*100*100 | Legs |
Materials
The amount of material is indicated for the manufacture of a bed with a mattress size of 2000 by 1500 mm. This is not a single bed, a bed of this size is suitable for two. If the mattress is of a different size, you will only need to slightly change the length of the boards, but the manufacturing algorithm and sequence of actions remain the same.
In addition to wood, you will also need:
- Self-tapping screws 30 mm;
- Self-tapping screws 60 mm;
- Self-tapping screws 50 mm;
- Acrylic varnish (for decorative finishing);
- Stain;
- Wood putty;
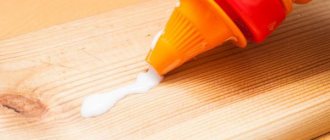
- Solar glue.
The above-mentioned wooden elements are based on the manufacture of furniture without a headboard. By adding a carved headboard, you can create an antique bed with your own hands. In this case, the headboard will not act as a headboard, but rather will act as a decorative element.
Fasteners
Recycled bed
When living seasonally in country houses, you can make a homemade bed from waste from woodworking enterprises. Particleboards are covered with a protective layer of veneer or polymer coating in order to reduce the negative effects of formaldehyde resins.
To make your own bed, you need laminated particle boards, bars and planed boards. A rectangular frame should be assembled according to the size of the mattress. The corner block will also serve as the foot of the bed.
A load-bearing strip is fixed along the perimeter of the inner side of the frame. Now unloading beams are attached to this bar with screws at intervals of forty centimeters. The inside of the frame is covered with laminated chipboard.
It is first necessary to drill holes in it with a diameter of fifty millimeters in random order to ventilate the mattress. The ends of the particle boards should be covered with special strips of the appropriate color and hot glue.
Manufacturing of elements
The sequence of manufacturing elements for the future bed includes cutting materials, sanding them, drilling holes for screwing in self-tapping screws at an angle and fastening furniture elements using wood glue and self-tapping screws.
Frame
To make the frame, two boards measuring 2.5×20×205 cm and two boards measuring 2.5×20×148.5 cm are cut. How to make the frame yourself:
- The cut boards are cut to the required length using a jigsaw;
- The wood is sanded using a sander or plane;
- All four boards are placed at a 90 degree angle to each other. You can check the connection angle using a square. For more reliable fastening, you can use metal corners at 90 degrees;
- For fastening with self-tapping screws at an angle, we make special holes, and after joining the wood with self-tapping screws, the joints are secured with wood glue.
The corner of each board must be ground and rounded. This will ensure not only safety in operation, but also protect the carpenter making the bed from wounds, scratches, splinters and cuts.
For this fastening, 30 mm self-tapping screws are used. Remains of wood glue, before they dry, are removed with a damp cloth. To process the bed frame with your own hands, you can use not only electric, but also hand-held woodworking tools.
Cutting boards to the required size
We polish them
Fastening the corners
Assembling the frame
Base
After the frame is processed, you can begin to make the base for the slatted bottom. It is advisable to install the slats themselves after assembling the bed, so that it would be more convenient to build the remaining parts. Step-by-step diagrams on how to make a bed base:
- To make the frame, boards 50*100*2400 mm are used;
- They need to be cut to length so that it is 202 cm;
- All 3 wooden boards are attached along the base of the bed;
- They can be attached using self-tapping screws and wood glue;
- The side boards are attached using wood glue (clamps can be used to secure the fastening), and after it dries, they are fastened to the boards of the bed frame with self-tapping screws every 25 cm. Self-tapping screws are used with a length of 50 mm;
- Before screwing in the screws, you need to prepare holes for them. This simple operation will make the work easier and help avoid cracking of the wood;
- In order for a homemade wooden bed to be securely connected with your own hands, you should attach the elements to the ends of the frame not only with self-tapping screws, but also with glue.
Selecting lamellas by size
Be sure to make the same indentation
We fasten them with lamellas
Features of inserting lamellas
Headboard
When making a bed from solid wood, the headboard should be used as a decorative element. A backrest is not provided in a wooden bed, since wooden furniture is considered a sign of wealth and luxury. When a carved wooden bed is made, the headboard must be selected in accordance with the dimensions of the base of the structure.
To ensure that a wooden bed does not lose its sophistication and luxury, the headboard must be created either using a wood milling machine, or ordered ready-made. If the external design is not as important as the functionality of the bed, you can make the bed without a headboard, or attach it later, after purchase. A headboard assembled from several parts detracts from the beauty and sophistication of expensive, hand-made wooden furniture.
The headboard needs to be treated and painted with the same materials that were used to create the beautiful frame and base. In this case, the bed will be both functional and beautiful.
Cut out the part to the required size
Making holes
We glue foam rubber
Upholstered with fabric
Supports
The legs will be used as support. They are made from wooden beams. We do it like this:
- From a wooden beam 10*10 cm, 6 elements 10.5 cm long are cut (the height of the legs can be changed according to the specific project);
- Such legs can be made more beautiful if the lower corner of the support is made slightly beveled. This is done at will;
- After this, each leg can be rounded off at the ends and then polished;
- Under each support, and there are three in total (two lateral and one central), two legs are placed. If a decision is made to decorate the legs by beveling the support area, it is not recommended to reduce the support area of the central legs;
- Under the central support, the legs can be mounted not at the edges, but closer to the center. Before fastening the parts with self-tapping screws, you need to drill holes for them.
You need to make marks on the supports where the screws are attached. This will help to avoid the screws from touching and the wood splitting from the load.
Selecting a bar of the required thickness
Determining the optimal length
Cut according to the markings
Making bevels
We fasten the legs
Wood finishing
After making all the parts and carefully assembling the product, you need to clean it with a grinder.
If you don’t have one on hand, you can use sandpaper of different grits. After this, all dust is removed from the product with a brush.
If desired, the bed can be covered with stain of any shade . After it dries, the product is coated with two layers of varnish.
Advice : if you are serious about furniture for the bedroom, try making a dressing table, bedside table or changing table. You might also be interested in a loft-style wardrobe or table.
Fastening elements for solid wood products
During the manufacture of wooden beds, special attention is paid to fastening elements. Among these you will need:
- Wood screws (various lengths);
- Metal corners with a rounded stiffener (to make the wooden structure more reliable);
- Nails (not suitable for all wood).
For more reliable fastening of parts, it is recommended to use clamps.
How to choose self-tapping screws for fastening two specific parts:
- Measure the thickness of the part to which the second part will be attached;
- Measure the thickness of the part that is attached to the main one;
- Add both values (in mm);
- Subtract 10 mm from the resulting figure;
- The resulting value will indicate the length of the self-tapping screw required to fasten the 2 above-mentioned parts.
For example:
- The main part is 55 mm thick;
- The thickness of the attached part is 25 mm;
- 25+55=80mm;
- 80-10=70mm.
To fasten two parts (55 and 25 mm) with a total thickness of 80 mm, it is necessary to use self-tapping screws 70 mm long.
Tools and materials
After making the drawing, purchasing materials and other preparatory work, you need to prepare tools . In the process of manufacturing and assembling individual elements you will need:
drill;- sander;
- screwdriver;
- Miter saw;
- clamp;
- hammer and mallet;
- tape measure and pencil;
- square
Prepare the following materials
- beam;
- boards;
- screws, nails;
- plastic plugs;
- paints and varnishes;
- wood putty;
- Eurobolts.
Assembly
After attaching the legs, you can return the structure to its original position. Now it stands the way it will stand during operation. Further assembly of the bed includes decorating two end and one long side with decorative boards, as well as creating a slatted bottom on which the mattress will be laid in the future.
How to make homemade mattress slats:
- Since the length of all slats will be the same, the length can be measured for only one slats, and the rest can be created by drawing correspondence between its dimensions and the dimensions of the first (reference);
- Each strip must be cut, sanded and holes made for fastenings;
- The slats are laid on the base of the bed at an equal distance (relative to each other), and are attached with self-tapping screws screwed into the prepared holes to the side and central supports. Before attaching the slats, you should mark the places where the legs are attached to the frame, so that when screwing in the screws you do not damage the wood with excessive load. The distance between the screws that secure the legs and slats should be at least 5 cm.
We make slats to size
We polish them
We attach them to the base
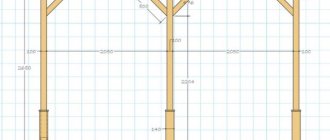
Double bed drawing
After choosing lumber, it is worth considering the future design of the furniture item and its dimensions. To make it easier in the future to manufacture individual elements and follow the strict sequence of assembling the bed, you need a drawing. You can do it in different ways:
- Draw it yourself on paper with a pencil . In this case, you must be able to draw and calculate the dimensions of the product.
- Order from a furniture company . Most modern companies offer not only professional furniture manufacturing, but also design drawings and detailing of all elements. This is a very convenient option. Making furniture this way will cost you a little less than buying it in a store. After the efforts of specialists, you only need to deliver all the parts home and assemble the product in the correct sequence.
- Use special programs on your computer . Here you will need to make preliminary calculations and dimensions of the parts, and you will receive a drawing in different projections.
Which option you choose is up to you. If you know how to draw and do calculations, draw a diagram of the bed yourself. If you have excellent command of a personal computer, use special programs.
Advice : if you want to be sure that the future product will be practical and easy to use, contact a furniture company.
Decor options
Three boards serve as decorative finishing. They can be decorated with carvings, which are made on a milling machine, or with engraving. How to attach decorative elements:
- After cutting and sanding, decorative boards are attached to the top of the frame;
- Wood glue is applied to the ends of the wooden planks, and the planks are pressed with clamps until they are completely secured;
- This decorative finish will not only reduce the risk of injury to the sleeper on the ends of the frame boards, but will also give the bed a more beautiful appearance;
- It is advisable to press decorative boards with clamps using small pieces of wood. They increase the area of pressing 2 boards against each other, and also protect decorative boards from marks left by clamps.
In addition to attaching decorative boards, you can use a carved headboard as decoration, or choose bed designs that include a footboard. As a beautiful decorative element, you can create a special place for the cat at the bottom of the bed, or rather under it. Making this place is easy with just a few boards. To ensure secure fastening, as well as to prevent the bed from creaking, all holes prepared for self-tapping screws must be filled with wood putty after finishing the work. In this case, the bed will not creak while sleeping.
As you can see from this article, which includes step-by-step instructions on how to make a bed out of wood, if you have enough tools and materials, the work can be done at home. Wooden furniture does not belong to the class of simplest furniture; it is considered elite, and therefore is very expensive. There is simply no other way to save on luxury furniture other than making a bed yourself.
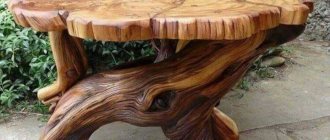
Making a wooden bed of a special design
Sometimes there are cases when it is necessary to have a bed of a non-standard shape or design, these include the following: bunk and house beds, with a lifting mechanism and other technical devices.
How to make your own bunk bed at home
The stages of making a bunk bed are exactly the same as in the case of a conventional design, the only difference is that the two sleeping places are located one above the other.
Bunk bed made of natural wood
As a rule, a bed of this design is intended for children, therefore, during its manufacture and installation, special attention should be paid to such points as:
- the quality of the materials used - they must be able to create a durable and reliable structure;
- Fastening the bed to the floor, and also, if necessary, to the wall, should prevent the possibility of tipping over during use.
For your information! To climb to the second tier, various staircase designs can be used (attached, attached, etc.), which depends on the location and availability of free space, as well as the designer’s creative abilities.
Making your own bed-house
A house bed is also an option for arranging a sleeping place for a child, which can be one- or two-tier, which depends on the number of children in the family, as well as the design idea for such a piece of furniture.
Bunk bed-house with an extension ladder from the end of the structure
There can be a huge number of options for designing a bed of this type, and the only limitations can be the financial component of this process and the design abilities of the design developer. Depending on the gender of the child and his interests, the bed-house may include sports equipment and playgrounds, a work or school corner. Due to their significant overall dimensions, beds of this type are difficult to place in a room of standard sizes, therefore, as a rule, owners of country real estate and large apartments turn to such furniture.
Cabin bed with attached sofa and shelves for books
Features of making your own bed with a lifting mechanism
For owners of small apartments and studio apartments, the issue of efficient use of usable space is very important. One of the options for rational use in this case is the purchase and operation of a bed with a lifting mechanism.
For your information! The lifting mechanism installed in the design of the bed allows you to expand its functionality by adding another one to the main purpose (rest and sleep) - storage of things and bedding.
A double bed with a lifting mechanism is convenient and practical to use
You can make a bed with a lifting mechanism yourself, but you should be aware of some of the nuances of performing the work, which can be formulated as follows:
- the dimensions of the internal space must meet the requirements for them (the volume depends on the height of the legs and the width of the side walls of the product);
- the convenience and reliability of its operation depends on the type of lifting mechanism chosen;
- the strength of the lifting mechanism must correspond to the size and weight of the bed;
- The lifting mechanism fixation design (vertical or horizontal) must meet the requirements for the bed.
For your information! There are three types of industrial lifting mechanisms: manual lift, spring system and gas shock absorber lift.
Lifting mechanism brand MT-46 with gas shock absorber
When making it with your own hands, the craftsman performing the work himself chooses the type of lifting mechanism, as well as the materials used for the load-bearing elements of the structure and its decoration.
Related article:
Furniture made from pallets : photos of the best ideas. What can be made from pallets for an apartment, office and cottage; rules for selecting and processing pallets; master classes on making a table, sofa, bench, armchair and shelving - read our publication.