The socket is considered a complex structure, and carpenters charge dearly for such work. If a house has many windows, the cost of construction increases by hundreds of thousands of rubles. The participant of our portal was far from carpentry, but he and his wife decided that buying good tools would be many times cheaper than paying hired specialists. And now we are confident that casing can be done by anyone with a head and hands.
Romantic retreat Why you need to make a piping yourself How to prepare an opening How to make a bottom How to make sidewalls How to make a bottom lock How to make a top and top locks How to make the final assembly Can be done by mere mortals
Maybe the FORUMHOUSE member with the nickname Maxi Mka would never have made a joint himself (especially since he had never done anything like this before), but his wife, a FORUMHOUSE member with the nickname Asq2013, treacherously gave him a milling cutter and a multi-tool. This is where you need to make a romantic retreat.
And we do it.
Romantic Retreat
One day, while choosing a gift for Maxi Mke, Asq2013 stood in front of a display case with cutters and watched the man who was sorting them out.
— What do you do with a milling cutter? she asked.
- Yes all!
- Specifically, what, for example?
The man thought for a minute and confidently nodded his head:
- All!
Maxi Mka often remembers this story and tries to uncover the router at the first opportunity. And now such an opportunity presented itself.
Installation of casing of an adjacent window opening with a balcony door
If the house is supposed to have access to a balcony combined with a window, you should take into account some subtleties when installing such a structure.
With this arrangement of the opening, the casing cannot be made common; they should be separated by a T-shaped sidewall. The combined side of the door will have a U-shape, which will allow the overall structure to slide parallel to each other without deforming the opening.
The gap left above the window opening should be smaller, and above the door larger. After final shrinkage, the gaps will become equal.
Why do you have to make your own pigtail?
A year has passed since the heroes of our romantic story built a house from 20x15 profiled timber. The house has settled down, the time has come for windows, and therefore frames, because windows in timber houses are installed only with frames.
A thoughtful reading of FORUMHOUSE led the couple to the conclusion that the joint should be:
- finishing;
- U-shaped;
- with quarters;
- window-sill bottom.
This was a few years ago, but even then such a window was worth a lot of money, only for the work you would have to pay about 10 thousand per window, and there are 15 windows in the house! Of course, the owner of the router must do this work himself.
All weekends, days off, and absenteeism in May and June were spent creating the joint. The speed of work grew along with his skill: Maxim took two weeks to complete the first window, and completed the last one in a day and a half.
The photographs show that there is a fairly large gap left between the top of the frame and the opening; and although the house has been shrinking for a whole year, this is correct: a wooden house has been “settling” for several years, and this particular house has not yet survived a single winter with heating.
Asq2013 FORUMHOUSE participant
We decided it was better to seal the gaps rather than re-cut them over the inserted windows. It’s an unpleasant sight when a beam sits on a window.
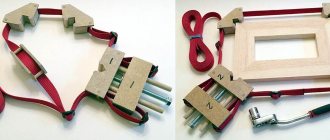
Locks in details
I developed the locks for connecting the parts of the pigtail myself, taking into account both ease of manufacture and practical meaning. Each node has a labyrinth - there is no direct connection between external and internal air.
Useful SketchUp program
The pictures show drawings made in SketchUp. A very useful program. With its help, it turned out to be possible to make 3D models of the pigtail. These models make it very easy to explain the inexplicable to inquisitive clients - how do you make locks?
After studying this program, I am happy to show you how I make them. In this program I developed the latest version of the locks. It is much more convenient to design locks in a program visually than in your head mentally.
What are self-tapping screws for?
Self-tapping screws are required for assembling a workbench and benches, for working with both parts and openings. Usually, when installing a frame, there is still no floor in the house (only beams) or there are rough floors that you don’t dare walk on even after crossing yourself. So I use screws instead of nails. They can then be easily unscrewed without leaving marks from the nail puller.
And the hole from a self-tapping screw is much smaller and less noticeable than from a nail. I also use self-tapping screws to fasten the parts of the frame together. Everything is done secretly. So you won't even see where they were used. This is done to give greater strength to the structure. The design of the pigtail allows you not to use them at all. But I hold it together - the usual protection against a fool.
Sealing the shrinkage gap
A moisture-vapor insulating film is used to seal the required shrinkage gap above the top part of the frame. A film is attached to the outside and inside, and the insulation inside is roquewall or any other soft insulation such as roquewall.
How to prepare an opening
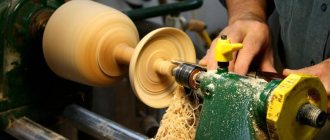
The first step to creating a frame is preparing the opening. Maxim: marked the future thorn; I made a cut with a circular saw along the entire outer perimeter of the pigtail; stepped back inside to the depth of the tenon and made a through cut with a chain saw. The width of the window is determined by the external cut, because the side frame will rest on it.
Maxi Mka User FORUMHOUSE The width of the tenon turned out to be equal to the width of the beam minus two cutting depths of the circular saw, which was about 45 mm. The height of the spike is 35 mm. The height of the wind spike under the lower part is 10 mm.
The most delicate part of the work here is cutting with a chain saw. Here you need to proceed like this: first cut 1-2 cm from bottom to top, make the remaining cuts from top to bottom. The hardest thing was to saw horizontally; no matter how hard Maxim tried, the saw would drift away.
Pipe design
Regardless of the manufacturing method, the main parts of the frame are.
- Vershnik. Its purpose is to hold the upper ends of the sidewalls in a static position. Essentially, this is a horizontal casing strut. At the same time, it provides a shrinkage gap into which the sealing material is placed.
- Threshold. The lower part of the pigtail. In window openings this is the window sill. It solves a problem similar to that for the apex, but it is this element that bears the maximum load, and therefore great importance is attached to its strength.
- Sidewalls (carriages). Vertical casing elements installed on the sides of the opening. The function is to ensure the “sliding” of the walls of the house (up/down) when the wood shrinks.
How to make sidewalls
Maxim bought some of the timber for the sidewalls, and cut some from the remaining profiled timber that was left over from the construction site. (As Maxim said on another occasion, nothing human is alien to him, and with all his perfectionism, he tries not to slip into snobbery). The timber that remained from the construction site was dry, but cracked in places, and Maxim dug into it for a long time until he found a suitable one of good quality.
Then I adjusted the size, cut the profile and leveled it with an electric planer, selected a groove and a quarter.
Maxim increased both the width and depth of the groove by 4-5 mm in order to leave room for the jute and compensate for possible unevenness of the tenon. It would be faster with a circular saw, but with a router
- You can and should do everything.
- It turns out to be more accurate.
The quarter dimensions that Maxim settled on - 70x30 - are a compromise between his inner carpenter and his inner window maker. 70 is the profile width, and 30 is 10 mm for overlap and 20 mm for foam. Window workers always say that you need more, then the foam will fall better. But the carpenters stick to their line: you have to do less, otherwise you’ll weaken the sidewalls!
Suitable formats and sizes
The edging of openings is necessary in houses made of ordinary, planed and profiled timber. Highly recommended for houses made of dry and laminated timber. The main reason for its installation is the phenomenon of shrinkage, that is, a decrease in the volume of wood when drying. When shrinkage occurs, the height of the cut openings decreases, and the timber in the walls can rotate and crack.
about casing and windows in the comments and get a qualified answer. The questions are answered by real people who have been working on the glazing of wooden houses for many years!Go to comments
If you install windows without casing in a house built from freshly sawn or dried timber, then soon through gaps will appear between the beams on both sides of the window to the street - the timber will hang on the screws that secure the window. There will also be a suspended beam that rests on the frame from above.
To prevent this from happening, casing boxes are installed in the openings. For timber houses, T and P type sockets are suitable. It is easy to distinguish them, look at the end of the pigtail - it will look like the corresponding letter.
P-casing and a quarter.
T-casing made of solid wood with a glued tenon.
Recommended dimensions for walls made of 100 mm timber
| Planed timber with natural humidity | P – casing 90 mm thick. Thin walls tend to shrink a lot; a strong box is needed. |
| Profiled timber with natural humidity | |
| Dry profiled timber | P and T casing with a thickness of 55 mm. |
| Glued laminated timber |
Recommended dimensions for walls 145 – 150 mm
| Planed timber with natural humidity | P- and T-pipe with a thickness of 55 mm. |
| Profiled timber with natural humidity | |
| Dry profiled timber | |
| Glued laminated timber |
Recommended dimensions for walls 200 – 220 mm
Casing in an embedded block carries a lot of hidden costs and delayed problems. Therefore, I will not recommend it. Read more in the article “Basics of a warm house - once again about casing in embedded timber.”
How to make a bottom lock
In fact, it turned out to be somehow too simple for the word “lock”: I sawed off the bottom on three sides by 20-40 cm with a circular saw, and - please, get a spike. If there is a quarter, then on the third side you need to saw off to the depth of the quarter.
Then I placed the side panel on the bottom, outlined the tenon - all that remained was to select the groove using this marking.
No matter how perfectionist a novice carpenter is, he is still a beginner. No matter how hard Maxim tried, on the first windows he was distressed to discover that the side frame fell into place with gaps up to 3 mm wide. And here the main tool of a novice carpenter came into play: a grinder with a grinding wheel.
Maxim KaParticipant FORUMHOUSE
We trim it here, trim it here, try it on - and so on 10-15 times. The main thing here is not to rush. After all, you can cut off what is unnecessary, but you won’t be able to put on what has been cut in vain.
With a little effort, the gap in the visible part of the connections does not exceed 0.5 mm.
Jewelry work!
Filing the casing
The frame for plastic windows can be of various shapes: rectangular, triangular, polygonal in the form of a trapezoid with beveled corners, balcony blocks, entrance blocks, octagon and even circle.
In each case there are features of filing the casing corners. It is the correct filing of the corner joints of the casing structure that ensures the rigidity and tightness of window openings.
Filing the corners of the frame is a labor-intensive process that requires accuracy in the dimensions of the tenons and grooves, an even plane of contact of the risers and window sills. Maybe someone read on the Internet about a unique old Russian method.
This method is not unique, but it is the only correct one. This is done by everyone who knows how to make a joint and who cares about customer reviews. And this is the best advertising.
How to make a top and top locks
Having adjusted the lower locks, Maskim cut the sidewalls clean to the height (then he always left 6 cm for shrinkage).
First, I made a top with a quarter and tenons for locks and sawed out the corresponding shape in the sidewall. I made the cuts so that the openings at the top were the same as at the bottom. Using a grinder, I brought the product to perfection: the apex fit in freely, but not too much so that after laying it with jute it would be “tight.”
Maxim KaUser FORUMHOUSE
There is a transparent logic in castles. Understanding it is more important than specific dimensions.
The main tasks solved by the pigtail
The formation of a gap between the upper beam and the window opening, which ranges from 5 to 8 centimeters.
Organization of a strong connection of logs located horizontally in the window area. Organizations of structures intended for installation of windows.
Important. The casing in a wooden house does not rigidly tie the structure to the house; it can move freely if the house shrinks.
Installing a frame (casing) in a wooden house is a necessary and important event that should not be neglected. By installing the joint on time, you will save yourself from problems that may arise in the future.
Source: profibrus.ru/okosyachka-svoimi-rukami-v-derevyannom-dome.html
How to do the final assembly
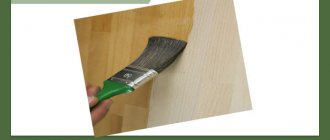
Having assembled the entire casing in rough form, Maxim disassembled it and processed it with belt sanding. Along the way, I had fun with the edge cutter and made some nice curves on the windowsill. The wife polished the product with an eccentric, treated the openings and parts with an antiseptic, using a flower sprayer from a flower shop, so that not a single millimeter in the grooves remained unantiseptic, and covered it with the first layer of oil.
The finished openings were insulated with jute and all casing parts were finally installed with sealant. The spacers are there for safety - after installing the windows they will be knocked out.
All people who build a house are looking for the correct sequence of actions: what should be done first: the floor, the frame, or paint the walls? I want the house to settle better, so it’s better to do the framing later, and at least sand and prime the walls to preserve them, but you also need a floor, at least a rough one, so you don’t jump on the joists! But at the same time, there is always so much garbage from the joint, sawdust, oil from the chain splashes on the walls - so, should we start with it?
Maxim KaParticipant FORUMHOUSE
And a house without windows is not alive, and I want to install windows as soon as possible. This point is psychological, not technological, but it also has to be taken into account.
Therefore, for this wonderful family, the process lined up like this: Maxim was “mowing” in one room, while Asya was painting the walls in another. Then, in order to save the labor of his beloved wife, Maxim had to cover the freshly painted walls.
The main types of pigtails in a wooden house and their manufacturing technology
The pigtail “in the embedded block”.
This type is a prefabricated structure. A block measuring 50 cm x 50 cm is installed in a cut-out groove prepared in advance. This block will be the main guide for moving the log house vertically. In a wooden house, the frame (casing) is made up of edged boards measuring 50 mm x 150 mm or 50 mm x 200 mm, based on the thickness of the logs.
This technology is highly popular for 2 reasons: 1) due to rapid production and subsequent assembly, 2) due to its relative low cost.
Okosyachka "In Shim Monolith". This technology involves making a casing in a wooden house from a solid rectangular profile beam. Its installation is carried out in a groove in the log house, which is cut in advance. The function of the top (upper horizontal jumper) is performed by an edged board, the thickness of which is 50 millimeters.
The “in the deck” socket is the most common method of casing among the people. Installation involves cutting a groove into a monolithic casing, which is made of rectangular profile timber. The function of the top is performed by an edged board with a thickness of 50 millimeters.
The ridge, which is cut into the end of the log house, serves as a guide for moving the log house. The racks on the sides are also made of timber. At the same time, “blocks” are made, inside of which a groove is cut in the center (50mmx50mm in size); when making them, it is important to take into account the thickness of the logs.
Having laid the thermal insulation in advance, the decks are placed on the ridge, and the racks are attached to the lower supporting crown using pins or wooden dowels. The top is placed on top in a spacer; it is secured with self-tapping screws to the side casing posts.
Pit "in a spike with a ready-made slope." A groove is cut at the end of the opening. A block (50x50 mm) is installed into it through the seal. This block is a guide for the vertical movement of the log house.
More on the topic Standard sizes of plastic windows according to GOST
To make the pigtail, this method uses a glued carriage, which is made from coniferous trees, its thickness is 50 millimeters. Then, on the frame, an “internal quarter” is made from laminated veneer lumber for the installation of window structures. The frame is secured to the opening using self-tapping screws.
In order to facilitate the process of installing a window frame in a wooden house yourself, we present its main stages.
Main assembly steps
All operations for the production of pigtails are strictly regulated and are usually performed in the following order:
- preparation (marking and cutting) of the corresponding opening;
- its design to match the casing option you have chosen;
- installation of the casing itself;
- installation of a window or door block in it.
Stages of installation of the frame
When preparing the seat, it is necessary to clarify its dimensions, taking into account the distance to the floor level. For windows, in particular, it should be about 80–90 cm. After this, the opening is marked with the obligatory use of the simplest tools for checking - a plumb line and a level.
The dimensions of the opening should be approximately 40–60 mm larger than the dimensions of the window structure, which is due to the need to leave shrinkage (compensation) gaps.
Depending on the manufacturing technology you choose, the work on designing the opening for the frame includes preparing a groove or ridge in it. The installation of the casing is also carried out taking into account the characteristics of the selected type of casing technology, that is, in compliance with all the rules and assembly procedures for this structure. At the final stage of the work, the window or door block is directly installed in the prepared casing.
Custom shaped window frame
When making a pigtail with your own hands, you should always remember that its use is justified only when the age of the house does not exceed 10 years. For long periods of time, the use of these technologies is not necessary, since the structure has already completely exhausted its shrinkage resource.
Video
This video shows how to make a casing on a plastic window in a log house:
Options for locking connections
Photo: types of box connections
The casing can be made and fastened in several ways. It is impossible to say that one of them is definitely better. Each has its own characteristics, which we will analyze in more detail.
Spike monolith
As soon as profiled timber with ready-made recesses (bowls) began to be sold on the construction market, tenon casing immediately became popular. Since the elements come ready-made and there is no need to cut anything additional.
Its other name is T-shaped. It is used in houses made of timber, where the wall thickness is from 100 to 150 mm, or from rounded logs (small diameter).
Let's take a step-by-step look at how to properly make such a lock:
- Align the opening with a hand or chainsaw.
- Perform markup. Draw vertical lines along the center of the ends. Retreat 3 cm on each side.
- According to the markings, cut niches for the tenon.
- Coat all wooden elements with antiseptic.
- Using a milling cutter, cut out a beam in the shape of the letter T of the required dimensions.
- Treat the side parts of the pigtail with antiseptic again. Secure them with self-tapping screws.
- Secure the top jumper. Leave a gap of up to 5 cm so that the insulation fits well, but there is still free movement during vertical shrinkage.
- Fix the window sill board.
- Caulk all cracks and joints.
- The side parts can be covered with special tape (optional).
In the production of finished elements, there are options when the tenon is simply glued into the body. But it is much better when the tenon and base come together in one piece.
If you are installing the casing yourself, then it is strictly not recommended to use polyurethane foam as a sealant. It prevents normal shrinkage and can cause deformation of openings.
Deck
Another name is U-shaped. Often used in the construction of log houses and rounded logs. The lock in the deck is characterized by increased reliability and durability.
This involves sawing out a tenon at the end of the wall where the vertical elements will be attached.
U-shaped casing helps reduce the load on door and window openings. Often a quarter is selected from the outside for mounting frames (for windows, doors).
Mortgage beam
Considered a quick, inexpensive installation option. Such a casing box can be manufactured and installed on your own.
A box is assembled from boards of small width, mounted in an opening of suitable dimensions, and fixed with self-tapping screws.
Despite the speed of assembly, experienced builders recommend using embedded timber only as a temporary option while the frame is being assembled. Upon completion of construction, an additional wide board should be attached to the beam, to which the frame should then be fixed.
There is no point in reducing costs by using conventional timber. This threatens to bend the pigtail and nullify all efforts to install it. You need to take only chamber-drying timber.
In baths made of different materials
The material of the walls is the main factor influencing the choice of method of fastening the window in the opening. Let us remind you that a bathhouse can be built not only from wood (and this is not only timber or a log house, but also a frame structure, because the frame is made of boards), but also from block material - brick or one of the cellular concretes (foam concrete, aerated concrete).
Made of brick
In order to facilitate installation into a brick wall, even at the stage of its construction, so-called “mortgages” - these are bars between the bricks where the future window will be attached. The openings themselves in brick buildings are completed either with a lintel beam or with a brick “castle”.
ADVICE! There may not be any mortgages. This is not a hindrance to installing a window. If they exist, but the bathhouse is old, then before installation you should check the condition of the bars. To do this, take a regular shoe awl and drive it about a third of the way into the block. It’s good if you didn’t succeed or had to make an effort to both stick the awl in and pull it out. Only in this case is the tree still suitable.
dowels or anchors are best suited for brick Of course, you need to drill the frame first, but if there are no embedded bars in your window opening, you don’t need to drill anything in advance - first try the frame into the opening so that the fastening does not fit into the seam between the bricks, but into the bricks themselves . After this you can remove it and drill it.
IMPORTANT! The dowels must be taken as long as possible so that at least 6-10 cm of the total length is buried in the brick itself. And if hollow brick was used during construction, then it is recommended to use 202 anchors instead of dowels.
Anchor plates are also sometimes used for fastening in brick, but this is difficult even if the brick is not hollow, and in a hollow brick such fastening is not used at all.
Doors for a bath: designs, choice of materials, instructions for self-assembly and installation
Windows to the bathhouse: sizes, types, features, construction installation technologies
The plastic window does not close - causes of problems and their elimination
Types of doorway casings
The window frame allows you to strengthen the walls in the openings and prevent their curvature. If the distortions have already occurred, then the pigtail can correct the situation by fastening them and aligning them. It also protects the house from the penetration of cold air and moisture. At the same time, warm air remains in the room - the window acts as a sealant.
The pigtail allows you to prevent shrinkage of the house, stop the processes of its destruction and deformation.
The pigtail not only protects the house from destruction, but also has a beautiful appearance. The sapling may differ by type. They differ in manufacturing and installation methods and in price.
There are several types of doorway casings
- Chernovaya. High-quality casing at low cost.
- Finishing. This option does not require cleaning the slopes.
- Eurocasing. There is also no need to clean the slopes.
- Power. It is usually installed in arched openings, large windows and large doorways.
- Combined. It is inexpensive and stylish in appearance.
- Arched. Consists of solid pine.
The production time for different sieges depends on the size and quality of them. It is important to choose high-quality materials, as well as calculate the dimensions of the casing in advance. Today, manufacturers offer a wide range of inexpensive, but quite practical and durable casings.
Method N 1. Installing doors using a special casing
The procedure for carrying out work by installing a special casing is as follows:
- The first step is to cut out the opening intended for installing the door frame. It needs to be cut in such a way that half of the log or beam remains on top and bottom.
- Next, using a cutter, you need to cut a groove at the end of the opening measuring at least 50 × 50 millimeters. You can use a chisel to adjust the size of the groove.
- A beam is inserted into the resulting opening. It is necessary to take into account its length. If the log house is new, then the size of the timber should be 5 centimeters smaller. If the structure has already shrunk, then the length of the beam should be less than 2 centimeters.
In some cases, the timber needs to be strengthened. This can be done using a board with a thickness of at least 50 millimeters, and its width must be no less than the size of the wall.
Sometimes, instead of timber, metal channels of appropriate sizes are used. Additional reinforcement of the opening is important when constructing heavy buildings, for example two-story buildings.
After the beams are fixed in the side parts of the opening, a threshold should be made. To achieve maximum strength, a timber with a thickness of at least 10 centimeters is used, which must be cut in a T-shape.
Method No. 2. Circular casing made of timber
Installing doors in a log house using the second method can also be done with your own hands. The principle of its implementation is not much different from the first. All you need to do is install the blank under the box, following the rules mentioned above.
In other words, it is necessary to install bars around the entire perimeter of the opening. They can be fastened to each other in several ways:
- tongue and groove method;
- self-tapping screws;
- nails.
In addition, it is possible to install the casing without the use of fasteners. To do this, you need to fit the bars as tightly as possible to each other.
It should be noted that in most cases, the construction of log houses is carried out according to this principle. The pressure created by the weight of building materials is quite sufficient for the stability of the structure. The bars must be installed by surprise.
What tools will be needed for installation?
When deciding how to make a doorway and insert a door, first of all you need to decide on the tools necessary for this work. They must be at hand at all times. This will allow installation to be completed as quickly as possible. To carry out the work you will need:
- chainsaw or electric saw with a bar;
- hammer;
- perforator;
- circular saw or manual milling machine;
- chisel;
- construction measuring instruments: level (preferably laser), tape measure and square.
As a rule, searching for tools will not take much time, because all of them, one way or another, were used during the installation of the log house. Having prepared everything you need and understood how to install the door correctly, you can begin work.
Technological stages of casing installation
For successful installation of the pigtail, compliance with the technology will be a prerequisite:
- an opening is cut in the wall, which is located at a height of 80 cm from the floor;
- a groove or ridge is cut out - this depends on the type of casing chosen;
- all wooden elements are impregnated with an antiseptic solution;
- insulate the opening around the perimeter using thermal insulation materials.
The casing box is installed with mandatory compliance with the technology.
Measurements to order the manufacture of plastic frames must be taken after preparing the opening and installing the casing . This avoids incorrect sizes.
Methods for making casing boxes
Among the known methods for manufacturing casing boxes, the methods described below are most often used.
"Into the embedded block"
Jigsaw with embedded block
Such a frame is a structure consisting of a block with a cross-section of 50×50 cm and an edged board of 50×150 mm or more (depending on the size of the logs). The mortgage or guide bar is attached to the sides of the structure in such a way that the crowns of the log house can freely move along it as if along a guide (if there are appropriate grooves in them).
The widespread use of this method can be explained by its low cost and ease of implementation.
Differences in casing for windows and doors
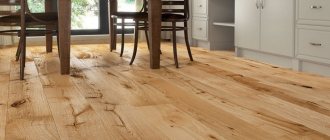
The lower part of the window opening casing can serve as a finishing window sill. Its appearance can be customized to suit your taste. For example, move the window sill inside the room and expand the protruding part to the sides. This is called “with ears.”
In another case, if the window has a plastic window sill, the lower part of the window casing is made thinner than the other parts. This way it retains its function and does not interfere.
Bottom with ears = excellent wooden window sill
Window option with a plastic window sill. It also looks harmonious.
The door frame can be supplied without the lower part. In this case, the bottom of the side panels is screwed to the wall with self-tapping screws - wood grouse. This method is optimal if you plan to have a threshold-free floor. Door casing without a threshold is often used. The technology has been proven and the guarantee remains in full.
Casing without threshold on internal doorways.
This is where the differences between window and door frames end. Their side parts and top are the same.