Wood carving: photographs, drawings and sketches
The main key to success in creating interesting things with slotted carvings is the choice of pattern. It is he who conveys the overall concept and sets the aesthetic tone for the entire product.
The easiest way for beginners is to make geometric patterns, as in the photo.
Carved designs of floral and animal themes are classic ornaments for any field of application.
Inscriptions are a modern option for using wood and plywood carvings. At the same time, you are unlikely to be able to find drawings and sketches on the Internet - they will have to be compiled purely individually according to personal requirements for sizes, fonts, and words.
Plywood constructor
Various plywood construction kit drawings are now gaining more and more popularity. Assembling such models from safe material is a very useful activity for children and teenagers. Such crafts will become good examples of collections and will decorate the modellers' corner.
Tank
The photo shows drawings of a plywood tank: top of the hull
Tank bottom
Tower details
Other elements of the tank
The stages of installation of the tank model are as follows:
- The plywood is sanded (first with medium-grain sandpaper and then with fine-grain sandpaper);
- The drawings are carefully transferred through carbon paper onto sheet plywood material sanded with fine-grained abrasive.
- In the corners of the contour transfer, through holes are drilled with a drill (drill 3 mm or more);
- Attach the file to the jigsaw and start cutting out the elements of the tank;
Sawing can be done even by a child
Note! Cutting out parts must begin inside the contours of the tank blanks, and only then around the office itself.
- After cutting out all the parts, sand them again with sandpaper, removing the burrs left from the file;
We polish every detail - Start assembling the parts.
Advice! When assembling the model's plywood assemblies, have different types of needle files on hand so that you can fit the elements together at any time.
- After adjusting all the parts, you can start gluing them (for example, with PVA glue, “Titan”);
Advice! In order for the components and elements of the tank to grip each other more firmly and reliably, you can tie them with thread or rope for a while after gluing them.
- The cannon can be made by cutting the wooden handle of a watercolor brush or from other auxiliary material;
- If desired, you can apply a side number or other inscriptions and patterns to a tank, or any other model, using an electric burner;
- For greater preservation and decoration of the model, they can be coated with varnishes and paints.
The model of the tank is made of plywood with a thickness of (3 – 5 mm), the plywood elements were sanded, joined with “Titan” glue, primed and coated with acrylic varnish and paint. The photo shows the result of the actions described above.
Car – retro (old Mercedes)
Model of a retro Mercedes car
Note! When you transfer these drawings of a plywood machine with your own hands onto the plywood sheets themselves, do not forget to transfer the numbers.
Mercedes parts (1)
Mercedes parts (2)
When assembling the model itself, look carefully at the numbers.
In this case, the process is carried out according to the following algorithm, in accordance with digital notations:
- the part or assembly numbered 1 must be connected to another number 1;
- and part number 2 is attached accordingly to the next number 2 and so on until the machine is assembled.
Gun
Model of a pistol of the Bulldog type M19
Drawings of a pistol made of plywood of the Bulldog model. When assembling, we follow the same rules as when assembling a machine: the same numbers must be mounted with each other.
Pistol parts(1)
Pistol parts(2)
Advice! This model of pistol is best coated from a bottle of spray paint; for a better resemblance to the original, layers of black paint can be applied.
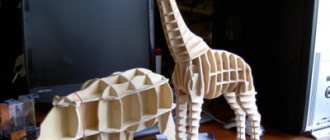
Dinosaur
It’s not difficult to make a model of such a dinosaur; it’s just a matter of patience when cutting out the parts with a jigsaw.
When designing, drawings of plywood dinosaurs, for example, those presented below, can be made in any scale you need according to the presented pattern in a drawing program for a computer.
Preparing the material, model elements and the assembly itself is not difficult, but you will have to have some patience when working with a jigsaw and adjusting the model components to each other.
Parts for assembling a dinosaur
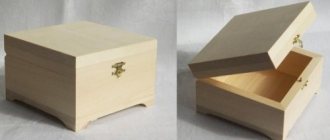
Napkin holder – “Grape leaves”
Very light + simple + necessary detail in everyday life
This item in the shape of grape leaves is always useful in the household for its intended purpose - for napkins, and for storing, for example, sheets of paper of the selected format:
Drawings of a plywood napkin holder: before varnishing, staining or painting a plywood blank, you need to burn out the pattern
Napkin holder base with technological slots for attaching vertical parts, in the shape of grape leaves
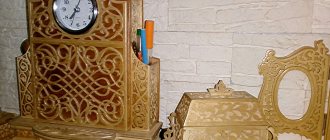
Vase, stand for pencils, pens, brushes
A vase that can be used for sweets, for writing objects, for storing other small household items.
Drawings of a plywood vase, from which you can easily cut out a craft of the size you need:
Stand, with holes for fastening the side walls of the vase
Side, prefabricated walls of the vase with holes for attaching to each other
Plywood panel
It is the ease and simplicity of cutting out plywood sheets of various configurations with different sizes with a jigsaw, and installing various structures from them, that allows us to create a variety of decorative panels for the walls of our homes. Any panel made carefully is an excellent gift for family and friends.
Panel – “butterfly shelf”
Drawings of a plywood panel, which also serves as a shelf in the household:
A panel in the shape of a butterfly with a hole for a shelf (the shelf can be made shaped, rectangular, or semicircular).
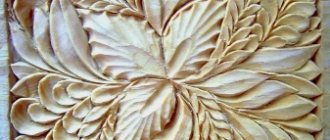
Stencils for slotted threads
However, unlike cut-out inscriptions on plywood, drawings with plant, animal and fantasy themes can be found on the Internet. So feel free to choose the stencils you like for your album, and you’ll have plenty of ideas for creativity for a long time!
The simplest sketches are suitable both for training at the very beginning of product manufacturing, and can become individual elements of a complex design. For example, this is how carved houses are decorated.
More complex templates will require some skill and patience, but the results are worth it. Such pictures can serve as an independent product, even as a gift.
Entire compositions with an idea and meaning usually serve either as a separate work or form the basis of a work.
Photo gallery: patterns of animal, bird and insect figures
The fox figurine will take its place in the garden
Swan figurine template
Cat hanging on the fence Rooster looks good on the roof
Butterfly made of wood
Geese are flying
It would be great to place a hedgehog under a tree
The mouse sits by the fence
A snail figurine will decorate a pond
Craft a swan from plywood
Stork carries a baby
The frog can be placed on the fence
The stork will decorate the pond
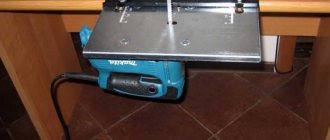
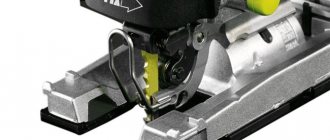
Tools for slotted carving: jigsaw or router
However, choosing a design is only a third of the success. Another important aspect that must be considered before starting the work itself. Namely, the choice of tool that will be used to carve wood or plywood.
Depends on the equipment:
- how thin the thread will be;
- complexity of pictures;
- cutting speed;
- accuracy of work.
Therefore, it is important to evaluate all the pros, cons, capabilities and limitations of each of the traditional sawing tools:
A jigsaw is a device for shaped cutting of parts. Working with a hand tool is quite labor-intensive, but it allows you to cut very accurately according to the drawing. Power tools allow you to quickly produce shaped plywood products, but require caution.
A milling cutter is a tool thanks to which a flat-relief slotted thread takes on a thinner and more complete appearance. It is with its help that you can round edges, remove chips, make valances, and carry out the most complex cutting.
Theoretically, a milling cutter can do the same work as a jigsaw, and even more, but in fact, such handling of the tool is fraught with its rapid failure and frequent replacement of the frieze.
Operating procedure
To obtain a high-quality product and minimize the formation of defects, you need to do the work slowly and focus on the process. Before starting work, it is recommended to make sure that the thickness of the plywood is equal to the height of the groove on the printed sketch.
Preparing the stencil
Schemes for sawing with a tool can be of different sizes. To create a drawing of an interior item, for example a shelf, you will need to use whatman paper in A1 or A0 format, and for toys you can use a standard sheet of cardboard.
The contour of the product is applied to the surface in compliance with the exact dimensions. Templates for cutting with a hand jigsaw can be found on special resources. But it’s easier to come up with your own compositions based on the type of workpiece. An individual approach to developing a product design will highlight the texture of the wood.
Transferring an image to the surface of plywood or boards
To accurately apply a contour to the surface of plywood or wood, print the template on thick paper. Transferring a drawing from an A4 drawing can cause a lot of trouble if you draw the ornament with a pencil.
In order to apply contours and complex patterns, you can use auxiliary methods. One method involves using carbon paper. To do this, the carbon copy is placed on the workpiece. Place a template on top and draw lines.
The drawing can be glued to the plywood with 2-sided tape. When using glue, you need to clean the surface with sandpaper. An accessible method involves using a stencil made using nail scissors. After preparation, the template is applied to the surface and each fragment is outlined with a pencil.
For convenience, the sheet is secured with tape or insulating tape. The design can be applied thermally. For this, an inkjet printer is used, with which the diagram is printed. After this, the design is applied to the surface with the front side and processed with a heated iron.
Sawing process technology
Sawing from plywood is carried out after applying the drawing to the workpiece. Processing begins with the internal elements of the product, and then the outer contour is cut out. This order of work allows you to get a straight line and provides convenient fastening of the workpiece.
Holes for the blade must be drilled in sharp places on the internal contour. This requires attention as chips may form on the back side. To avoid this, it is recommended not to make the holes completely.
You can limit the depth using insulating tape that is wrapped around the drill. After this, turn the workpiece over and process the hole with an awl. After finishing the work, the product is polished using a file or needle file.
Small elements require delicate handling, so it is recommended to be smart when processing. To do this, cut a thin strip of sandpaper and insert it into a jigsaw file instead of a blade.
Sawing with hand tools requires the equipment of a special machine with a clamp. This device is used as a base. During processing, the workpiece is fixed at chest level, which provides convenience and allows you to closely monitor the process.
For beginners, it is important to be careful when using a jigsaw in order to practice smooth movements. The cutting blade for a jigsaw is fragile, so it is recommended to avoid distortions, sudden movements, and overheating.
When processing a workpiece, the movements must be reciprocating, and the tool must be positioned vertically. Using an electric jigsaw requires securing the workpiece to a workbench. When using this equipment, workpieces up to 5 cm thick can be processed.
Defects in work
If the workpiece processing technology is violated, the tool may shift. A jigsaw may cut crookedly if the tool is tilted or improperly fastened. If the blade gets stuck at the stage of forming the figured elements, then you will need to carefully draw a new line located parallel to the fragment with the defect.
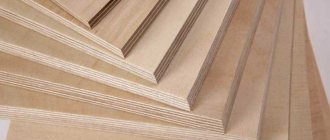
Materials for slotting threads
In most cases, plywood is chosen for this type of work - it is uniformly thin, has a pleasant color and structure, and does not suffer from further use or storage, unlike solid wood. It is the choice of material that becomes the third pillar of successful work.
The modern market is replete with different types of materials, so it’s easy to get confused. For this work you should choose:
- FC plywood – harmless to humans and the environment, durable, easy to cut, practical;
- FB plywood is also safe for humans, but resistant to aggressive environments, since it undergoes special processing and receives a protective coating, which is why it can cost an order of magnitude more.
Note! Under no circumstances should you choose FSF class plywood for interior work - it is treated with carcinogenic preservatives and is suitable for use only in the fresh air - they are excellent for lining a bathhouse or a house outside.
Characteristics of plywood
Plywood is a multi-layer, sheet building material made from veneer of deciduous or softwood by gluing several layers into a single sheet. Due to the peculiarities of the arrangement of the fibers (at one angle), the sheet usually has an odd number of layers - three, five or more. If coniferous varieties are represented in several plywood (fir, spruce, pine), then deciduous ones are mainly made of birch. There is also a combination - a coniferous “filling” and birch cladding, in which case the plywood will still be birch. The best is entirely birch plywood, but it is also the most expensive.
The material is divided into varieties and brands, depending on the decorative effect and the chemicals used in production. There are five grades, differing in the quality of veneer and the appearance of the sheets:
- Elite grade (E) - no defects on the surface of the material, uniform, monochromatic, smooth texture without knots, cracks, wormholes or repair inserts.
- First grade (I) – there may be microcracks (up to 20 mm) and knots of small diameter on the sheets.
- Second grade (II) - even fused knots are acceptable if their number does not exceed ten pieces per 1 m² of sheet and their diameter does not exceed 25 mm. There may also be some wormholes and veneer repair inserts.
- Third grade (III) – fused knots without quantitative restrictions, voids in place of fallen knots, up to a dozen wormholes (up to 6 mm) per 1 m² of sheet.
- Fourth grade (IV) - the sheet must have a strong adhesive connection, peeling is unacceptable. The entire spectrum of appearance defects - in almost any quantity, but the diameter of wormholes, knots and voids - no more than 40 mm.
The grade concerns only the outer layers of the sheet and is indicated by two numbers, and the grade can be either common to both sides or vary, more often within the same grade - I/II/II E/I and so on. Except for the fourth, lowest grade, all other grades of plywood are sanded on both sides, and the elite grade can be additionally varnished.
Naturally, the higher the grade and decorativeness of the material, the more beautiful the finished product will be. But considering that the cost of the elite, and even the first grade, is decent, and the parts cut out are most often small in size, you can use a lower grade if you actually cut a high-quality blank from the sheet. The plywood from which the workpiece will be cut should not have knots - they may fall out and other defects. They also pay attention to the ribs - you cannot cut out masterpieces using fragments with voids in the middle layers.
The grade of plywood and its main characteristics are determined by the chemical compositions used:
- FB – impregnation of veneer with bakelite varnish, which provides resistance to high humidity.
- BS – bakelite glue (alcohol-soluble), provides high performance characteristics, such plywood is stronger and more durable.
- BV – water-soluble bakelite mixtures; plywood is resistant to high humidity.
- FC – phenol-urea resin bonding, relative water resistance, for indoor use.
- FSF – gluing with phenol-formaldehyde resin, moisture-resistant material for external use.
Photos of carved wooden houses
For Russia, slotted carving is of particular importance as a decoration for building facades. Since ancient times, ornaments carved on birch bark and other similar materials have been decorating huts, bathhouses, and churches, as photographs colorfully demonstrate.