Elegance of form, unusual style, modern design - all these qualities are inherent in the work of master Michael Cullen, who creates original wooden boxes. In this master class we will tell you how to make such wooden boxes with your own hands.
Creative projects do not require a lot of time, complex measurements and planning. The boxes do not have carpentry joints, and the starting material for their manufacture can be unnecessary scraps lying around in the workshop.
The creation of lightweight, durable and elegant boxes is based on extremely simple technology. The products are cut out on a band saw or jigsaw from a single piece of wood, sawn into two parts and glued back together. Plywood allows you to relieve internal stress, eliminating deformation and cracking of the box as the wood dries out. After this, a lid is made and the bottom is glued in.
All boxes are made using the same technology, however, each of them has its own unique style. These projects welcome creativity. Experiment with limitless variations of shape and decoration, creating unusual and stylish boxes for jewelry, rings, watches and other small, and if desired, large items.
Double-walled cherry box
Drawing of a cherry box
Quick sketch . On the processed workpiece, cut lines are drawn with a pencil. A simpler option is to paste a pre-printed drawing with dimensions onto the upper plane of the workpiece. When transferring the sketch, it is important to maintain the longitudinal orientation of the fibers.
Blank for the lid . A flat longitudinal part 15-20 mm thick is sawed off from the main workpiece, which will later become the lid of the box.
Changing the inclination of the saw table . The angle of the table is changed by several degrees.
Cutting out internal waste . Having changed the tilt of the table by 2-3°, the part is cut in two and the internal waste part is cut out, forming a conical cavity of the box.
Plywood . The two halves are glued back together. Plywood allows you to relieve internal stress, preventing deformation and cracking of the wooden box. The glue is applied in a thin and even layer. Excess that bleeds through is very difficult to clean inside the box.
Drying . The glued workpiece is carefully placed under the clamps, carefully checking the absence of displacements and distortions.
Blanks for the lid and bottom . Having returned the table to a horizontal position, two sections are sawed off from the waste part. This will be the lid element and the bottom of the box.
Drawing of the blank for the lid and bottom
Cavity coloring . If you want to decorate a wooden box not only on the outside, but also on the inside, paint its cavity while there is easy access on both sides.
Sawing out the outer walls . Returning the saw table to an inclined position, make cuts along the outer contour.
Bottom gluing . A thin layer of glue is applied to the ends of the bottom and inserted into the lower part of the box, pressing with your fingers until it stops.
Cover stopper . The element intended for the lid of the box is glued onto the blank made at the very beginning.
Sawing out the cover . After the glue has dried, trace the main outline of the lid and cut out this final part.
The presented technology is universal. It allows you to experiment with design and unusual shapes, creating at home beautiful and original boxes that are not similar to each other.
First of all, we think about the design
I offer you step-by-step instructions in order to get not just a chest, but a unique piece of furniture. Do you want to make an antique chest? Turn on your imagination and go ahead!
First you need to determine the location and draw an approximate image on a piece of paper. The dimensions need to be considered in advance, taking into account the thickness of the wood.
It is very important what kind of wood is used for production, there are many options. The least expensive option is pine furniture, but you need to take into account that at the slightest sign of moisture, the material swells, becomes covered with cracks and soon loses its “marketable appearance.” Alder is also on the list of budget options. It is not very hard, but thanks to its soft texture and light tone, it can imitate expensive tropical woods.
Making an antique chest.
How to make an antique chest? And this question can be answered. Several tricks are used to age wood, which I wrote about earlier.
To give it an antique look, you should arm yourself with matte, semi-matte or craquelure varnish. When applied to a wooden surface, it will become covered with a web of small cracks, imitating old wood.
Simple walnut box
A similar sequence of actions underlies the next project - a four-wall wooden box. Thanks to its unusual curved shape, its design looks stylish and modern.
Drawing of a walnut box
A little history
Since time immemorial, chests in Rus' have been a necessary item in which things, kitchen utensils, family heirlooms and jewelry were stored or transported. It was not distinguished by design; special attention was paid not to decoration, but to durability, because even now there are reliable chests from the 15th century.
Over its long history, the chest was modified many times and already in the 17th century, legs were attached to it and cells were installed, like a prototype of a modern chest of drawers.
Chest with legs.
Casket with concave lid
Drawing of a box with a concave lid
Flight of fancy - decoration
We transform a simple wooden box into an original decorative element. The first thing you need to do is get rid of flaws and sand the surface. It is important to go through the corners of the structure, rounding the edges.
Now the chest needs to be coated with a special varnish to give it an “antique” look. When dry, it will become covered with small cracks. To emphasize the natural structure of the wood, we apply a transparent topcoat, and tinting paints will add color.
To create an original design, you can print a picture on a printer and use paper as a stencil to make a unique design.
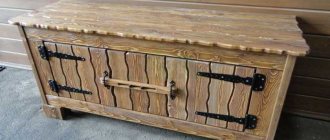
There are many ways to decorate, using various techniques: carving, inlay, forging. The forged chest looks original and quite beautiful. Forged elements can be made to order or purchased. Be sure to match the design of the chest. It will take time, but you will be pleased with the result.
To prevent the chest from looking lonely, you need to add a few more decorative elements of the same style.
A beautiful floor chest is ready and will serve as an interesting decorative element and a container for storing various things.
How to decorate a wooden box with your own hands
Despite the external attractiveness of the form, the truly original style of the box acquires after decoration. The technique of relief carving gives unlimited freedom for creativity in this matter.
Using basic carving techniques, unique textures are created on the surface of the boxes. These can be either simple textures or complex ornamental or geometric compositions.
- Using a semicircular chisel to texture the box with small dimples.
- Making the lid of the box with grooves made with an angle chisel.
These photos show more complex decoration options using geometric patterns and complex textures.
Video instruction
Watch the master class on how to make a wooden chest with your own hands. It clearly shows the sequence of connecting parts.
A wooden chest can be used to store small toys or other pirate “treasures”. A boy can make a chest with his own hands with the help of his dad. Such joint crafts between an adult and a child help build relationships and give the joy of creativity. You can also present a wooden chest with your own hands as an original gift. Write how you liked the craft. Better yet, try making such a chest yourself.
Step 11: Adjustment
I glued a piece of plywood to the wall to stop the nails from falling out. Before gluing, I insert nails into the holes.
How to conveniently use a chest in different rooms
- Toys are stored in the nursery.
- Shoes are most often stored in the hallway, but storing various items for cleaning the house would also be an interesting solution. Most often used as a stand for a mirror, table lamp and various items such as gloves or hats.
- A chest in the bedroom is suitable for storing pillows or home clothes.
- Do you have a lot of things in the kitchen that you need less often? Skewers, a festive tablecloth and many other things can be hidden in the chest you made.