Crafts, the basic skills of which are taught in labor discipline classes, for the majority of people remain just a couple of trinkets to remember. But for some, a favorite hobby begins with the basics of working with metal or wood, which later brings pleasure from the opportunity to show imagination, apply skill and end up with a useful household item or simply a decorative item. One of these areas of folk art is sawing out of plywood, which is also popular among users of the FORUMHOUSE portal. We will dwell on it in more detail in our article, we will analyze what, with what and by what technology real carved masterpieces are created and in what cases stencils are used for cutting. Fortunately, our craftsmen are happy to share their experience.
Process of working with material
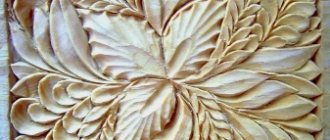
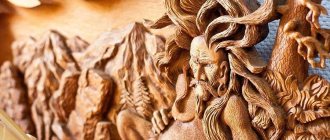
Wood carving is the act of cutting and trimming wood material. As a result, ready-made contour drawings emerge from under the carver’s knife. The outlines of objects, landscape compositions, and flower collages are embodied mainly in wooden panels.
How is the process of working with wood carried out? How do you get beautiful pictures? All work on a piece of wood, which later becomes a work of art, can be divided into stages:
- Initially, select an image.
- The drawing is transferred to a stencil for carving.
- A sketch is made from the stencil for carving on a wooden piece.
- Wood carving is carried out.
- The finished panel is sanded, polished, and varnished.
Wood carving requires special skill, the sketches of which involve the execution of a complex pattern.
A selection of sketches for contour wood carving
Each drawn line must be smooth and clear. For drawings in a particular case, the master decides how deep the lines should be cut. The expressiveness of the image on the tree depends on this.
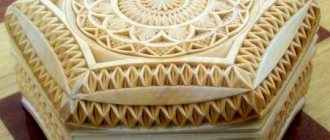
Using the technique of contour wood carving, boxes, crosses and other products are made where it is necessary to reproduce the outlines of flowers, animals, and people. The work is carried out both on natural wood and on tinted wood, as well as on plywood.
Making a blank
Scheme of blind geometric carving on plywood.
Before work, it is necessary to prepare the workplace. It should have good lighting, the workpiece should be located on a work table that has good support. Any unintentional movement of the table can lead to damage to both the workpiece and the entire work.
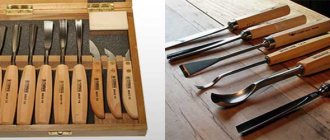
The cutter must be held tightly in the working hand, holding the blade with the other. The handle of the tool should be held so that it rests firmly in the palm, while using the little finger of the other hand to control the angle of the blade. As for the angle of inclination, as stated earlier, it should be 45 degrees.
This will provide the necessary stability to the tool, in which the blade will cut the plywood and not rest against it or slide.
For this reason, the sharpening angle of the tool is important, since the angle of work depends on it.
Type classification of plywood carvings.
Cutting curved lines should be done without tilting. In addition, the line must be the same width, for which you should observe the pressure on the tool, which is carried out by one of the hands. To prevent breakage, it is recommended to hold the tool cutter tightly.
After applying the design, the workpiece must be coated with colorless varnish in several layers. It is recommended to apply the next layer after the previous one has completely dried. Alcohol varnish works well for this material. You can also use nitro varnish if the workpiece was previously treated with stain. However, you need to remember that nitro varnish is not suitable for working with nitro paint. Applying varnish will add saturation to the image.
Wooden patterns on plywood
Carving on plywood is somewhat different from carving on wood. Working with the material involves performing several techniques. These include:
- performing contour cutting;
- carving;
- openwork carving;
- combined thread.
Using the sawing method, outline images of animals, human figures, and flowers are cut out. As a result, a convex image is formed on a flat background. Contour carving involves cutting out complex designs by cutting and trimming. The result is an exquisite relief pattern.
Openwork carving involves cutting through the details of the design. The pattern made using this technique is the most labor-intensive and beautiful. The product resembles airy lace. Combined contour carving combines 2 or more techniques at once.
Artistic themes and uses
The carver uses various sketches in his work, from which he takes an image and transfers it to the surface of the workpiece. Today, for this it is not necessary to use an image made by hand with a pencil. Modern technological advances make it possible to use photographs and scanned digital images that can be taken on the Internet.
Sketch of the ornament
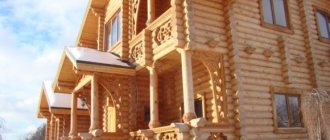
Samples for artistic wood processing are distinguished by their decorative and thematic variety. On the Internet, websites dedicated to this craft offer a large selection of cutting themes. The facade of a wooden house is decorated with wooden patterns. This decor will look great on doors and walls. Artistic cutting is used for the production and finishing of furniture and tableware.
Kitchen utensils and interior wooden products decorated with intricate openwork are very popular among buyers. In each specific case, the master selects the material, creates a sketch of the future product and begins to work.
The drawings come in a variety of themes. Geometric plant motifs are used. Often the wooden surface is decorated with genre scenes depicting animals, people and trees. Wood is a very plastic material, and in the hands of an experienced carver it turns into a real artistic canvas.
For each type of artistic cutting, a special surface treatment technology is used. Using different techniques, the master creates a three-dimensional canvas on which you can see the smallest details of the image.
Plywood carving technique
Before starting work, a blank is made, it is sanded, and, if necessary, painted in a dark tone with nitro paint. Allow the workpiece to dry and paint it again. A drawing or sketch is applied to the finished sample using ink or gouache. Sometimes stencils are used instead. All curves of the drawing are drawn according to the prepared form.
Sketches and techniques for performing openwork carvings
The easiest way to explain the plywood carving technique is to use sawing as an example. The necessary tool for this technique is a saw. Sawing is done in the following way. The outline of the image is cut out using a saw along the existing contour.
To ensure that the background is smooth and the image is not jagged, continuous sawing is used.
Using the same saw, individual parts are cut out. A three-dimensional image appears. It is sanded, polished, and varnished. If necessary, after the first layer has dried, the varnish is applied to the product again.
Openwork contour carving on plywood is done using a jigsaw, files, a brace, and an awl. When cutting holes according to an existing template, the carving tool must remain stationary; Only the workpiece rotates.
An example of a painting made with openwork carvings on plywood
Large holes are cut out with a brace, small ones - with an awl. A jigsaw is used to cut through individual shaped elements. After finishing the work, the openwork is sanded and coated with varnish or paint. Typically, the resulting openwork elements are used to decorate mirror frames, lampshades, and as parts in the manufacture of jewelry boxes.
Flat creased pattern
This image has a slight relief. The image has the shape of a silhouette, and all the details are located in the same plane. For execution, an oval contour, a cushion pattern and a selected background of the pattern can be used.
How subtypes of this technology are distinguished:
- contour,
- stapled
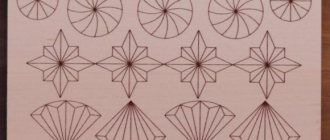
- geometric (triangular).
To perform the contour technique, in-depth lines running along the main background are used.
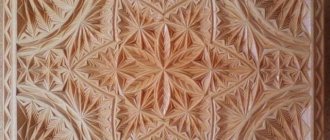
Staple technology uses special notches in the form of staples to create the finish. When using geometric carving, the master applies the outline using triangular pyramids and pegs. The type of cutting repeated many times in different versions allows you to create a variety of relief decors that are slightly recessed into the general background. This technique is characterized by numerous compositions of geometric shapes in the form of rhombuses, triangles, honeycombs, wreaths, etc.
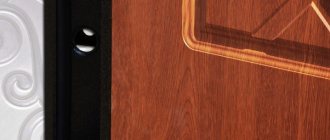
Cutting designs on painted plywood
This carving method is similar to engraving. Cutting is carried out on plywood coated with ink or other dyes. Such products can decorate homes, company premises, be used as elements of outdoor advertising, or simply enrich the home interior. Like any other work, creating such jewelry requires a certain consistency.
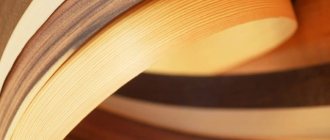
The basis
The basis is plywood on which the image will be cut. It must be of good quality, without delamination, knots or other defects. The thickness can be 3-12 mm. Accordingly, the shape and size must correspond to the pattern that will be cut out.
Advice! It is much easier to cut lines along the layer rather than across it. Therefore, the base from a sheet of plywood must be cut out in such a way that the lines of the future engraving are predominantly located along the outer layer.
Before you start painting the plywood, you need to prepare it.
To do this you need to do the following:
- First of all, you need to clean the edges of the plywood with a file. Movements should be made along the edge so that the base does not crumble or pinch off.
- Then you should process the working side of the base on which the design will be cut. First, it must be cleaned with coarse and then fine sandpaper. After this, the surface should become smooth.
- Use a clean cloth to thoroughly clean the base from dust.
Coloring
The base should be painted with dark tones. The most commonly used colors are black, brown and blue. You can also use watercolor and gouache paints, ink, and a solution of potassium permanganate. But it is best to work with nitro paint.
The advantage of this paint is that it covers the base with an even layer that covers the texture of the plywood. If you apply the nitro paint in a thin layer, it will be completely dry within 20 minutes.
Apply the paint with a foam pad, rather than with a brush, in an even layer and quickly to prevent subsequent touch-up. If touch-up cannot be avoided, it should be done after the previous layer has dried.
On a base painted with the above dyes, only silhouette and contour images can be applied. To apply shadow images, the base must be coated with an aqueous solution. In this case, after the image is cut out, certain areas are wiped with an ink eraser or sandpaper.
Example of outline drawing
Drawing
For carving, you can use any graphic images that are made with complete, clear lines. Plywood carving patterns can be your own or borrowed from somewhere.
It is more convenient to transfer the drawings onto tracing paper, and then apply them using carbon paper to the base. If the original does not correspond to the intended image size, it can be enlarged or reduced using the grid. It is important to ensure that there are no gaps in the lines when drawing.
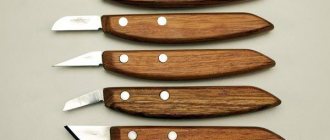
Sawing
Carving all kinds of figures from plywood is perhaps the simplest type of plywood carving. It is very simple in technique, but very effective in results. Combining this technique with cutting out designs looks especially impressive.
The tool used is a hand or jigsaw. (see also: Sawing out of plywood with a jigsaw: drawings and rules for working with the tool) At enterprises, sawing is carried out using a laser beam. An electric jigsaw increases the cleanliness and speed of work, however, in any case, you need experience, which will come with skill.
The photo shows a combined thread (sawing and contour)
The instructions for performing the work are as follows:
- First of all, you need to find or draw a contour drawing of the image. For example, it could be a human figurine, a tree or an animal. The first work is best done without internal holes with smooth contours.
- The workpiece must be secured with a clamp or pressed firmly with your hand against the stop.
- The saw should be positioned strictly perpendicular to the plane of the base. You need to cut evenly, at the same speed, without jerking. At the same time, the hand turns towards the drawing.
- At the end of the work, the part should be sanded.
- Then the decoration can be painted and varnished.
Warning! When working with an electric jigsaw, you need to press the workpiece more tightly to the table and smoothly move it towards the moving file according to the drawing. Perform this procedure carefully so as not to injure your fingers!