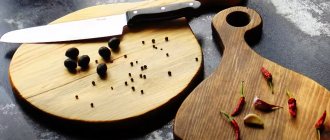
Aging wood with your own hands by brushing
The method is simple, but not every breed is suitable for it. Spruce, larch, oak, and wenge have large fibers and the result will be impressive. Alder, cherry, birch, teak, on the contrary, are unsuitable for brushing due to their fine-fiber texture. Once you decide on the material, you need to prepare the tools.
You will need
- Hard wire brush.
- Abrasive brush or sandpaper.
- One of three coatings: varnish, wax, oil.
Sequencing
- Wet the item with water to avoid any wood dust during processing.
- Go over it with a wire brush, moving along the grain. A stiff brush will select soft fibers without damaging hard ones. The wood will become more prominent. The deeper the relief, the more aged the wood appears.
- Use an abrasive brush or sandpaper to clean the surface from burrs and roughness.
All that remains is to apply the coating and wait for it to dry. To enhance the decorative effect, you can paint the product in two colors. The grooves are in a light shade, the convex relief is in a dark shade.
Instagram @polychrome_spb78
Instagram @mara_nova_dolls
- Furniture
All about painting old furniture with your own hands
How to work with old wood
Unless you're really lucky, the wood you manage to get will require a little more work than store-bought lumber. You will have to be very careful to avoid encountering metal fasteners and dirt, which dull the cutting tool. Focus on how much you've saved, and the time spent completing the following six procedures will fly by.
Remove any visible nails or screws from the boards.
1. Don't forget about metal
Metal is enemy number one for cutters and saw blades. Remove any visible nails or screws from the boards. To detect hidden metal fasteners, spend some of the money you save on an inexpensive metal detector or all-in-one detector. Circle the dangerous areas with chalk and avoid them when sawing.
Scrape off loose dirt with a stiff brush
2. A blank slate is a happy slate.
On the list of things that can dull your tools, dirt is right behind metal. Scrape off any loose dirt using a stiff plastic or brass bristle brush. Avoid steel brushes, which may require repeated metal removal.
Remove the last layer of dirt or old finish
3. Bring out texture
The last step before the cutting tool touches the wood: remove the last layer of dirt or old finish. This is not the time to stand on ceremony. Get out your belt sander with an 80-grit abrasive belt and give the boards a quick scrub. Move the power tool constantly. Belt sanders remove material very quickly and can create a dent in the surface in an instant.
Saw off the ends of each board a few centimeters
4. Sacrifice the ends and save the saw blade
The porous end cuts collect dirt as well as the tabloids. This is especially true for boards taken from old barns or dragged along the ground, such as pallets. Saw off a few centimeters from the ends of each board. By doing this you will not only ease the fate of your cutting tool, but also remove small cracks that are always present on old boards.
Make a straight cut along one edge of the board
5. Is it possible to process the boards now?
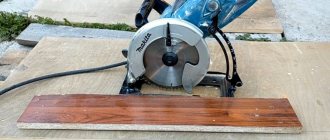
Yes. The time has come to cut the wood and obtain suitable material from it. But first, remove the expensive and high-quality saw blade and install instead a cheap or old one that you don’t mind getting dull. Make a straight cut along one edge of the board using a bench saw or circular saw with a guide. Turn the board over and file the second edge parallel to the first, removing just enough material to remove any rot or stains. Before processing old boards on the jointer and thicknesser, also install the old knives.
Under many years of layers of dirt and sand, a board from an old barn hid a beautiful textured pattern with streaks of marble rot.
6. Emphasize the story
When dealing with heirloom furniture, its provenance is almost as important as its design features. Reused wood adds its own history to the piece. Accentuate it by flaunting it. Rough edges, nail holes, worm marks and faded finishes can all become design elements in the finished product.
Source
Use patination
Now we’ll tell you how to properly age wood using staining.
You will need
- Paint in two tones.
- Stiff sponge or fine sandpaper.
- Varnish.
Patination instructions
- Before processing, lightly sand the wood for better adhesion to the coating.
- Apply paint to match the furniture and let it dry.
- Repeat the procedure, but in a lighter tone.
- After drying, wipe the top layer with a hard sponge or fine sandpaper so that the bottom layer shows through.
Finally, apply varnish and let it dry. It should give the impression that the furniture has been painted many times.
Instagram @tatsianahei
Instagram @technocolor_russia
Creating a harmonious interior
You want to touch old boards, feel their rough texture, the warmth of the wood, and feel the course of history. That is why interiors decorated with such material attract on a subconscious level, and not just with their aesthetic appearance, because people are always drawn to nature and their roots. And in the accelerated rhythm of modern megacities, when you come home, you really want to plunge into a completely different world, far from the industrial cycle with its abundance of cold glass and metal, soulless gray concrete.
Country house with a ceiling made of aged boards
Advice! Not every old board deserves a place in a modern interior. It is not enough to simply dismantle the fence and make a floor out of it. The boards that are given new life are unique and have special features in the form of knots, marks, cracks, paint, etc.
In order for old boards in the interior to look harmonious, it is important to follow a number of recommendations:
- Finishes or accessories made from old boards should not attract undue attention to themselves, but rather emphasize the design, creating the impression that this is exactly how it was intended. Therefore, when finishing, you should carefully select boards according to size and thickness, shade, pattern, and be sure to include some special elements.
- You should not use the material too actively, trying to decorate the entire room with it. 1-2 main elements and a couple of accents are enough, for example, aged floor boards in combination with the same wall panel, headboard, large mirror frame, table or wardrobe. Otherwise, you may feel that the room needs urgent repairs.
An old board is perfect for decorating a rustic interior.
- To make the interior look fresh and modern, it is better to balance old boards with splashes of bright or contrasting color accents, use modern finishing materials, and high-quality natural textiles.
- A great way to emphasize the character of a room and tell about its history is to combine old boards on the floor or furniture with brick walls.
Use wax
Wax helps to achieve the effect of a destroyed top layer of paint.
You will need
- Paint in two or three colors (depending on what result you want).
- Wax (you can use a regular candle).
- Rag.
- Varnish.
- Fine sandpaper.
Sequencing
- To do the job properly, sand the wood.
- Choose a color that will be the main one. For example, the darkest of the three. Paint the product in it, using wide, uneven strokes, and let dry.
- Take a candle and, pressing hard, rub the places where you think there should be holes in the color.
- Then apply a light shade and wait until it dries.
- Using a rag, thoroughly wipe the areas where the wax was applied. The paint will peel off there, giving the product the appearance of old and shabby.
If you are satisfied with the result, then the third layer does not need to be applied. If you want to change the color, then repeat the entire procedure. At the very end, coat the product with a fixing varnish.
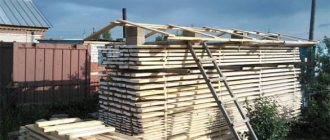
Reuse old wood
Reuse old wood
By reusing hardwood , you can save a lot of money. Look around you and you can't help but notice recyclable wood. However, be prepared to sacrifice your ego and roll up your sleeves.
To gain the right to reuse this valuable material, you'll soon have to ask favors from strangers, rummage through places that are hardly clean, and do a lot of work.
What is trash for one is treasure for another
Slow down near construction sites
Do not drive past buildings being reconstructed or demolished. If you don't intervene, the materials will likely end up in a construction waste landfill. Find the work manager or building owner and politely ask permission to take some of the material. The older the structure being renovated or demolished, the higher the chances of encountering excellent seasoned wood with a fine grain grain.
Valuable finds: hardwood floors, wide plinths, massive doors of residential buildings, wooden beams of administrative buildings.
Avoid: houses built in the last 60-70 years; the standardized building materials demanded by the growth of residential construction are of little use for carpentry projects.
New life for an old barn
The bonanza of old barns
Wooden sheds are another promising source of recycled wood.
Treasure Finds: Classic long-beam timber frame structures contain a significant amount of straight-grained timber.
Avoid: wood that shows signs of wood-boring beetles or termites; these insects can easily spread throughout your lumber yard and throughout your home.
Bargain with merchants
A few minutes spent leafing through the Yellow Pages will provide you with the location of many hardwood companies. From furniture shops and veneer manufacturers to door and boat makers, any shop that cuts boards produces waste.
Valuable finds: mahogany; This popular material is still often used today in the production of doors, boats and expensive furniture.
Avoid: companies that use resources efficiently; tiny scraps will only fill your trash bin.
The cost of delivery will be covered by the amount of material
Don't ignore old furniture
Discarded furniture can be considered one of the most undervalued sources of material for carpentry projects. Even though old furniture doesn't look much like planks, that doesn't mean it doesn't have usable wood. Pay close attention to garage sales where real gems are found. When the trade is winding down, instead of trying on shoes and shirts, ask if you can borrow the shelves. Even without finding a suitable material, you can purchase cabinets, racks or shelves with compartments for your workshop. Finally, if your town is in the midst of a spring cleanup, go hunting early (perhaps even the evening before)—the game may be big.
Treasures: Wooden countertops, headboards, broken pianos and church pews are treasures for a woodworker.
Avoid: Veneered furniture masquerading as solid wood furniture.
You can make a lot out of pallets
Ubiquitous pallets
You can find pallets for transporting goods from almost any company that has a loading dock. However, before you reap the benefits, you'll have to pull out a lot of nails and clean the dirt off your pallets. Therefore, be selective; Don't waste time and effort on regular pine board pallets. Instead, look for hardwood (after getting management approval, of course). The heaviest or most expensive goods are usually shipped on pallets made of thick oak planks.
Cover with stain
Protective and coloring impregnation ages the wood for decades. Tinting with stain looks beautiful both on its own and with other techniques. For example, with brushing.
You will need
- Water based stain.
- White spirit stain.
- Soft sponge.
- Primer.
- Antique wax.
Antique wax is a completely natural product. It contains three types of wax: mineral (mountain), animal (bee), vegetable (carnauba). Suitable for processing any wood. Waxing saturates wood well and has restorative and protective properties.
Sequencing
- Treat the item with a water-based stain.
- Take a soft sponge and wash off the impregnation without touching the edges and corners. This way it will look more prominent.
- After drying, apply a layer of white spirit stain. Leave overnight until completely dry.
- Prime the surface with a soft sponge or brush, filling all cracks.
- Wait until dry and use a brush to apply the antique wax.
Instagram @pinkezhik
Wood tar
In the old days, wood tar was actively used to protect wood from rot and insects. Birch was used more often, pine less often. Tar was made from tree sap, resulting in a composition with a strong odor.
The thick and sticky consistency allowed the product to adhere firmly to the surface after application. I decided to try treating a piece of wood with the mixture.
It was quite difficult to work with tar; the mixture practically did not wash off the wood and left sticky marks.
People choosing tar need to remember that the treated wood surface cannot be painted or sanded in the future. The method didn't work for me.
Birch tar
The main danger of wood tar is that the composition is highly flammable. The processed material is good for use in underground structures during the construction of buildings.
Use dry brush method
The method is simple and economical. It is suitable for furniture that does not have any relief.
You will need
- Dry, very hard brush.
- Water based paint.
You can use an old dried brush.
Sequencing
- Dip the brush into a small amount of coating and paint the furniture or decor in different directions, leaving unpainted areas.
- Let dry.
The product looks scratched after this treatment. There is a second version of this method. It requires two shades: the base one and the one with which you will imitate scuff marks. In this case, you need to act a little differently.
Instructions
- Paint the entire surface with the base color.
- Dip the brush into the second tone and dry it well with a cloth or paper. So that it becomes almost dry.
- Apply loose strokes in the direction of the grain where dirt would naturally accumulate and become shabby.
Instagram @handel.ahsap
Instagram @eugene.po.wood_lab
Time-tested: how to make money on old barn boards
Muscovite Alexander Kapota sells barn boards that are several decades, or even more than a hundred years old, and which used to be part of a house, barn, fence or mill. Such antiques, for example, are in demand among interior designers and restaurateurs. Among Alexander's clients there are individuals, small design bureaus, and even global corporations - in particular, Google and McDonald's. The founder of the Greyboard project, Alexander Kapota, told the Biz360.ru portal about how to give a second life to old boards.
Dossier
Alexander Kapota
, 29 years old, founder of the project. Graduated from the University of the Russian Academy of Education with a degree in banking, finance and credit. The idea of selling old boards for interiors and making furniture out of them was suggested to Alexander in 2010 by his sister, who drew his attention to a niche that was relatively empty at that moment.
How it all began
As a child, my grandfather, who lived in the village, every summer before digging potatoes, forced my brother and me to repair old wooden boxes for them. I couldn’t stand it, but now, by and large, this is exactly the kind of work I do. I constantly deal with rusty nails and old boards.
My . I sold my first board in 2012. At that time, I worked with my sister, who is an interior designer. She was familiar with the subject of barn boards and gave me the idea to start selling them.
- Barn board
is
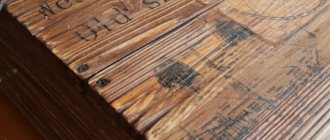
old wood from which barns, village huts, mills, etc. were once built. It is usually called greyboard - gray board - because of the color given to it by winds, rains and sun. Such a board bears traces of time - chips, chips, nail marks, old paint (sometimes in several layers). The structure of each board is unique - it is always a unique pattern of wood fibers, knots, scratches, and abrasions. It is for these qualities that barn boards are so highly valued.
The market did not exist at that time, there were only a couple of companies, but they worked in a different vector.
In addition, there was import - quite expensive at that time. And there was a demand for the old board, albeit small: it was bought mainly by designers. I didn’t prepare in any way to launch my business, I just decided to try it and started working. I drove around the villages of the Moscow region, collected samples of old boards and photographed them.
Where did I look for the first barn boards? I dismantled the old houses and barns of my friends. I posted advertisements offering to demolish dilapidated buildings for free, and looked for houses to be demolished through district administrations.
It turned out that no one wants to not only give away, but also sell the material. They said that they themselves needed these boards. When asked to exchange them for new ones or for firewood, they answered that they didn’t want to, that they were fine as is. For some reason, people in the outback have some strange doubts when it is proposed to replace the old siding of their house or cottage with new siding. Or take their shed disassembled for firewood and leave money for a whole car of firewood. People immediately suspect something is wrong. Only one person out of a hundred agreed. And he did not always turn out to be reliable.
It turned out to be impossible to dismantle abandoned houses - they all either have an owner, or their neighbors know him. And they also know the district police officer... Therefore, now we work only under a contract.
At first, I invested everything I earned from my sister into the project. According to my calculations, before the project began to make a profit, I invested about 3 million rubles in it. Purchasing tools, trips in search of old houses, flights, the board itself (I bought it most often), delivery from the regions.
I took everything that I managed to buy to my parents’ attic, to my veranda, to the construction site. I failed everything I could. My relatives decided that I was crazy - it all cost money.
Step by step
At first, old boards sold sluggishly. This material is such that it needs to be viewed in assortment and touched with your hands. To increase sales, I began to look for photographers to take beautiful pictures, and collected contacts of designers on social networks. I wrote to the designers and was sent many times, but occasionally I managed to sell to them.
At first I also looked for clients through my sister, a designer. Then I developed my own website - on my knees, in 30 minutes - no designers, self-written. It’s good that I have a big family: my brother is an expert in this area. The first client who came through the site was a girl - not a designer, but a private person - she bought a board for her home for a shelf by the fireplace.
Then I opened the pages of the “Old Greyboard Shop” project on social networks. With the advent of Instagram, it has become easier to find clients. I photographed various old buildings and posted them on . Little by little, the flow of clients grew, which is why we had to move to a garage not far from the house so that we could work in it.
He did everything with his own hands: he sanded, sawed, painted and processed the boards himself, and he himself delivered them to clients. Then, together with my brother, they began to make furniture from barn boards - tables, countertops, panels. We were creative: we took something from our heads, sometimes we looked for ideas on Pinterest, sometimes we did it according to the client’s ideas.
Barn board is primarily a solid material. Anything made from wood can be made from barn boards. Mainly, of course, furniture and interior items. It's a fashion statement right now, but when people realize that by buying something from an old board, they are saving the life of a growing tree and helping to make our world a little cleaner, it will become a popular trend.
If you want to be healthy, expand
The flow of clients gradually grew. However, at some point, my designer sister’s number of orders decreased, which is why I was left completely self-sufficient. And then a fairly large order fell in for the decoration of the restaurant. During the negotiations, I did not immediately recognize the customer - the famous actor and restaurateur Stepan Mikhalkov, I realized this only after signing the contract.
Having received money for a large order from Mikhalkov, he ran to look for new premises for his project. There was nothing decent for my budget. I remembered the factory where my sister’s husband and I once rented premises. I came directly to the director - they found a 40-square-meter basement for us. The money from the seemingly “fat” project was enough to pay two months of rent, a salary for my brother and certification.
We are still working on the territory of this plant in the Leninsky Prospekt metro area. After moving to this location, clients flocked to us because of the convenient location. We began to grow: we were fully equipped with boards and bought additional tools.
Soon my brother and I no longer had enough hands to process the boards. And we are not carpenters: we learned everything on YouTube and on various sites. I hired a carpenter, then another one. It’s interesting to work with them - everyone wants to cut down everything that is actually valuable to us in its original form. Such is the professional deformation. We had to explain for a long time what we still needed.
During the development of the project, we tried to work with different carpenters, but not everyone was able to cope. Now we have a good team, but in January we are opening another Greyboard workshop - we will need new carpenters.
We recently moved from a basement to a separate two-story building in the factory. On the ground floor we have a warehouse store, on the second floor there is a workshop. The roof is also ours, where we sometimes have a barbecue for our team.
Not just one board
By and large, I wanted to sell only the old board, but it turned out that we also make furniture. The board turned out to be too complex a product. Nobody except the designers knew what to do with it. We had to make furniture to show that this material deserves a second life.
At the moment, all our sales are distributed as follows: about 30% are barn boards, the rest are products from our own workshop. The Greyboard showroom sells tables, chairs, cutting boards, photo backdrops, stands and other small items. All these are old things or made from old things. We also have a large collection of old chests, shutters and doors.
Many of our suppliers are our employees. If they find interesting beams and stumps while dismantling the house, they tell me. Yes, yes, we have our own stump and tree stump store. But they don't sell much, to be honest.
Our old boards are mostly over 70 years old. They are made of pine, spruce, larch, fir, oak, beech, toplyak (old dam) or oak beams. The quality of materials depends on the type of wood and the place of its use.
We constantly have to deal with stereotypes that furniture made from old boards is unprofitable. The tree is already old! Although its service life is not limited if used properly. We provide a guarantee for our boards and products made from them. In addition, the “loft” and “industrial” styles in which we work imply deliberate sloppiness. Over time, our furniture will only get better: somewhere it will be pressed, hit, chipped, scratched. We will be happy to correct it or advise what to do about it, but for the appearance this is only a plus!
In addition, it is creative, and such furniture has an unusual appearance, while maintaining all the properties of solid wood. And most importantly, almost all of our boards were made by hand and for ourselves. Over the decades and centuries they have been patched, scratched, nailed and painted. Generations of our ancestors grew up within such walls. These are akin to antiques, they deserve our attention.
How everything works
We have tried many methods of processing boards, but not everything suits us - different compositions have different effects on old wood. There are such nuances as coating with oil in several layers with an interval of no more than a day - otherwise wax appears on the surface of the boards. Experts don't know why this happens, but we figured out how to avoid it. There are a lot of such nuances in our work. And they are not on the Internet - everything had to be discovered through experience.
We bring the bulk of the boards from the regions. We have warehouses there and our artels work there. There are only five warehouses - in Arkhangelsk, Kostroma, Kirov, Grozny, Krasnodar. There were people there who were ready to work with us. Warehouse and production facilities remain from the times of the Soviet Union. To establish work with barn boards in the regions, I myself went there several times.
Preliminary preparation takes place at regional warehouses. We are looking at houses proposed for demolition. If it is practical, we demolish them (not all of them). Then, after careful dismantling, we examine the boards for rot. Some of the boards, unfortunately, break during demolition.
Then the wood is pre-cleaned with soft brushes and all metal objects (nails, staples) are removed. Then the cargo is formed at the warehouse. When we collect the required volume, we send it for drying. There the board spends three weeks at a temperature of 72 degrees.
We have our own drying facility in Krasnodar, but its capacity is not always enough. That's why we use third-party ones in other regions. It is not so difficult to organize your own drying, it is more difficult to constantly load it with work. It needs to be heated all the time, which requires a stoker and loaders. These are fixed expense items. We don't always have enough boards to start drying. It’s easier for us to accumulate wood in a warehouse and then take it out for third-party drying.
After drying, the barn board is loaded into a car and goes to Moscow to the central warehouse. Here we recalculate it and reject it again. Sometimes up to 50 percent of the material is defective. It breaks during dismantling and transportation.
Here in Moscow, all that remains to be done is carpentry work, furniture and other products. At the last stage, I am almost always present myself.
Price issue
Today, the “Shop of old Greyboard boards” earns from 200,000 to 1,500,000 rubles per month in net profit. The project has long paid for itself. Our monthly expenses, excluding costs directly related to the supply of the board, amount to 1-1.5 million rubles per month.
Our prices are as follows. A board generally costs from 1,000 to 5,000 rubles per square meter, an oak table - 30,000-50,000 rubles, a pine panel - 5,000 rubles per square meter, cutting boards - 1,500-2,000 rubles. We sell stumps mainly for 1500-4000 rubles. Chests from 3,000 to 25,000 rubles (depending on size).
A private client often buys one board for 150-500 rubles, while an order from the restaurant business amounts to 1.5-2 million rubles. That is, the spread in terms of receipts and customer capabilities is very large. But for us, each of them is unique, we value each one.
Our regular clients are mainly designers - 40-50% of the total. Major corporate clients include McDonalds, Moo-Moo, and Google. There is a client whom I and none of our employees know. We communicate with his architect, supply him with beams, boards, make window sills for the house, and doors. We have been working for a year and a half, the cost of the project is already close to 10 million rubles. This is a record amount for us. And at the same time, no one says who the customer is: neither the driver, nor the architect.
What's next
Every year I tell the team that January will come and then we’ll take a break. But work keeps popping up this month.
Yes, we have competitors, but we do our business professionally: we invent new methods of wood processing and produce furniture. We have the largest warehouse of barn boards in Russia. And, perhaps, in Europe. There are always 12,000 square meters of material in stock.
My plans for the future are to increase turnover. I also want to develop a direction for restoring old furniture. We have already brought two truckloads of chests of drawers, benches, chairs, and sideboards to our warehouses.
We want to firmly enter Europe. So far we are selling a little there, but, for example, this year we furnished a restaurant in Berlin. Moreover, its owner plans to accept orders for furniture that we will make from barn boards.
Make aging using the “Provence” method
We'll tell you how to artificially age wood for a romantic, bright interior in the Provence style and more.
Required Tools
- Dye
- Brush
- Scraper or spatula
Sequencing
- Paint the item.
- While it is still wet and tacky, use a scraper or spatula to scrape off the layer of color in the desired areas.
- After drying, wipe with a soft cloth.
- Sand away any rough spots.
It is best to scrape off the sticky layer in the corners of the furniture - this way the aged effect will be more natural.
Instagram @scrapksu
Instagram @burmistrov_wwork
Use rinse
Rinsing is one of the easiest ways to age wood yourself.
You will need
- Brush
- Dye
- Water
- Rag
Sequencing
- Paint the item in the color of your choice. As with the previous method, don't wait for it to dry completely.
- Take a rag and gently rinse off some of the shade, creating the desired distressed effect.
- Wait until it dries to evaluate the result.
Instagram @brigwoodenproduct
Make a vinegar solution
A solution of vinegar and steel wool can quickly give an item a noble, aged look.
You will need
- Vinegar
- Steel wool (shredded steel wool will do)
- Container for mixing them
- Gloves
- Wax
- Brush
Sequencing
We recommend treating the item with black tea before applying the solution. When reacted with vinegar, it gives very rich shades.
- Put on gloves and crumble steel wool into a container (or a regular glass jar).
- Pour vinegar over everything. After a few minutes, a chemical reaction will begin and the solution will begin to darken. The longer the solution sits, the darker the color will be. In a few hours it will be ready to use.
- Moisten the wood generously with black tea and leave to dry.
- Then spread the vinegar and steel wool solution. It will immediately begin to absorb and give a dark shade.
When the surface dries, you can make one or two more layers with the solution. Wait until the product is completely dry and varnish it to give the product a finished look. Instead of varnishing, you can use waxing.
Instagram @painted_home
Instagram @olga_nazarova63
Use baking soda
Hardwoods that contain a large amount of tannins and are dark in color are suitable for this method. Soda draws tannins out of paint and brightens the product, artificially aging it. The item you want to age must be untreated. If the item has previously been painted or varnished, sand it first. The treatment solution is very easy to prepare at home.
You will need
- Baking soda
- Water
- Brush
- Wire brush
- Rag
Sequencing
- Pour one part baking soda into a bucket or bowl and fill it with one part water. The solution should be thick.
- Apply a thick layer of solution to a horizontal surface with a brush and leave to dry, preferably in the sun. It should take at least six hours for it to dry completely.
- Use a wire brush to remove the dried mortar. Press the brush intensely to remove all the soda from the pores and additionally age the surface externally.
- Take a clean, damp cloth and wipe the item thoroughly.
- Wait until it dries to evaluate the result.
The procedure can be repeated several times.
Instagram @classic_plus_home_decor
Instagram @tarassych
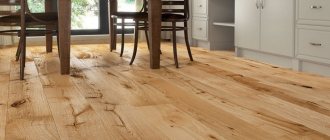
New life for old boards
Oh, how attractive, charming and romantic old boards look in the interior, the photos are simply amazing, forcing more and more people to join the circle of fans of this design. Dried by the sun and wind, absorbed by sea salt, cracked by frost or heat, eaten away by bark beetles—these boards have lost their original appearance, but over the years they have only become more noble, more expressive, and “wiser.” Now they are carefully stored in warehouses, trying not to damage them, awaiting new owners who will value and love them even more than in their previous life.
Advice ! What was previously thrown away or burned is now highly valued: barn or fence boards, cargo boxes, shelves, parts of furniture, boats, carts - there is a place for everything.
Beautiful double bed in shabby chic style
In a modern interior, old boards have many uses:
- Decorating walls or highlighting only one part to create an emphasis on a functional or decorative area. Such a solution can replace the use of traditional materials (wallpaper, paint, plaster) or can be successfully combined with them if you choose the right texture and shade.
- Laying the floor or highlighting a part of it, for example, a podium.
- Use as furniture elements, window sills, doors, bar counters, partitions. The boards can be used as a whole or by cutting parts out of them, with careful adjustment to each other and subsequent decoration.
- Creation of accessories - shelves, decorative panels, frames for mirrors or photographs, etc.
Advice ! The interior elements look original, created using old boards of different shades and sizes.
Burn the wood
Firing is in demand when you want to quickly age a material and you have the tools for the job at hand.
You will need
- Gas torch or blowtorch
- Wire brush
- Protective glasses
- Varnish
Instructions for firing without pre-treatment
Use a blowtorch or gas torch to quickly burn the product. Do not keep the tool in one place for a long time to prevent fire.
Brushed
- Pre-treat the surface with a wire brush, choosing soft fibers. This will give the wood the necessary convexity.
- Then burn at an accelerated pace, also avoiding fire.
Do not forget about safety glasses; they should be put on at the very beginning of work. When performing both methods, the final step will be the application of varnish.
Instagram @pinatikgifts
Instagram @andy_loft43
- Furniture
How to paint chipboard at home: detailed instructions in 3 steps