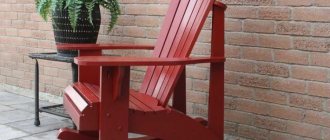
The most ordinary thing, for example, a box made of plywood, will become a very useful addition in a private home, country house or even in an apartment. This is not only a container for tools, consumables, detergents, but also an interior detail. It is enough to spend a little time and a leather substitute, and a plywood box will turn into an original chair.
An example of quality work with discreet design
Varieties and styles
A mailbox, which is located in the local area, often serves more than just its intended purpose. Such products also become a harmonious addition to the design of the building facade. Therefore, before making such a product, you should decide on the design variations. Experts distinguish three main types of mailboxes:
- In a classic style. This design is a vertical box equipped with a slot for letters and other correspondence. As a rule, they are installed by hanging them on a fence or wall of the house. Despite its simplicity, even such a box can be decorated in an original way through painting, decoupage techniques and other techniques.
- In English style. This product is made in the form of a cabinet-table, which is mounted directly on the ground. As a rule, a mailbox is placed a few steps from the main entrance to the house. Externally, this design resembles a miniature model of a residential building and is made of durable steel or brickwork.
- American style. Such mailboxes are a metal box in the shape of a half-pipe. They are mounted on a separate support or wooden rod and equipped with a special flag, which signals the presence of correspondence inside. It simply rises if the box contains letters.
Options in the photo
Variations of mailboxes depend on the imagination of the owners
Street mailbox - addition to the ensemble of a country house
The outdoor mailbox should be in harmony with the design of the house
What types of boxes are there?
Construction stores offer not only materials for repairs, but also special boxes in which it is convenient to store tools in a compact form. If you don’t have the time or desire to make such a box yourself, you can easily purchase it ready-made. However, it would be much better to do it yourself.
Before purchasing or making one at home, you should clearly determine the type of box that will be most useful. For this purpose, its purpose is determined.
Irregular use does not imply the presence of a sophisticated design. In this case, a simple box-box with one section is much better suited. There is another type - an organizer box. It is more suitable for men who are constantly engaged in repair work, be it at home or at the workplace.
To make the right choice, you need to rely on personal preferences. The choice of box depends on the man himself and his ability and desire to make something.
Required Tools
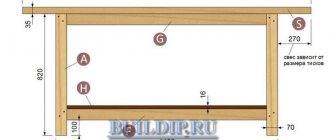
A table made of logs: technology and do-it-yourself manufacturing scheme
. There is nothing more pointless in the age of technological progress than scraping parquet with a piece of glass and being proud of such a “hand-made” product. Even the monkey picked up a stick when it got tired of hitting its competitors with its bare limbs.
Back in Soviet times, thanks to a lot of connections, I purchased a household woodworking machine
Tabletop, compact and most importantly: multifunctional. At that time, there was only one model on sale, quite expensive and not very comfortable, but now choosing the right one based on “price-quality” is not a problem
Household woodworking machine
Using the Internet, I discovered a domestic machine with the required configuration for only 12 thousand rubles. I won’t name the brand – everyone is already fed up with advertising. So this unit answers the question “How to make a box out of wood” completely. All that's left to buy is:
- Hammer.
- Roulette.
- Pencil.
- Right construction angle.
This concludes the instrumental question as far as woodworking is concerned.
Now it’s worth explaining this acquisition. Using this machine, which is quite heavy, but slightly larger than a suitcase, we can make box number one from an unedged, unplaned inch board 1300 mm long and 250 mm wide.
Assess the amount of work required with hand tools if you decide to put the production of boxes on stream – even if it’s a small one.
Necessary tools for making plywood boxes
Before you make a plywood box with your own hands, you should stock up on the necessary tools. To work with plywood you need the following equipment:
- jigsaw;
- Sander;
- wood glue;
- sandpaper;
- construction corner and pencil;
- small nails;
- masking tape;
- screwdriver
Other tools may be needed if the design has additional parts that complicate the design.
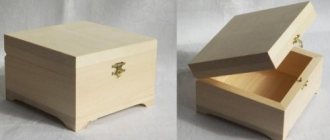
Plywood box with sliding lid.
Carriage: what is it, do-it-yourself manufacturing technology
It is quite possible to make a box from plywood with a retractable lid yourself, and in the household this design is considered unique. Visually, this can be compared to a pencil case; it will be convenient in the household and not only for storing small items, documents, photographs, etc. We will use a small parcel box made of plywood (thin) as an example. It is not necessary to purchase building material. You can use scraps.
How to make a box out of plywood? It consists of the following parts:
- Back and front walls.
- Retractable lid.
- Bottom.
- Pen.
The size should be chosen based on personal preference. Everything is cut from plywood of the same thickness, although sometimes it is worth strengthening the bottom. Each part is cut using a circular saw and then polished. The side parts need to be worked out, additionally making grooves for the cover
It is important to make them on the same parallel so that there is no distortion when moving
Holes are installed in the front and rear walls to provide side bracing. To do this, self-tapping screws are purchased in advance (length depending on the thickness of the plywood). But the previously obtained structure must stick. The range of adhesives is huge, it’s worth choosing a reliable one for construction. The composition is applied to the back wall, after which it is additionally fixed. To remove excess adhesive, use a wet cloth. Since the box will have a lid, you need to carefully ensure that all the walls are at the same level and do not differ in size.
Glue is also poured into the lower grooves, after which the walls are fixed with self-tapping screws. Next, the cover is inserted into the grooves and the movement is checked. Any violations are corrected with sandpaper. The handle is a mandatory element; it is glued, and staples from a stapler are used for strength. After 6 hours, the entire structure is further processed with an emery sheet or grinding disc.
Selection and preparation of plywood
You can make wooden boxes with your own hands from boards, cardboard, metal, and plastic. But plywood is more often used. The material is easy to work with and pliable. The finished product pleases with its lightness, strength, and stability. It will find application on the farm. The work does not require a welding machine or complex tools.
What material do you usually use?
PlywoodTree
Advantages of plywood:
- strength;
- available material;
- safety;
- different thickness;
- light weight.
Minuses:
- the material does not like moisture;
- Only standard sheets are available for sale;
- When the plywood dries, it cracks.
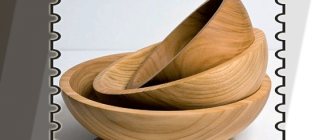
There is no such thing as too much plywood. The remains can easily be turned into shelves for the kitchen, souvenirs, and flowers. We recommend making your own organizers and stands. A necessary household item is a wine rack.
Purpose and types of wooden containers
Algorithm for making different models of plywood chairs with your own hands
The most common and popular models in this section, presented in our assortment:
- wooden boxes;
- sides of different heights (depending on the intended purpose);
- wooden containers;
- military wooden boxes;
- used pallets at reduced prices;
- Euro pallets (pallets);
- solid and with gratings - made of plywood, boards, slats of various configurations and sizes;
- box for transportation by transport (road, rail).
Vegetable warehouses contact us to order wooden boxes at low prices of different sizes for storing, transporting and selling vegetables, berries, fruits, mushrooms (apples, grapes, pears, cherries, potatoes, onions, carrots). The height of such products and their load capacity are calculated based on the characteristics and size of fruit crops, and the possibility of laying in several layers.
The wooden packaging we create performs a wide range of tasks, including:
- storage of raw materials and goods;
- packaging of products for their subsequent sale;
- loading and unloading equipment and machinery;
- safe transportation of goods and materials over any distance;
- protection from impacts and damage during transportation.
The use of wooden containers will secure the transportation and storage of fragile and breakable products, including glass (chandeliers, dishes, clay souvenirs, porcelain). It is convenient to use for vegetables and fruits, technically complex devices, bakery products, and packaged goods. The flat bottom and the presence of eyes ensure comfortable and prompt loading by loaders, as well as with the help of automatic forklifts.
Compact boxes are ordered by our clients for packaging corporate prizes and branded gift products. If you are interested in this offer, we are ready to develop for you a sketch of a wooden structure, taking into account the goods packaged in it.
Another variety of this category of products is decorative and gift boxes made of wood. We are ready to consider any wishes of our customers and fulfill the order taking into account the drawn up description and drawing.
Types of products
Today, a plywood box can be made in different shapes, types and for different purposes.
The main types include:
- Mailbox.
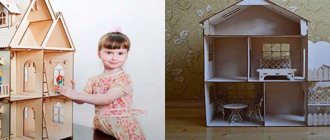
- Product for collecting children's toys.
- Design for sending fragile and valuable parcels.
- Toolbox.
- For storing and transporting vegetables, fruits and other products.
In addition to the main types, you can make gift packaging from raw materials, as well as niches as a cabinet and other things.
Create a unique plywood box with your own hands
Making with your own hands various useful household things, such as a box made of plywood, is not only pleasant, but also very useful. Spending your free time in this way not only promotes relaxation, since at such moments you don’t think about problems, but will also benefit the surrounding household and the interior.
Plywood box is useful and multifunctional
Plywood box is useful and multifunctional
One of the options - simple to implement and not requiring special material costs - is the ability to make boxes with your own hands. Plywood can be used as a fairly durable, reliable and aesthetic material.
This material is definitely easy to process, can withstand heavy loads, and has a wide range of thicknesses. Products made from it are suitable for all occasions. Plywood boxes can be used to store small items and tools.
There are many more different valuable ideas for their use.
Plywood Processing Tools
Plywood Processing Tools
With the availability of high-quality tools, even an untrained person can make a box from plywood with their own hands.
- Drill including screwdriver function
- Electric jigsaw. To begin with, you can purchase a device with semi-professional functions. In addition to the tool, a set of files is purchased to perform various functional work.
- Furniture stapler
- Roulette
Material and accessories
Material and accessories
Plywood for the bottom. The thickness is selected depending on the purpose of use of the product. It should be thicker than the side walls and lid.
- Plywood sheets for side walls
- Material for the lid, if a lid is intended
- Lid handles
- Planks and blocks of wood - for decoration
- Finishing and finishing nails
- Piano hinges
- Decorative overlays
- Wood glue
- Wheels, if you make the box mobile
- Finishing varnish
- Wood putty
DIY built-in wardrobe made from various materials
Scheme for making plywood boxes
Scheme for making plywood boxes
Before making plywood boxes, you need to think about what function they will contain.
- To think over the design solution for the future product, for this you need to draw a drawing of the box.
- Make measurements and necessary calculations.
- Transfer measurements onto sheets of plywood.
- Having drawn the pattern of the product on the surface of the plywood, we cut out the component parts using a jigsaw or a circular saw.
- We process the edges of the sawn blanks with sandpaper or a grinding machine until there are no roughness or burrs.
- We draw lines of grooves on the walls of the parts (if you use a groove connection), in those places where they will be connected, this method will help keep the future structure in one integrity.
- After preparing the parts, a plywood box is assembled; for reliability, the seams are first glued with glue for wooden surfaces. After the gluing process, the walls are fastened with self-tapping screws or confirmats.
- For fittings, holes are drilled in the places where the handles are attached.
- As an addition, internal partitions can be installed. But a simpler option, the so-called catalog storage, is more in demand. These are small, durable boxes that can be removed and replaced in the usual way.
- Larger plywood boxes may have wheels to make them easier to move. Wheels will also add individuality to this furniture.
If you have experience, such boxes will be made quite quickly.
In cases where plywood boxes are supposed to have a lid, the blank for it is made in such a way that in size it should either cover the assembled sides or be recessed inside. In the second option, you need to provide additional strips to hold the lid.
The piano hinges are attached to the middle of the back wall of the assembled box. Then carefully attach the lid of the product.
An option with a retractable lid is also possible, but it requires at least a little carpentry experience. Then the lid is made smaller than the box itself and grooves are cut for its unhindered movement.
Eternal log - myth or reality?
Using the knowledge of how to make a box from plywood, it becomes possible to purchase a lot of exclusive useful devices for the household, which can be used as a box for documents; the housewife will have a box for small items or handicrafts. And by making your own wooden structure with drawers for tools, you will get your own drawer organizer, where every item will be in its place.
Design features of plywood boxes
Making plywood boxes is not difficult. You need to immediately decide what the product will be used for. The design of the container will depend on this. The production of plywood boxes begins with sketching a sketch.
- Folding plywood boxes differ in the principle of fastening the sides to the bottom. Instead of nails, glue or self-tapping screws, the parts are connected using canopies. The same connection between the sides.
- Plywood packaging boxes are the simplest in terms of arrangement. All sides are nailed together using small nails or twisted with self-tapping screws. Such containers are used to transport cargo, so plywood parts 500x400 mm are small side parameters.
- You can create a box from plywood, the sides of which will be attached using grooves and wood glue. Usually these are decorative items.
It’s easy to create a drawing of plywood boxes with your own hands if you immediately decide on the dimensions. Manufacturing or making plywood boxes requires certain woodworking skills and abilities.
Advantages of plywood boxes
A plywood box has a number of advantages compared to other types of packaging:
- The design, even with large dimensions, is light in weight. This is very beneficial when sending valuable cargo over long distances.
- The box is easy to seal or open. Simply hammer a few nails into the lid and the load is securely sealed. You can remove the cover after removing a few nails with a nail puller.
- The cost of manufacturing such a container is low, since the material is easy to work with and its cost is not too high.
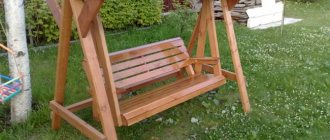
- The design can become the basis for the manufacture of decorative furniture - an ottoman, a stool, a coffee table, a shelf.
- Reliably protects contents from mechanical damage under heavy loads.
- The usual shape and strength of the box allows you to store many things of different configurations in it.
- The designs are very compact and can easily be placed in any corner of the car during transportation or in a warehouse.
If you take into account all the advantages of such a product and use them correctly, you can get an indispensable type of container for any purpose.
The technical process of making a kitchen by American DIYers is clear
Let’s make a reservation right away, of course, not everyone makes kitchens this way, this is a kind of middle option, because the result can be achieved using various design solutions, but visually it will look the same.
Photos taken from the site https://www.addicted2decorating.com, which, by the way, is not the first one, for some reason, American housewives make furniture, skillfully using various tools. Whether this is actually true, we don’t know.
Although, we think that someone might like this kitchen manufacturing technology and refuse to use chipboard. In general, the whole process resembles a construction site with a lot of garbage, dust, and noise.
Making a kitchen module
As you can see in the photo, all the details of the kitchen modules are made of plywood, and not birch, like ours, but veneered with valuable wood. Assembling cabinets using a nail gun.
| Rice. 11. Side of the kitchen module and side of the support box |
| Rice. 12. Support box and kitchen module without back wall |
| Rice. 13. Kitchen module with rear stiffener |
| Rice. 14. Kitchen module with plywood back wall |
| Rice. 15. Kitchen cabinets with a fixed front frame |
| Rice. 16. Kitchen module for drawers |
Kitchen module with drawers and making a drawer
Drawers are made entirely of plywood. To install the box on ball guides, remember there is a front frame on the body, bars are attached to the side walls, and the guides themselves are attached to them.
| Rice. 17. Drawer assembly |
| Rice. 18. The support bars for the bottom of the box are secured |
| Rice. 19. The bottom of the plywood box is secured with brackets |
| Rice. 20. Ball guide screwed to the side of the drawer |
| Rice. 21. Special device for mounting a block under the guides on the side wall at a right angle |
| Rice. 22. Ball guide screwed to the block |
| Rice. 23. Drawers installed in the kitchen module |
| Rice. 24. Drawers behind hinged doors are installed in a column |
Making a countertop
The tabletop is made of hardwood parquet, with a strip glued to the end of the tabletop.
| Rice. 25. Parquet on the tabletop, the joints are then puttied |
| Rice. 26. Differences and putty were sanded first with a belt and then with an eccentric sander |
| Rice. 27. Stain was used to tint the tabletop |
| Rice. 28. The tabletop is prepared for finishing |
How kitchen facades are made
The author chose a simple method for making facades, no complicated milling or panels. The doors are based on a panel structure.
| Rice. 29. Pre-painted blank panel for the future door |
| Rice. 30. A layout of rounded wooden slats is nailed along the perimeter of the shield |
| Rice. 31. Another interesting device for drilling under hinge cups |
| Rice. 32. A device for drilling for hinges in operation |
| Rice. 33. The holes for the hinge cups are drilled |
| Rice. 34. Decorative layout is printed along the contour and inside of the future facade |
| Rice. 35. Facades with a stuffed decorative layout |
| Rice. 36. This is what the finished facades look like after painting |
| Rice. 37. An interesting photo that shows what kind of hinges are used to hang doors on the front frame, and with this design the drawers can be easily pulled out without touching the doors |
| The diversity of modern kitchen design - Americana from Brazil To create an article on modern kitchen design from South America, we analyzed a large selection of photographs of kitchens from rental and real estate sites in Brazil. As a result, we will highlight the main design features of the façade and the color design patterns of South American kitchens. |
What else is inside the kitchen modules?
And inside the kitchen modules there are drawers, pull-out modules for kitchen utensils and even a refrigerator that mimics the color of the kitchen.
| Rice. 38-39. The refrigerator is painted in the color of the kitchen |
| Rice. 40. Drawers for dishes and household appliances inside the pencil case |
| Rice. 41-42. Pull-out module made of plywood for kitchen utensils |
| Rice. 43. Internal drawers for pots behind hinged doors |
Boxing decoration
Plywood boxes should not only be comfortable, but also beautiful. The easiest way to treat wood is with impregnation. Stains come in a variety of shades that help transform the neutral surface of the slab. The product washes off quickly, so the design can be changed frequently.
Varnish and paint are materials that extend the performance characteristics of plywood and protect against negative external influences. Glossy transparent raw materials give the product a luxurious touch, without hiding its natural beauty. Enamel coating will allow you to radically change the design and paint over defects.
Source livemaster.ru
Plywood boxes should be decorated using decoupage technology. The easiest way is to use paper napkins with a pattern. I carefully sand the wood to remove any unevenness, cover it with 3-4 layers of primer, drying it before each application. I cut out the picture, apply glue with a brush and carefully press it to the box. I paint the top with adhesive and after 60 minutes I varnish it.
If you have artistic skills, I advise you to decorate with your own drawings. Homemade plywood boxes can be painted. Stencil inscriptions or ornamental images look original.
Source livemaster.ru
I advise you to hide the ugly surface under stickers or mosaics. A flat, monochromatic lid should be decorated using burning technology. Textiles harmoniously combine with wood. I recommend wrapping a structure in the shape of a square or rectangle with coarse twine. Individual details decorated with leather look original.
Stages of work
How to make a wooden box with a lid? There is no point in buying or ordering it. And it's not interesting. You can do everything yourself. There is nothing complicated here, just follow the instructions. You have to do the following:
First you need to cut the bars to the length you need them. This will be the basis for the future box.
To create a three-dimensional frame, you need to combine these bars with each other. You will need nails to connect.
Next, calculate how many drawer slats you will need. They need to sew up the bottom and sides.
Professionals in their field advise to sew the bottom first, and then connect the sides. This way you can never go wrong with the size. When working, be sure to use a construction angle.
After all these steps, all you have to do is screw the handles to the drawer. Ready!
Stool box: drawings and description
This is a carpentry product of a more complex level of manufacture than a simple box. For a stool on which you can sit or stand, a durable frame is built from a bar. The interior space is used to store tools.
You will need:
- board 20 mm thick;
- block 50x50;
- plywood 8-10 mm;
- wood glue;
- cutting tool;
- screwdriver or drill;
- block, fine sandpaper or sander;
- hinges, handles, lock.
First prepare a drawing with dimensions
Now you need to assemble the stool:
- Trim the blanks to size.
- Connect the bars with tongue-and-groove fastenings and dowels.
- Cut out the bottom and sides from plywood.
- Sand all the details.
- Lubricate the contacting surfaces with glue.
- Insert dowels and connect the elements, remove excess lei
- Tighten with clamps for 24 hours.
Aging in clamps
While the glue is setting, a seat is made from the board. The parts are polished and the edges are rounded. Glued to the frame and connected with an “oblique” screw.
The sides and bottom are fixed to the stool. The opening part is secured with overhead hinges. To prevent the lid from opening spontaneously, install a latch. The functional box-stool is ready.
Plywood: advantages and disadvantages of the material
Of course, first you need to understand why we choose plywood to make boxes, because they can be made from many other equally practical materials, for example:
- metal;
- cardboard;
- wood;
- plastics, etc.
We answer: plywood is the easiest to work with. Of course, it will not serve you as long as metal, however, you won’t need a welding tool to create a box. Cardboard, for example, will not provide the resistance to damage we need, and even more so, it does not have the same solid decorative qualities as plywood.
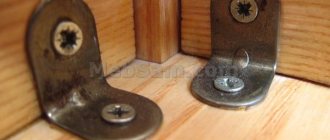
Plywood box with metal corners
In addition, if you ask a similar question to craftsmen whose activities are related to the manufacture of furniture, they will probably assure you that plywood is the most pliable and rewarding material to work with, which has a lot of advantages, although, of course, it can also have disadvantages. In the table below we have covered this topic in more detail.
Table 1. Advantages of plywood.
| Parameter | Description |
| Strength | One layer of plywood consists of several layers of wood laid on top of each other perpendicularly. This layout allows you to cover all the flaws of the canvas, giving it maximum strength. It turns out that plywood is much more reliable than, for example, plastic or thin wood. The performance characteristics of furniture made from this material allow it to be used again and again for at least 10-15 years, and even longer if handled with care. |
| Low cost | The production of this material on an industrial scale is inexpensive for companies. In addition, there is practically no waste left from the raw materials used to create plywood, therefore, the final cost of purchased plywood is also affordable for any wallet. |
| Versatility of use | The required material can be used for the manufacture of almost any piece of furniture, since due to its structure, it:
|
| A wide range of | It would seem that sheets of plywood differ only in thickness, which can range from 2 to 30 millimeters, however, in fact, each layer contains a different number of veneer layers. If you look at the leaf from the side, you can see them with the naked eye. The more layers, the stronger and thinner the plywood. Accordingly, you will choose specific sheets based on what goal you have now: to make a box, chair, table, etc. |
| Performance characteristics | Despite the fact that plywood is a very strong and damage-resistant material, its weight indicators are very small. Therefore, it is easy to handle, as are the objects made from it. Plywood does not wear out for decades, since products made from it are very flexible and not so easy to break. |
Plywood can be very durable
Table 2. Disadvantages of plywood.
| Parameter | Description |
| Sensitivity to air humidity levels | Despite the fact that plywood is resistant to water falling on its surface (largely because it is also treated with varnishes and special water-repellent compounds before use), it exhibits increased sensitivity to changes in the level of humidity in the air. So, it should not be placed in a place that is too wet, as it will become damp and rot. But it also cannot be left in a room where batteries are continuously operating at full power, as it will crack. However, the use of sealants, varnish and resin obtained by polycondensation of phenols can slow down its wear even when used in unsuitable conditions. |
| Sale in the form of layers with standard parameters | In stores, plywood is sold in the form of standard size sheets, the size of which is 1.525 * 1.525 millimeters. That is why, even if you want to make a box of the most modest size, you will have to purchase a huge sheet at once. In addition, the minimum thickness of plywood is 2 millimeters; there are no thinner sheets, so you also have to take this into account and make at least medium-sized objects from this material. |
Plywood sheets
Tool box with slats, angles and hinges
This design also requires a bottom and two pairs of identical blanks for the walls. You will also need a lid, the dimensions of which will allow you to cover the resulting box. The walls with the bottom are fixed with slats:
- Nail them along two adjacent sides of the perimeter of the lid and bottom.
- Assemble only the sides of the box, securing the pieces together with metal corners.
- Empirically mark the location of the slats for the remaining pair of sides.
- Lower the bottom with the slats towards the bottom. Screw along the contour.
- If necessary, attach legs to the box.
The hinged model is interesting. It looks like two simple small boxes. The boxes are connected with loops. It turns out that the parts are both a useful container and a cover for one another. Peculiarities:
- It is better to use plywood 6 mm thick;
- for half-boxes, a depth of 15-20 cm is enough;
- in one of the halves you can make retractable drawers with compartments for consumables;
- the tool will be located in the second half - secure it with any type of fastener.
You can improve this assembly a little and get a real organizer. The sliding mechanism is what distinguishes it from elementary models. Making such a box is more difficult:
- Assemble the bottom deep box with an open top using plywood. The space inside it can be divided into two compartments by a partition.
- Make a pair of boxes. The width of each pair must match the width of the lower compartment. Make retractable lids for the drawers.
- Place the boxes on metal plates, which will form a retractable base. An example for a 3-story structure, when it is necessary to fasten on both sides separately:
- a couple of lower levels;
- all three (two longest plates);
- middle and upper floors.
The technology allows you to move individual levels of drawers. If you have any difficulties, refer to the diagram. Assembling any box is not difficult. Success is guaranteed by a pair of skillful hands and the necessary materials.
Tool Chest Ideas
In the hands of a true craftsman, any thing that has outlived its useful life can become a useful and functional device. Various ideas that are implemented from improvised means arouse interest and become an impetus for one’s own creativity:
- A tool box made from cable ducts and sofa springs is an economical lightweight device for storing small accessories.
- Plastic canisters are record holders for generating various ideas. If you cut out a window in the upper part, such a container can be used to store screws, nails, drills and anything else that may be useful in your work.
A shopping cart, if obtained legally, can be transformed into a convenient Tool-box through some transformations. It is enough to arrange compartments or shelves, and the handle and wheels are already there. Old "diplomacy" bags are strong and durable, and reliable locks have worked properly for more than 20 years. Inside the case you can arrange small pockets for storing small items, and the suitcase itself can easily withstand the weight of a drill or screwdriver.
Types of tool organizers
Tool boxes differ in the material used and the type of items stored. According to the material used they can be:
- wooden. Wood is an affordable and easy to process material. To make the box, use a board or durable multi-layer plywood with a thickness of 10, 16 or 18 mm. The complexity of the design depends on the wishes and skills of the master;
- metal. Steel or iron structures are quite heavy, but they are strong and durable. Lighter boxes are made of aluminum;
- plastic. These boxes are lightweight, durable, convenient and have a modern design.
Wooden tool box
Boxes also differ in the type of tool stored in them and are:
- Unprofessional. They are a design with several compartments. They use bags or cases of different sizes.
- Power tools. Special boxes used for storing drills, grinders, screwdrivers, etc. As a rule, such boxes are equipped with a large compartment for certain equipment and several small ones for additional equipment.
- Professional. Most craftsmen prefer this particular type of tool box, since they have separate seats for a certain type of equipment.
- Universal. Boxes of this type have a large number of compartments and are used to store a wide variety of tools. There are tool boxes with removable partitions, which allows you to rearrange the internal space at your own discretion.
Universal tool box
Slat box
Step 1. First of all, you need to cut the blanks to create a box. You will need bars of the selected length, slats 1 cm thick. The bars need to be cut to length so that their profile is triangular.
The process of creating blanks
The block has a triangular cross-section
Step 2. Next you need to take the bars, lay them on top of each other (2 bars on each side) and start making walls. You need to apply wood glue to the flat surface of the block and arrange the slats so that they rest on the flat side surface of the bars. The slats are placed at a certain distance from each other to create gaps.
The slats are parallel
Step 3. Then the slats additionally need to be secured to the corner bars using nails or self-tapping screws. In this way, two side walls of the box are made.
Additional rail fastening
Finished side wall
Step 4. Next, the prepared walls need to be placed in a special template (or simply held correctly) and, using the same principle as in steps 2 and 3, attach the next slats to the sides of the free sides of the bars. Thus, it will be possible to create two other side walls.
The next slats are attached
All side walls are ready
Step 5. Then the bottom is made. You need to lay two slats (with a length equal to the length of the box) parallel to each other, and fix other slats on them, but without gaps, so that the bottom is solid.
Making the bottom of the box
The bottom turns out to be solid
Step 6. All that remains is to secure the bottom to the underside of the box, and it is ready. If necessary, all structural parts can be sanded before assembling the box. It is better to varnish or paint the product after assembly.
The bottom of the box is attached
This is what the finished box looks like
Video - Making a tool box
https://youtube.com/watch?v=KrEfL3C_kJg
The box was and remains a simple but indispensable item for storing all kinds of things. It is especially necessary at the dacha or in a private house, as well as for those people who love everything simple and uncomplicated. In any case, a product made by yourself will be as reliable as possible and will last for more than one year, or even more than one decade.
Moreover, as it turned out, making a wooden box is simple - it is only important to understand what shape you want to get the product
Source of the article: https://mebel-expert.info/yashhik-iz-dereva-svoimi-rukami/
Properties of a wooden box
Why, despite the emergence of cheaper and simpler competitors, does an ordinary wooden box not lose its popularity?
It's simple - the answer to this question lies in the unique properties and features of such containers. Table. Comparison of box characteristics.
| Drawer type | Advantages and disadvantages |
| Veneer | Such a box is made from planks that have virtually no processing. It is quite fragile compared to wood, but costs less. Suitable for storing and transporting fruits and vegetables, as well as other products. Afraid of moisture. |
| Made of plastic | A fairly convenient type of box that is not at all afraid of moisture. Depending on the quality of the plastic, it can be either very durable or quite fragile. But this type of box is still easier to damage than a regular wooden one. It doesn’t cost much, but it’s more expensive than a wooden product. Suitable for storing and transporting not only dry, but also wet products. |
| Made of metal | A species that is quite rare. Metal boxes have not become popular due to their tendency to rust, as well as their heaviness and high price. It is not easy to make a metal box at home without special equipment. |
| Made of wood | The most optimal type of box. It is quite durable, can have different designs, and is suitable for storing all kinds of products. Looks much better than a regular veneer box. When used as a decorative finish, it can be used at home; it is durable if the wood has been treated with protective compounds. |
Wooden box
The production of wooden boxes in production occurs in accordance with GOST 20767-75. And for them, a wooden board of a certain quality, 1 cm thick, is used. Such boxes are thin-walled, but durable. They are quite light and easy to use.
Tool cabinets, drawers, cabinets
Tools and materials
Creating any thing with your own hands requires knowledge of the product diagram, the main stages of work, as well as the availability of the necessary tools and materials.
To make a box using plywood as the main material, you need to have the following things.
- A sheet of well-dried plywood, the optimal thickness should be at least 8 mm. Wet or poorly dried wood will not cut or sand easily and will result in a disappointing finished box.
- High-quality polymer glue for fixing parts.
- A jigsaw or jigsaw for cutting parts.
- Face and hand protection – goggles and gloves.
- Sandpaper of varying degrees of grit.
- Putty.
- Small awnings.
- Short screws and a screwdriver.
- Gas-burner.
- Acrylic type of varnish.
- Decorative paint.
- Hand router or cutter with a 45 degree angle.
- End milling cutter.
Tool storage box with lid
A slightly more complex, but also more practical option, is often called a “carpenter's toolbox”. It is distinguished by its massive walls and bottom, the presence of a hinged lid with a carrying handle and a removable compartment for small items.
Below is the layout of the parts and the order of their assembly
An important feature of this model is its assembly with self-tapping screws, which significantly simplifies the work for an inexperienced carpenter. Unlike the tongue-and-groove system, this assembly does not require the mandatory and precise selection of grooves on the side edges of the parts
To make a tool box with your own hands you will need:
- high-quality wood or plywood with a thickness of at least 8 mm for the walls and 12 mm for the bottom. The area of sheet material or dimensions of parts is shown on the parts layout;
- screws or nails for assembly, fittings for the lid (piano or furniture hinges of a suitable size, holders for a leather handle, locks), thin screws or nails for fastening the fittings, a leather strip for a handle or a finished handle;
- a screwdriver or screwdriver for tightening screws (or a hammer for driving nails), a jigsaw or hand saw for cutting parts, a tool for milling grooves for assembly.
Additionally, a tool for marking and measuring is required.
The sawn parts are processed at the ends to remove burrs and roughness and are assembled according to the instructions:
The composite bottom and cover are being assembled
It is important to make the grooves correctly and ensure a clear match of the geometry of the parts; a container for small items is assembled; stops and sealing linings are attached to the side walls for inserting the container; the bottom is connected to the side walls; The cover is assembled (top part and four side parts); hinges and locks are mounted on the lid and one of the side walls (marking in place); the lid handle is attached (this can be done at the assembly stage); the functionality of the structure is checked, the lid and locks are closed. The parts are treated with moisture-proof or protective-decorative impregnation or coating after final assembly or before installing the fittings (depending on the type of coating)
It is advisable to apply impregnation before assembly, varnish and paint - after, but before installation of fittings
Treatment of parts with moisture-proof or protective-decorative impregnation or coating is carried out after final assembly or before installation of fittings (depending on the type of coating). It is advisable to apply impregnation before assembly, varnish and paint - after, but before installing the fittings.
With the right type of wood and fittings, and high-quality workmanship, such a portable tool box looks very impressive and solid, not inferior to industrial products.
Preparing the box parts
Our machine has a circular saw with good speed - about 2000 per minute. With its help, we make edged boards from unedged boards. Using a guide ruler, we first cut off one long end, and then, setting the width to 200 mm, the second.
The guide carriage provides you with any cross-cut angle - we are now interested in 90 degrees. First, we saw off the uneven (usually) edge of the board, and then from it we cut four dies 200 mm long and one 240 mm long. For now these are just blanks.
You won’t believe it, but the machine has an electric plane that is height adjustable. To begin with, set it to 1 mm and run the planes of the workpieces on both sides. Next, we set it to 0.5 millimeters and achieve a thickness of 20 mm for our workpieces, cutting off the “ugly” side - this will always be found even on an ideal board.
Two blanks have already turned into parts. These are the future sidewalls 200x200x20 mm. If you did everything carefully, they don’t even need to be sanded - after all, we’re just building a fruit box for now.
Let me remind you that we are making the entire box from one single board, so the planks also remain 20 mm thick - why plan them?
We cut the remaining three dies into 45 mm lengths along the wood grain. Three slats will be redundant (one 240 mm long and two 200 mm long) if we want ventilation, that is, gaps between the slats.
Hotkeys for Corel DRAW
Install in the Corel DRAW interface: Tools > Options > Workspace Standard hotkeys
- E - center vertically
- C - center horizontally
- L - left
- R - right
- T - top
- B - bottom
- Ctrl + K - disconnect
- Ctrl + Q - convert to curve
- X - eraser
- F6 - rectangle
- F7 - circle
- F4 - show all
- Shift + F2 - selected to screen
- Ctrl + G - group
- Ctrl + U - ungroup
- Ctrl + Home - bring to front
- Ctrl + End - move to background
- Ctrl + T - show text properties
Panels
- Alt + F7 - move
- Ctrl + F9 - outline
- Ctrl + Shift + A - alignment
Customized
- Q - intersection
- W - rear minus front
- S - front minus rear
- D - union
- K - disconnect
- J - convert to curve
- A - distribute vertically
- Z - distribute horizontally
- V - deleting a virtual segment
- F5 - B-spline
- F3 - broken line
- ` — angle
- 1 - height
- 2 - width
- Size 3
Instructions for making a plywood box for collecting mail
A device made of wood material is a universal design option. Using the appropriate parameters and manufacturing techniques, you can make a device for storing mail:
- Take plywood (12 mm wide) and cut it into pieces. The width of the first is 22 cm, and the second is 6.5 cm.
- A sketch is formed on these strips. On a strip 22 cm wide, draw a sketch of the front and back walls.
- You need to divide the canvas in half with a point at the very edge. Step back 5 cm from the corners on both sides of the strip - mark the points. Draw a triangle.
- From the base of the resulting triangle, retreat 25 cm to form the height. Make another similar piece. Step back 5 cm from the edges of the strip and draw lines.
- From the already obtained lines, retreat another 5 cm from the edges and draw stripes that will determine the location of the hole for mail.
- Cut strips 6.5 cm wide into pieces 25 cm high.
- Cut out parts on a machine.
- Use a jigsaw to cut out a hole for letters. Work the part along the lines that were marked at a distance of 5 cm from the edge. You will get a frame with a removable inner part.
- To make the box neat, you need to sand the parts in disassembled form.
- Use glue to connect all the parts. Small nails serve as additional fixation.
- To protect the plywood box from precipitation, cut out parts from a 6.5 cm wide strip from which the “roof” will be formed.
- On 2 decorative canopies, attach the door to the base of the product.
- A “stop” made from leftover material is installed inside the structure. It is needed to prevent the door from falling inward.
Such a device for mail will be an excellent design that will not only protect letters and newspapers from rain, but will also decorate the design of the yard.
How to choose plywood and fittings for making a box
Before you start making a plywood box, you need to choose the appropriate type of base material. The canvases are formed from different types of trees, so their properties will be completely different:
- The base made of birch wood is considered the most common option. This type of base will provide an original pattern and a smooth base.
- Layers of pine wood make the canvas strong and resistant to mechanical damage.
- The linden base will provide flexibility and strength to the sheets.
To create a body with positive characteristics, you need to use several sheets of wooden material of different thicknesses. For the bottom you need plywood with maximum thickness; the side walls and the lid (if necessary) can be made from thinner sheets. It will not be possible to make a full-fledged structure without the use of fittings and other materials:
- finishing and finishing nails;
- wood glue;
- wood putty;
- opening varnish;
- handle for lid;
- piano hinges;
- wheels (if constant movement is necessary);
- decorative overlays and strips.
The set of accessories depends on the purpose for which the device will be used.
Plywood structures
Here the material is selected depending on the intended use of the finished product. If the box is intended for correspondence, you can get by with thin plywood. For seedlings or flowers, multilayer sheets impregnated with a waterproof compound are more suitable.
The design is made according to the following scheme:
- make a drawing of the box with dimensions;
- the drawing is transferred to a sheet of plywood;
- parts are cut out according to the markings;
- individual elements are fastened together with self-tapping screws or nails, and the joints are treated with sealant.
Considering that plywood is easy to process, you can make more complex, non-standard country boxes. For example, the joints of the walls should be designed according to the tongue-and-groove principle. If you are making a deep box for storing children's toys, you can attach wheels from an old computer chair to the bottom. Drawers with a sliding top panel look interesting. Here a cover is cut out of a sheet of thin plywood and a groove is cut in the upper part of the walls.
Why the box layout in Corel DRAW?
Today, this graphic editor is used by most owners of laser machines and designers to create various layouts for laser cutting and engraving, including boxes, for example, gift or wine boxes, storage boxes, for example, organizers, or the same boxes. And they choose this graphic editor, probably, primarily because it allows you to easily and simply create any layout for laser cutting, taking into account the features of processing on a laser machine. You will also find many layouts for laser cutting in Corel DRAW freely available on the Internet. So what's the point of specifically studying another graphic editor for this purpose? Of course, if we are not talking about preparing photographs for laser engraving. But that is another story. You will find video instructions on this topic on our blog. By the way, who doesn’t know, to work faster in Corel DRAW
you need to use the so-called hot keys.
Plywood: advantages and disadvantages of the material
Of course, first you need to understand why we choose plywood to make boxes, because they can be made from many other equally practical materials, for example:
- metal;
- cardboard;
- wood;
- plastics, etc.
We answer: plywood is the easiest to work with. Of course, it will not serve you as long as metal, however, you won’t need a welding tool to create a box. Cardboard, for example, will not provide the resistance to damage we need, and even more so, it does not have the same solid decorative qualities as plywood.
Plywood box with metal corners
In addition, if you ask a similar question to craftsmen whose activities are related to the manufacture of furniture, they will probably assure you that plywood is the most pliable and rewarding material to work with, which has a lot of advantages, although, of course, it can also have disadvantages. In the table below we have covered this topic in more detail.
Table 1. Advantages of plywood.
| Parameter | Description |
| Strength | One layer of plywood consists of several layers of wood laid on top of each other perpendicularly. This layout allows you to cover all the flaws of the canvas, giving it maximum strength. It turns out that plywood is much more reliable than, for example, plastic or thin wood. The performance characteristics of furniture made from this material allow it to be used again and again for at least 10-15 years, and even longer if handled with care. |
| Low cost | The production of this material on an industrial scale is inexpensive for companies. In addition, there is practically no waste left from the raw materials used to create plywood, therefore, the final cost of purchased plywood is also affordable for any wallet. |
| Versatility of use | The required material can be used for the manufacture of almost any piece of furniture, since due to its structure, it is: easy to cut; doesn't crumble. Contrary to expectations, plywood is very plastic, and therefore even beginners in the field of furniture making can work with sheets of material without fear of violating its integrity through careless actions. |
| A wide range of | It would seem that sheets of plywood differ only in thickness, which can range from 2 to 30 millimeters, however, in fact, each layer contains a different number of veneer layers. If you look at the leaf from the side, you can see them with the naked eye. The more layers, the stronger and thinner the plywood. Accordingly, you will choose specific sheets based on what goal you have now: to make a box, chair, table, etc. |
| Performance characteristics | Despite the fact that plywood is a very strong and damage-resistant material, its weight indicators are very small. Therefore, it is easy to handle, as are the objects made from it. Plywood does not wear out for decades, since products made from it are very flexible and not so easy to break. |
Plywood can be very durable
Table 2. Disadvantages of plywood.
| Parameter | Description |
| Sensitivity to air humidity levels | Despite the fact that plywood is resistant to water falling on its surface (largely because it is also treated with varnishes and special water-repellent compounds before use), it exhibits increased sensitivity to changes in the level of humidity in the air. So, it should not be placed in a place that is too wet, as it will become damp and rot. But it also cannot be left in a room where batteries are continuously operating at full power, as it will crack. However, the use of sealants, varnish and resin obtained by polycondensation of phenols can slow down its wear even when used in unsuitable conditions. |
| Sale in the form of layers with standard parameters | In stores, plywood is sold in the form of standard size sheets, the size of which is 1.525 * 1.525 millimeters. That is why, even if you want to make a box of the most modest size, you will have to purchase a huge sheet at once. In addition, the minimum thickness of plywood is 2 millimeters; there are no thinner sheets, so you also have to take this into account and make at least medium-sized objects from this material. |
Plywood sheets
Finishing work
The finished plywood box should be able to be finished. You can coat it with varnish, and if there are cracks, they are first sealed with putty. As decoration, you can glue linings to the product. They can be cut from plywood sheets with a jigsaw, so the overall appearance will not be lost.
For better preservation of the material, it is necessary to treat the internal walls with varnish. If the box will be part of the decor in the room, then the outer sides can be painted in a certain color using regular paint. If putty is used, then before applying varnish or paint, the surface must be sanded with sandpaper, and the product itself must be smooth to the touch, without roughness.