There are things in our everyday life that we cannot imagine without. Every home, for example, has dishes. You can not only eat from it. She helps in preparing a variety of dishes. Among the readers there may be admirers of wooden utensils and their opponents. However, everyone without exception will agree that the environmental friendliness of a material such as wood makes any thing desirable in your home. Do-it-yourself wooden dishes can become a source of income for the craftsman. This business can be regarded as a home business, since it can be organized in a small area. This format of your business allows you to receive additional income to your main income, and over time, increase production volumes. Having your own small mini workshop where wooden utensils are made is an opportunity to become a financially independent person.
How to start a business making wooden tableware
Masters who have gone this route advise choosing one or two product positions to begin with. Only by perfecting the technology of their production can we expand the range further. All stages of wood processing for household utensils have been known for a long time. Since time immemorial, it has been used in agriculture in our country. Our ancestors also noticed that it is durable, comfortable, and the dishes in it acquire a special taste.
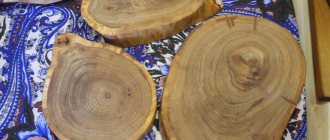
Wood is inexpensive. To start a business you will not need large amounts of money to purchase materials. Small pieces of utensils can be cut out entirely from waste that remains after the manufacture of other products. Such blanks can be picked up at production for free. The cost of timber ranges from 5 to 15 thousand rubles. The price is mainly determined by the type of wood. In addition, it plays a role from what part of the tree the blanks are cut from. The burl, rhizome and lower part of the trunk are usually taken into production. There should be no shells on the material. Stale material is not suitable, as it can affect the taste of finished dishes. In general, it has been proven that the taste of dishes in dishes made from different types of wood may differ. The best handmade wooden utensils are made from cedar, aspen, juniper, birch and bamboo.
Wood is an easily processed material. However, working with it requires certain skills, tools and equipment.
Carving tools and methods
The result in carving, as in any creativity, depends on the materials, the talent of the creator and the capabilities of the tools. Craftsmen can boast of a solid set of knives, cutting molds, spoons and scissors. Beginners will also need a few special tools. You shouldn't learn fruit carving with a regular kitchen knife - you'll most likely be disappointed. As a last resort, use a scalpel or wood carving knives.
There are two main directions - Thai and Chinese. The second option is simpler, but more limited in capabilities. It involves the use of ready-made stencils, recesses and shapes. They can be replaced by small stainless steel cookie cutters.
In the classic Thai version, hand work is practiced using the following tools.
Universal knife. A thin long blade, pointed at the end, will allow you to peel vegetables and fruits, give them the desired shape, make long cuts or deep punctures.
Sickle knife. A short curved knife allows you to draw complex geometric patterns on large fruits - watermelons, pumpkins or melons.
Thai knife. A small knife with a narrow and short blade is indispensable for creating small openwork ornaments.
Oval knives. Used to create designs with rounded edges of various diameters.
Carving knives. Their triangular cross-section will help in depicting petals, leaves and imitating engravings on the dense crusts of fruits or vegetables.
Scissors. May be needed to refine cuts and edges of the product.
Noisette spoons. With their help, you can extract pulp from fruits, or cut out spheres and hemispheres of various diameters.
Die cutting. They are useful for cutting the core out of fruit circles, for cutting fruit peels into shapes, and for creating repeating elements of a composition.
When purchasing a tool, give preference to blades made of high-quality stainless steel, without burrs. Handles should be ergonomically shaped from modern polymer materials - they are hygienic, durable and do not absorb odors.
You may need toothpicks, toppers, or barbecue skewers to hold elements of complex shapes together. Serving finished sculptures can be done either on a classic dish or on a wooden tray.
Technology for making wooden utensils
The manufacturing technology of wooden utensils consists of the following stages:
| 1 | Cutting out the workpiece. |
| 2 | Drawing the outline of the future product. |
| 3 | Sawing blanks. |
| 4 | Marking the side contours. |
| 5 | Cutting of the product itself. |
| 6 | Surface treatment: grinding and polishing. |
| 7 | Decoration with carvings or designs. |
Finished wooden utensils are often varnished. For this, a special food composition is used. Sometimes varnish is replaced with wood oil. It is made from flax, especially for artistic painting. Each painting school uses its own compositions.
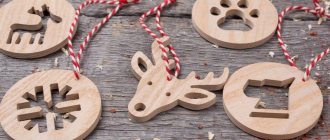
Range of possible products that can be produced
When organizing the production of wooden utensils, you can focus on different types of main consumers - the greatest demand is for ordinary kitchen utensils used in everyday life when preparing and eating food. Painted wooden dishes are also popular and have their own buyer, but their sales are somewhat lower due to the higher selling price.
One of the profitable areas of your business activity can be wooden tableware for restaurants and cafes - currently, a large number of such establishments are stylized in the Russian style and use traditional Russian folk costumes, paintings, customs and household items in their decoration.
Speaking about the range of possible products, at first you should pay attention to the following:
- Kitchen cutting boards;
- Stands for hot dishes of various sizes and shapes;
- Mugs and teapots;
- Trays and baking trays;
- Containers for storing bulk products, sugar bowls, salt shakers;
- Spoons, forks, spatulas, ladles;
- Plates for first and second courses;
- Salad bowls;
- Vases.
Decorating wooden dishes
Painting dishes with your own hands is not only an art. It used to be believed that properly decorated utensils drove away evil spirits from the house. Paints were made from those materials that were sufficient in a certain area, which is why entire schools and industries were created. In addition, each region has its own symbols. From the drawings you can determine where the wooden utensils were made. Today, along with old technologies, new ones are used, for example, decoupage.
The main stages that the product goes through:
| 1 | The surface is thoroughly cleaned. |
| 2 | The product is sanded with fine sandpaper. This is done only along the fibers. |
| 3 | A protective coating, such as stain, is applied. It can be based on water, alcohol, oil. Stains have different shades. This must be taken into account in your work. |
| 4 | Prime the product with a solution of PVA glue and water. |
| 5 | Drawing. |
| 6 | Fixing the pattern with nitro varnish. Oil varnish coating. There can be several layers. Each new coating begins only after the previous layer has dried. |
Paints can be used acrylic, gouache or tempera. PVA is added to gouache to give it brightness. Paint the products with kolinsky brushes. They should be soft and elastic. Brushes are distinguished by numbers from 1 to 10. The higher the number, the thicker the tool. Usually the drawing itself is applied with brushes numbered 3 to 5.
Features of marketing in the niche of wooden utensils
Wooden utensils are usually sold in souvenir shops, markets and fairs. A more modern way is to create an online store . When advertising products, experts advise using not only the properties of practicality and safety.
You can interest buyers with interesting facts that each food in dishes made of different wood acquires certain taste qualities. Thus, it is better to cook sauerkraut in a barrel made of coniferous trees, potatoes and other vegetables are tastier to eat from a bowl made of hardwood, and mushrooms will acquire a special taste when stored in a bowl made of juniper, aspen or larch.
Step-by-step launch instructions
- Market and competition analysis.
- The choice of products for manufacturing and material (affects the determination of the business niche).
- Search for a supplier and purchase of raw materials.
- Registration of LLC or individual entrepreneur.
- Choosing the optimal premises for rent.
- Purchase of equipment and inventory.
- Hiring staff.
- Searching for sales channels and conducting promotional events.
What documents are needed to open
Before you start making wooden utensils, you will need to register as a business entity. This can be done in two ways:
- registration as an individual entrepreneur;
- preparation of documents for registration of a legal entity, preferably a limited liability company.
For each of the named entities there is a specific list of documents that must be submitted to the registration authority. If you are setting up small production, then an individual entrepreneur is ideal.
For individual entrepreneurs:
- application for registration as an individual entrepreneur;
- photocopy of passport;
- Receipt of payment.
You will also need to open a bank account and register with government agencies.
Decorative fence made of plates
You can decorate your home front garden of a country house with an unusual fence made from old plates, dug in to the middle, one after the other.
Lamp shades made from old bowls painted in bright colors
Old cups are a treasure trove of decorative imagination. Use as a cute flower pot is not all of their functionality.
Starting from a base for a lamp glued together from plates and cups, ending with an avant-garde design of a chandelier or an original holder for curtains (in this case, the bottom of the cup is cut out, the curtain is then threaded through it, and the handle acts as a wall hook). The design option for a cup candle is quite popular.
Old wax candles are melted down to a liquid state, then poured into a cup, while the wick is held vertically in the center until the wax completely hardens.
Decoration of the fence around the house
Kitchen grater lamp
You can make your own napkin holders from forks and spoons. To do this, use pliers to bend the spoon into a ring with a diameter of 5-6 cm. You must first “bite off” the sharp ends of the teeth of the fork.
You can use jars to make lamps to illuminate your home.
Grater as a stand for jewelry
Expert opinion Ksenia Petrovna Romanova Expert in the field of interior design, as well as the head of a fabric sales salon
Broken dishes are sometimes more functional and beautiful than whole ones. From the shards you can make intricate colored applications for your personal plot in the form of a panel, path, steps, decoupage of a tabletop or door.