Long gone are the days when everyone in the country had the same dishes and furniture. Now no one will throw away the old “grandmother’s” chest of drawers, but will try to give things a second life. We know that in addition to decor, there is also decoupage.
Decoupage is a type of decorative and applied art. The word "decoupage" means "to cut" in French. Working with this technique involves cutting out images from different materials: paper, napkins, leather, fabric, and gluing them onto surfaces for decoration.
Now this interesting technique has received a rebirth; it is used all over the world. Decoupage is used in working with furniture, boxes, kitchen utensils, Christmas tree decorations, household items, bags, watches, and so on. For decoupage, pictures printed on a copier or printer are used. In our master class we invite you to decoupage a stool while simultaneously aging it.
A very current topic is the aging of things that you will decorate. Here are the main techniques by which aging is carried out:
- Shabby chic.
- Dry brush.
- Brushing.
- Patching.
- Spray
- Artificial aging by abrasions.
- Craquelure or crackle.
DIY aging techniques
Let's try to understand the techniques of aging in decoupage, starting from simple to complex. The most common and simple technique is “rubbing” with a candle. The most difficult one is craquelure or crackle. We chose the master class “Aging with abrasions” for our work. The master class is simple, even a beginner can handle it.
Shabby chic
Wornness and “wornness” are achieved by multi-layer painting: the corners, sides, joints of the product are covered with paint of a rich, but not too dark color, then rubbed with paraffin, then with light-colored paint. Next, use sandpaper to remove the top layer. This is how the aging effect appears.
Dry brush
Another simple technique. A great way to age a product, create a look of antiquity and wear. The work consists of applying paint to a flat synthetic brush. Excess paint is removed with paper and applied with light strokes to the pattern, edges, and protruding parts of the object. This is how we achieve the aging effect.
Brushing
Brushing wooden products in decoupage is usually combined with staining. The brushing technique is the removal of soft fibers from the top layer of wooden surfaces with a brush. For staining and brushing, you do not need to buy expensive special products; you can use strong brewed tea or coffee. Stain is also used. In places where there are abrasions, part of the wood is cleaned off with a hard metal brush or sandpaper, leaving light areas of the object.
Patching
Patination is traces of aging, imitation of darkening of the surface, as if this object had darkened due to frequent contact with hands. Patina is a green and brown coating that results from the oxidation of metal under the influence of moisture and air. Typically, in decoupage, patina is applied more to metal objects. Patina can be golden, colored, white, dark.
Spray
In addition to these techniques, spraying (splashes) is also used to create an aging effect on products. For spraying, usually an old toothbrush. The technique consists of dipping a brush into the paint and using your finger to make a “pull” motion. Splashes fly onto the product. This technique is often combined with abrasions. In this work you need to be careful, you cannot put a lot of paint on the brush, otherwise you will get blots.
Artificial aging by abrasions
Artificial aging by abrasions is the simplest process and does not require special skills. The technique consists of covering the places where there should be abrasions with paint of a dark shade. Then we rub these places with a piece of candle (paraffin) or soap. For example, on a white chair, the scuffs will be blue or brown. Rub the desired areas with wax. We cover these contours with white paint, dry them, then rub sandpaper over these areas. This style is also called “shabby chic” and is very popular. Our detailed master class will help you understand this technique.
Craquelure or crackle
Well, the most difficult process is craquelure or crackle. Craquelure is the creation of cracks in a paint or varnish layer. This is one of the expensive methods of aging, since this technology requires high-quality craquelure products. Aging products are divided into 2 types: one-component and two-component.
- The first product is a transparent gel. This one-component product helps produce colored cracks. First, let's determine what color the background of the product will be and the color of the cracks. Then we cover the entire surface with paint of the color that we have determined for the cracks. After the paint has dried, apply craquelure gel on top. At the end, we cover the surface with paint of the color that you have defined as the background. After a while you will see beautiful cracks forming. If you need large cracks, apply a thick layer of background paint; if small cracks, on the contrary, you need a thin layer of paint.
- The second product is called two-component, it helps to create cracks, like in old paintings. The effect of this product is amazing. These cracks are colorless and are only visible from a certain angle. At the beginning of work, the product is coated with a patina varnish and dries. For large cracks, the varnish is under-dried; for small cracks, it is over-dried. Then the surface is covered with craquelure varnish. After the craquelure varnish dries, cracks form. Next, using a tampon painted with dry pastel, the paint is rubbed into the cracks. Instead of pastels, you can use oil paint, eye shadow, and so on.
Decoupage technique: highlights
The algorithm for this decor is simple:
- glue is applied to the paper fragment with a soft brush;
- the picture is glued to a wooden surface;
- the pasted image is dried;
- Colorless acrylic varnish is applied to the decor created from paper napkins.
Coating the finished work with varnish is the final stage. The varnish is applied in two layers. If desired, using special coatings you can create the effect of a patina or an aged surface on which characteristic cracks appear.
These are the basic principles of decoupage technique. In addition to them, there are special varieties of such decor, which will be described below. Having mastered simple pasting, you can move on to more complex ways of decorating wooden surfaces with images from paper napkins.
Aging with abrasions (master class)
For our master class, we took the simplest aging technique, which does not require large material costs. This technique usually uses light pastel colors, as if they have been “bleached” by the sun or have lost their bright color over time.
To work you will need:
- White acrylic paint.
- Stool.
- Sandpaper.
- Knife.
- Decoupage varnish (the cheapest, water-based).
- Sponge.
- Pictures for decoupage.
- Candle.
We degrease the stool. You can degrease wood with gasoline, acetone, and alcohol. Rub the candle over all the protrusions and corners.
Next, we prepare white paint, a sponge, a brush, and begin to paint the stool.
We process all corners and protrusions with sandpaper; in some places you can scrape them with a knife.
We print the pictures on a printer, on regular office paper. Before sticking to the product, lightly wet the picture and remove excess moisture with paper towels. The picture must be a mirror image.
Then apply a layer of varnish to the front side of the picture. Carefully glue the front side onto the surface of the product (stool).
Slowly smooth out the pictures, removing bubbles and wrinkles. If this is not done, the drawing will not appear completely and there will be gaps in the paint.
We pasted all the pictures we needed for decoration this way. We leave the work for a day so that the pictures are well fixed on the surface. A day has passed and we are returning to our master class. The next step is to remove the top layer of paper. It is necessary to wet the pictures well so that excess paper can be removed. You can sprinkle some water to make it easier to remove the paper layer.
After removing the paper, you should get this result:
To complete the master class, apply several layers of varnish on top.
The video shows a similar decoupage of the box:
Decoupage technique of “implanting napkins into wood”
This is a more complex technique, the use of which when decorating wooden products will require additional materials:
- wax;
- cloth for polishing waxed surfaces;
- gas burner for roasting;
- metal brush.
This decoupage technique is performed on the basis of wood brushing - artificial aging of the surface. First, the wooden surface is prepared, which is given an antique look. To do this, the front side of the wood is burned with a torch, then part of the burnt surface is removed and brushing is carried out: processing the wood with a metal brush, which is moved along the wood fibers with light pressure.
This method removes the top layer of soft wood fibers, making the texture of the wood clearer and more prominent. Brushing is similar to scraping wood. This operation should be done carefully, otherwise the wooden workpiece may be damaged.
Pre-firing the wooden surface destroys the soft fibers of the wood and simplifies the brushing process.
After finishing brushing, you need to sand the wood with sandpaper of different grain sizes, having previously treated the surface with stain or varnish. Sanding should also be carried out along the grain of the wood.
After this aging of the wood, wax begins to be rubbed in. When waxing is finished, you need to sand the surface and polish it. Then you can glue the paper pictures by applying glue to them. When the paper decor is completely applied, the surface is dried and coated with acrylic varnish. You can also use the craquelure technique - creating small cracks that imitate an aged paint surface. To do this, you can use a special craquelure varnish.
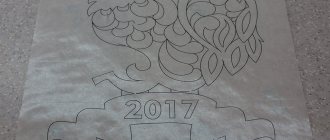
Pictures for decoupage
These pictures can be printed on a printer and used for work.
(1 votes. 5.00 out of 5)
Decoupage and creative ideas for your home
Decoupage can provide creative ideas that are very useful for your home and also help develop your children's imagination. It is very useful for children to learn step by step how to decoupage children's furniture, notebooks, albums and cute gifts for little friends. In addition, your activities together with children will greatly strengthen your relationship with them and add authority to parents. The list of things that can be updated and changed into works of art is simply endless. These include kitchen utensils, mirror and photo frames, bottles and furniture.
At home, you can decoupage almost any thing. The photo clearly shows beautiful clothes hangers, folk-style door handles, and chests of drawers. Please note that individual parts of the chests of drawers are made differently, but there is a match in color and style, so everything looks very harmonious. To help those who want to explore the varieties of decoupage, as well as see various new items and creative ideas, there is a website for decoupage lovers. On this site you can find any information and learn how to make decoupage in a variety of ways.
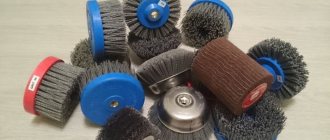
Required materials and tools
For beginners to master the technique of decoupage on wood from napkins, you will need the following materials and tools:
- high-quality napkins with bright and clear patterns, photo paper, wallpaper (in addition to the usual floral prints, you can find very unusual ones);
- files;
- glue (preferably PVA);
- varnish;
- dye;
- primer composition;
- putty, plaster;
- small scissors with short and sharp blades;
- a scalpel or a special knife with a rotating blade (useful for processing dense wood);
- brushes of different thicknesses;
- roller or other device for leveling and smoothing the surface;
- sandpaper;
- sponges, rags, containers of different sizes.
Spray
The final part of the decoupage lessons is called spraying. This is a very important element of decoupage, with which you can artificially age any product and bring to life various creative ideas for your home. The video master class clearly and clearly explains how to spray correctly. For this you will need the following materials:
- wooden frame;
- flat container for paint;
- hard brushes or old toothbrushes;
- acrylic paint.
The wooden frame must first be painted, and then varnished and dried. Only after this can you start experimenting and trying to spray. The consistency of the spray paint should be similar to medium thick sour cream. If you try to spray with too thick paint, the splashes will turn out to be convex pimples. Thick paint can be diluted a little with water. Take a hard brush and wet the end with paint. After this, lightly press the brush with your finger and then release it, splashing the paint onto the previously prepared surface.
You can practice on a piece of paper, making splashes near and far from it. Spraying paint close to the surface will produce very small droplets, while spraying from a distance will increase the size of the droplets. The shape and size of the splashes also depends on the quality of the paint we used for this purpose.
Glaze as a type of decoupage
Glazing is a special technique of applying layers of paint on top of each other. In this case, the paint is strongly diluted with water, and can be applied in stages both to an unpainted surface and to a previously painted one. The resulting color is very deep, and the number of shades is simply endless.
You can master the skill of glazing using the example of this master class with step-by-step photos. To do this, prepare a wooden box and a printout of the picture you like. In our case, this is a beautiful bouquet of lilacs, where purple and pink shades predominate. Before starting glazing, we will treat the wooden surface with fine sandpaper, and then dilute acrylic paints of suitable shades with water in separate containers. The more subtle and muted the desired colors, the more water should be added to each container. Now we need to cover our box inside and outside with several layers of different paints, doing this in stages, applying paint, drying the next layer and again going through sandpaper.
After this, the glazing continues, and a printout of a bouquet of lilacs is put into operation, onto which acrylic varnish is applied in several layers. After each layer, it is advisable to take a break of twenty minutes to dry. After this, cut out the outline of the design and cover it with a layer of water for several minutes. When the paper gets wet, it is better to separate it from the top layer, leaving only the picture in the work. Until this moment, the lid of the box remained clean, untreated. Now you need to coat it with varnish, stick a picture of the printout on the varnish, and let it dry. The final touch to the work is done by tinting the edges of the lid with paint left over from previous coatings of the side and inner surfaces. To achieve the effect of merging the lid with the picture, apply paint using a sponge rather than a brush. When finishing glazing the box, we coat the entire surface of the box twice with acrylic varnish.