When it comes to home, organizing things often becomes a real headache.
You can solve this problem by making a box with your own hands, which can then have almost any purpose.
Today we will talk about how to make a box yourself, where it can be used and much more. So, let's begin.
What is the box for?
The easiest way to answer this question is for people who live in a private house or spend a lot of time in the country.
Well, even in an apartment, you often need a container to store different things, even the same products, situations are different.
You can buy a box, or you can make it yourself - everything depends more on your desire, reluctance and financial capabilities.
If buying is not your option, look at the photo of the box you made yourself. First of all, this is necessary in order to get rid of fears and prejudices regarding the fact that this is a very complex process.
Don’t forget that the box can be small, but it can be extremely simple. During labor lessons at school, all the boys did more complex things, and therefore there is no need to be afraid.
Varieties
For the manufacture of wooden boxes the following is used:
- plywood;
- Chipboard or OSB boards;
- planed or polished board, etc.
Containers and sizes vary. For example, large containers are used for basements and cellars, but if vegetables will be stored at home, on a balcony or loggia, it is more practical to take small containers.
Other factors on which the price of boxes depends:
- amount of material used;
- frequency of sheathing (ventilation largely depends on this);
- availability of fittings, steel corners.
Product box
The simplest way to use a box is to store food in it - potatoes, carrots, onions, beets, and so on.
This can best be understood by farmers with small farms and simple gardening enthusiasts, who often think about how to make a box with their own hands.
In this case, the size of the box, its strength, and the product that will be stored in it will play an important role.
A simple example is that potatoes are much smaller than beets, and therefore there should be a small enough space between the slats of the box so that the same potatoes do not fall out.
The second point concerns the design itself. There must be free space on the walls and bottom between the slats so that the same potatoes can “breathe,” otherwise they may deteriorate and begin to rot.
If we make a wooden box for food with our own hands, we must consider whether we will carry it when it is full. If yes, then the box should be small, maybe with small handles, but this is a matter of taste.
Plywood structures
Here the material is selected depending on the intended use of the finished product. If the box is intended for correspondence, you can get by with thin plywood. For seedlings or flowers, multilayer sheets impregnated with a waterproof compound are more suitable.
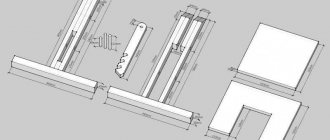
The design is made according to the following scheme:
- make a drawing of the box with dimensions;
- the drawing is transferred to a sheet of plywood;
- parts are cut out according to the markings;
- individual elements are fastened together with self-tapping screws or nails, and the joints are treated with sealant.
Considering that plywood is easy to process, you can make more complex, non-standard country boxes. For example, the joints of the walls should be designed according to the tongue-and-groove principle. If you are making a deep box for storing children's toys, you can attach wheels from an old computer chair to the bottom. Drawers with a sliding top panel look interesting. Here a cover is cut out of a sheet of thin plywood and a groove is cut in the upper part of the walls.
Mailbox
Another area of life in which you may need a box is receiving mail. This problem again concerns owners of private plots, because in apartment buildings a set of mailboxes or cells are usually installed at once, which will be the same for all residents.
If you live in a private house, you can make a mailbox with your own hands, or go and buy a ready-made solution. There will be nothing complicated in the design, but there is a high probability that you will make the mailbox out of wood, because metal requires special skills.
The disadvantage of such a box will come down to the characteristics of the wood, which is why it will need to be covered with a layer of water-repellent substance, and all joints will need to be sealed so that your mail does not get wet in the rain.
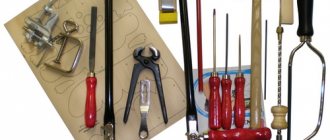
To do this, you will need several boards, a hacksaw, a pencil, a tape measure, a couple of hinges for attaching the door and a latch.
Pros and cons of wooden containers
Boxes made of wood are not as popular as plastic now, but they continue to be produced. Wooden containers can provide optimal climatic conditions, since air access to the stored products is maintained.
Treated wood boxes can even be cheaper than their plastic counterparts. Gaps are made between the boards of the container so that air can circulate freely (both during natural and forced circulation of the room).
When making boxes from wood, the sharp corners of the material are ground, which is necessary to ensure the integrity of tubers, bulbs or root crops during storage or transportation. The design of the boxes is usually rigid, so the products placed in them do not “walk” and, accordingly, are kept fresh longer.
Along with the advantages, wooden boxes have negative qualities, because wood is a natural material that has certain characteristics.
Disadvantages of containers:
Wood has a porous, heterogeneous structure that quickly reacts with products if they are damaged and release sap.
As a result, liquid is absorbed into the wood, and the box begins to slowly rot. For this reason, hard vegetables are usually placed in wooden boxes.- Difficulty in care.
Again due to the naturalness of the material. It is quite difficult to clean the box from dirt, especially if detergents are used. Another task is to ventilate, and even if all standards are met, this does not guarantee getting rid of microorganisms in the structure of the tree. For this reason, many gardeners take such containers for one season, using them as disposable ones. - Inconvenient to use. Wood is heavier than plastic, and handles and holders are rarely installed on drawers. In addition, they are problematic to stack, which is why part of the usable space of the storage area is “eaten up”.
Thermal storage box
Slavic nature is known for its desire to do everything on its own, thereby giving another reason to be proud of itself.
Sometimes such aspirations lead to quite interesting situations. One of them is to create a winter box with your own hands.
What it is? The winter box is a container similar to the portable refrigerator that Americans love so much. It is mainly used to store something that should not freeze in the winter frost.
But where does this apply? Avid fishermen already understood what we were talking about, because many of them tried to make a box for winter fishing with their own hands.
There are several reasons why this is a bad idea. Let's start with the fact that such boxes, which are sold in stores, are made of plastic and polymer alloys - light and durable. This means that the initial capacity will still need to be purchased.
Next comes a layer of thermal insulation, which again will need to be purchased and then installed in a previously purchased container, which, do not forget, must have a lid.
Next, you can add division into zones, thereby turning such a box into a kind of organizer.
Now the main question is - is all this worth the savings, and not even significant ones? Everyone will decide for themselves, I’m sure many will disagree with me.
Why exactly a tree?
Wood is the very material that is most often used to create products for the home. The reasons why this happens are simple. First of all, it is important to say that wood is an environmentally friendly material that does not pose a danger to human health . It does not emit an unpleasant odor and does not release any toxic substances into the air, so you do not have to worry about allergies or health problems.
Wood is easy to work with
Wood is also one of those materials that you can easily work with at home. You don’t have to use complex specialized equipment; it’s enough to have a sawing tool, drill and screwdriver or screwdriver on hand. Also, grinding and other processing of the material may require a minimum of cost and effort.
The wood is durable and beautiful and, varnished, can maintain its appearance for many years. Only uncoated material can darken over time and lose its former natural beauty. Fresh wood looks very nice.
Why wood is the best material for making boxes
It is not surprising that wood has been and remains one of the most popular types of materials. Although now in almost any specialized store you can buy its derivatives - plywood, panels, furniture board, etc. But none of these options, in any case, will be better than ordinary natural fresh board.
Box for holidays and themed events
On the eve of the New Year, you can make a small holiday for your child or children. To do this, you will need to make a mailbox of the size you need, which will be used to send letters to Santa Claus.
Don’t forget that children still believe in fairy tales, and for them this is truly a wonderful time, which means it’s worth making a Santa Claus box with your own hands.
The most interesting thing happens not during its creation, but after - at the decorating stage. The fact is that you can make the box yourself, but either completely entrust the decoration to the children, or do it together with them.
Don't forget that this will be a very good time that you will spend together. Next, you will take all the letters, study them, and you can give either everything that the children asked for, or choose something from their wish lists.
You will decide based on financial capabilities, and the moment of upbringing also plays a role - giving everything that children ask for is not a very good practice, which usually manifests itself at a later age.
Therefore, the box can be made small, and children can be told to throw in one letter at a time. You can do this with them to support the idea.
How to store vegetables on the balcony
There are quite a lot of options. The best one can be determined based on climatic conditions. So, if at the coldest time the thermometer shows 0 C or slightly higher, you can safely store food in trays or in a chest. But this will not be enough where snow already falls in mid-autumn and frosts are severe in winter. You can’t do without insulated containers here; you may have to install heating (we’ll tell you how to do this below).
The condition of the loggia is also important. When completely glazed, let alone insulated, food is preserved better. To maintain optimal temperature and humidity, you can use various types of storage:
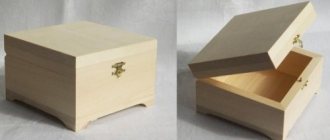
- Chest. This is a box with a lid, the design of which can be different. If there is no threat of freezing of the crop, it is done with holes for ventilation. Or additionally insulated. For example, double walls are installed. The insulation is placed between them. For more convenient storage it can be divided into sections.
- Cellar. A system with side doors or shelves can be assembled from containers of different volumes and shapes. Metal, plastic, and wooden products can be used. Convenient storage is selected for each type of vegetable. If necessary, it can be additionally insulated.
- Thermal cabinet. A metal box with a lid into which a heater and thermostat are built. Thanks to this, an optimal microclimate is maintained inside. They can have very different volumes and dimensions. The main disadvantages are the need to connect to electricity and the fairly high price. They are manufactured in a factory, but self-assembly is also possible.
- Flexible container. A fabric bag with several layers of insulation. Between them there is a heating element, which, if necessary, increases the temperature inside the container. Compact and quite convenient. Among the disadvantages, we should note the difficulties in separating products into compartments and the need to connect the device to the network.
Instagram sapa_tranquille
If you insulate the walls and lid of the storage box, vegetables will be preserved even in cold weather
- Country cottage area
All the secrets of long-term storage of cucumber harvest
Organizer
Even when we make special efforts to keep our garage tidy, we often end up with some kind of disorder. Partly because there is simply no suitable storage space for many small items.
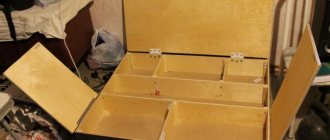
That is why next we make a box out of plywood with our own hands - an organizer. Why plywood? It is very easy to work with, and you can fasten the parts with nails or screws, or with simple furniture glue.
Next, from the same plywood we add a system of partitions inside and at the end we get a small but very practical organizer that will help solve the problem of small but constant clutter.
Wine corks
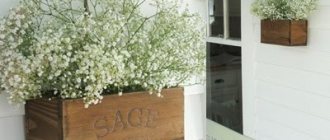
Have you been collecting bottle caps for several years, but still haven’t figured out what to make from them? Meanwhile, all this “good” does is successfully collect dust and take up space on the shelf. Use corks as a material to create a textured flower pot. Find a suitable container, glue wine corks to the outside (you can also use small wooden blocks), then paint the flowerpot in your favorite color. Plain “prickly” flowerpots, for example, white or black, look impressive.
DIY photo of boxes
Source
We insulate the storage structure
To prevent our harvest from freezing in the cold, the chest needs to be insulated. The easiest way is to make double walls and fill the space between them with heat insulator:
- After making the frame from sheet material, we cut out plates of the required size for sheathing the bottom and walls. In each case, we prepare two elements: internal and external. The first one should be smaller.
- We sheathe the bottom from the outside, lay thermal insulation, and cover it with a second sheet. We cover the walls outside and inside.
- Fill the resulting cavities between the sheets with sawdust or lay mineral wool. You can put a plate of foam plastic or any other insulator. We do the same with the lid.
Scheme of arrangement of a heated oven
If this is clearly not enough, you can install heating for the box on the balcony with your own hands. The simplest option involves using one or two incandescent light bulbs. In this case, a small groove is made in the cover through which the wire is inserted into the structure. The lamp is placed in a container so that it does not touch the food and connected through an extension cord. Turn it on as needed.
If the volume of the vegetable storage is large, use two lamps. Sometimes they take a hairdryer instead. It raises the temperature inside the container much faster, resulting in less energy consumption. If you have skills in working with electricity, you can make an analogue of a heating cabinet with the installation of a heater and thermostat.
